Introduction
Imagine you have just launched a new marketing campaign. You have a beautiful landing page, a compelling offer, and a HubSpot form ready to capture leads. Traffic is pouring in, and your sales team is getting notifications about new contacts. Everything seems perfect.
But then you open your Google Analytics 4 (GA4) dashboard to see which channels are driving these leads. You look for the conversion data, and you see… nothing. Or perhaps you see a generic “Page View” count that doesn’t tell you anything about who actually filled out the form.
This is a common and frustrating “Black Box” problem for marketers using HubSpot forms.
The issue arises because HubSpot forms often behave differently than standard HTML forms. They might load inside an iframe (a window within your website) or use scripts that do not trigger the standard “Form Submission” triggers built into Google Tag Manager (GTM). Essentially, your website and your analytics tools are speaking two different languages.
When GA4 cannot see your form submissions, you are flying blind. You cannot attribute revenue to specific campaigns, you cannot optimize your ad spend, and you cannot truly understand your user journey.
Today, we are going to solve this problem completely.
In this comprehensive guide, we will build a bridge between HubSpot and GA4 using Google Tag Manager. We will not rely on basic triggers that often fail. Instead, we will implement a robust JavaScript Listener that detects the exact moment a HubSpot form is successfully submitted. We will then pass that data securely into GA4 as a custom event.
We will also cover the essential legal side of tracking by setting up Google Consent Mode V2 using Cookiebot, ensuring your data collection is both accurate and compliant with privacy laws like GDPR.
Why You Must Set This Up
You might be thinking, “I can just check my leads in HubSpot. Why do I need them in GA4?”
While HubSpot is great for managing contacts after they convert, it doesn’t always tell you the full story of how they arrived. GA4 is your map of the customer journey.
The Problem: The Data Disconnect
If you ignore this setup, you create a disconnect between your traffic data and your conversion data.
- Blind Optimization: You might pause a Google Ad keyword that looks expensive because it has no conversions in GA4, unaware that it is actually driving your highest-quality HubSpot leads.
- Incomplete User Journeys: You cannot see which blog posts or pages a user visited before they decided to fill out the form.
- Algorithm Failure: If you run paid ads, the algorithms need conversion signals to learn. Without this data, they cannot find more customers like the ones you want.
The Solution: The Listener Script
The solution is a custom script we will place in GTM. This script acts like a security guard standing next to your HubSpot form. It waits quietly until it sees a successful submission, and then immediately radios the details to Google Tag Manager.
The 5 Key Benefits for Google Analytics 4 (GA4)
1. Better Algorithm Training (Predictive Audiences)
GA4 uses machine learning to predict user behavior. It can identify users who are “likely to purchase” or “likely to churn.” By feeding it high-quality lead data from HubSpot, you train these models to be far more accurate. You can then use these predictive audiences to target high-value users before they even convert.
2. Higher ROI/ROAS Analysis
You need to know which marketing dollars are working. By tracking form submissions as key events in GA4, you can calculate the Return on Ad Spend (ROAS) for every campaign. You can definitively say, “We spent $1,000 on LinkedIn Ads and generated 50 qualified HubSpot leads,” rather than guessing based on traffic spikes.
3. Accurate Reporting (Attribution)
Attribution is about giving credit where credit is due. Did the user find you via Organic Search, then come back via an Email, and finally convert via a Direct visit? GA4’s Data-Driven Attribution model needs conversion events to function. This setup ensures your SEO and Email efforts get the credit they deserve.
4. Audience Building (Retargeting)
Once you track these events, you can build powerful audiences in GA4.
- Non-Converters: Create an audience of people who visited the pricing page but did not submit the HubSpot form. You can then retarget them with a special offer.
- Converters: Create an audience of people who did submit the form and exclude them from acquisition campaigns to save money.
5. Future-Proofing (Privacy & Consent)
The digital world is moving toward strict privacy. Third-party cookies are crumbling. By setting up Google Consent Mode V2, you ensure that your tracking respects user choices. If a user denies cookies, Google can use “modeling” to estimate conversions based on the data you do have, filling in the gaps that privacy regulations create.
Prerequisites & Checklist
This is an advanced setup, but if you follow the steps, you will get it right. Ensure you have the following ready before we start.
Required Access:
- Google Tag Manager (GTM): You need Admin or Publish access. You will be creating tags, triggers, and variables and publishing changes to your live site.
- Google Analytics 4 (GA4): You need Editor or Admin access. You will need this to mark events as “Key Events” (formerly conversions) and register Custom Definitions.
- HubSpot Account: You need access to your forms to verify they are working and to know which forms you want to track (Global or Specific).
- Website Backend: Access to your CMS (WordPress, Shopify, Webflow, etc.) to ensure the GTM container code is installed correctly on all pages.
- Cookiebot Account: You need access to your Cookiebot dashboard to retrieve your Domain Group ID for the Consent Mode V2 setup.
Required Tools:
- Google Chrome Browser: The industry standard for web development and debugging.
- GTM Preview Mode: The built-in debugging tool in Google Tag Manager.
- GA4 DebugView: A real-time debugging tool inside Google Analytics 4.
- Google Tag Assistant Extension: A Chrome extension to verify tags on the live site.
Video tutorial - HubSpot Form Tracking
Step-by-step video guide to set up HubSpot form submission tracking in GA4 via Google Tag Manager for accurate reporting.
The “How-To setup ” (Step-by-Step)
We will break this implementation down into four distinct phases. Do not skip any steps, as each phase builds upon the previous one.
Phase 1: Google Tag Manager Setup
First, we need to ensure your GTM container is properly configured to communicate with GA4 and capture the necessary data.
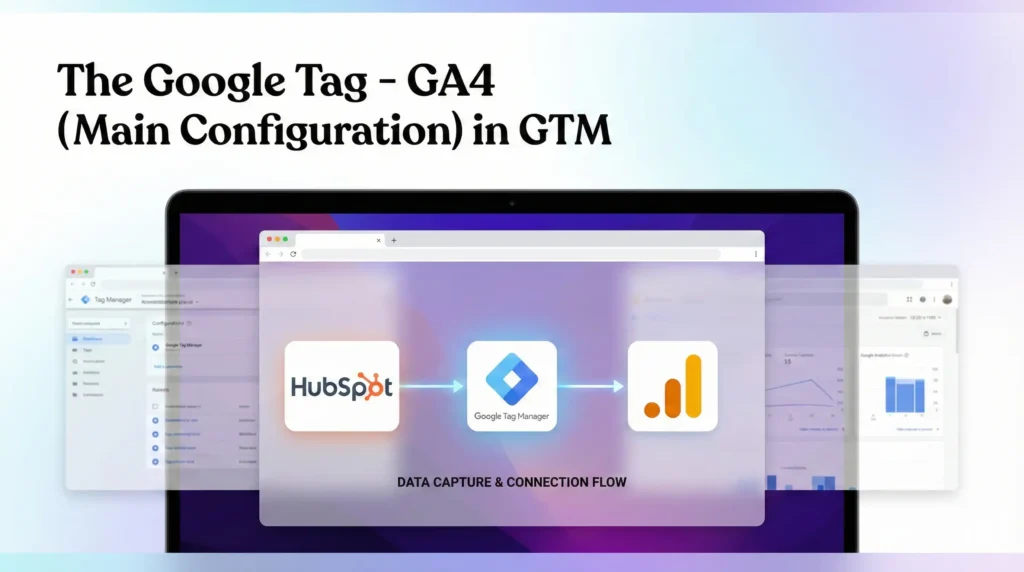
Step 1.1: The Google Tag (Main Configuration)
This is the “heartbeat” tag that initializes GA4 on your website. If you already have GA4 running via GTM, you can skip this, but please verify it is set up correctly.
- Open your Google Tag Manager workspace.
- Navigate to Tags in the left-hand menu.
- Click New.
- Name: Google Tag – Main Configuration.
- Tag Configuration: Select Google Tag.
- Note: Google consolidated the old “GA4 Configuration” tag into this new “Google Tag”.
- Tag ID: Enter your GA4 Measurement ID. It starts with G-.
- Where to find it: Go to GA4 > Admin > Data Collection > Data Streams > Click your stream > Copy the Measurement ID.
- Configuration Settings (Optional):
- Parameter Name: send_page_view
- Value: true
- Triggering: Select All Pages.
- Click Save.
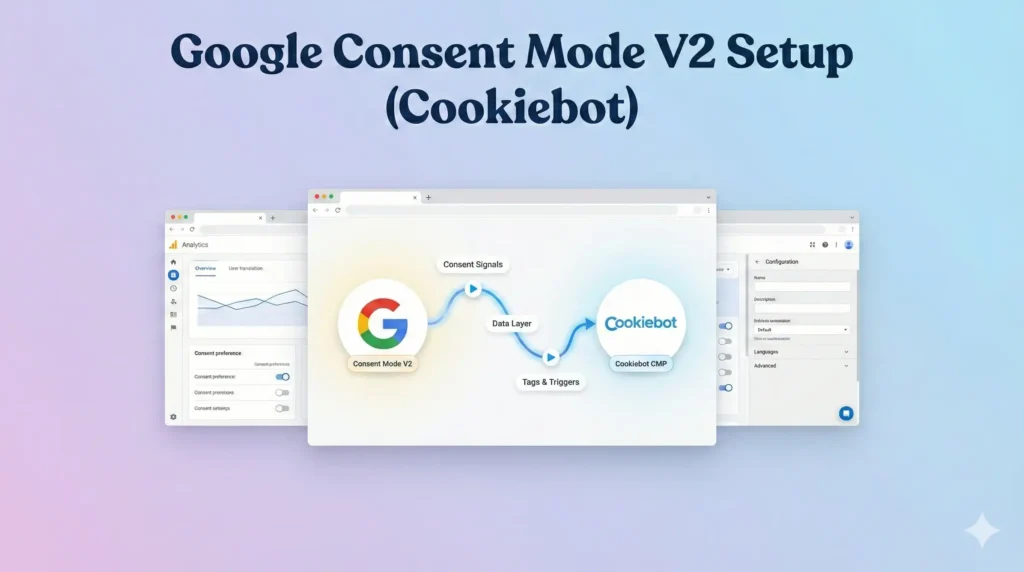
Phase 2: Google Consent Mode V2 Setup (Cookiebot)
In the modern landscape of SEO (AEO, GEO) and privacy laws (GDPR, DMA), collecting data without consent is a major risk. Google Consent Mode V2 is the mechanism that allows you to respect user privacy while still recovering valuable data through AI modeling.
We will use Cookiebot as the Consent Management Platform (CMP).
Step 2.1: Add the Cookiebot Template
We will use a community-verified template to avoid writing complex code from scratch.
- In GTM, click on Templates in the left sidebar.
- In the top section (Tag Templates), click Search Gallery.
- Click the magnifying glass icon and search for Cookiebot.
- Select the official template named Cookiebot CMP (Author: Cookiebot).
- Click Add to workspace and confirm by clicking Add.
Step 2.2: Configure the Cookiebot Tag
This tag will handle the logic of blocking or allowing other tags based on user choice.
- Go back to Tags and click New.
- Name: CMP – Cookiebot Consent Mode V2.
- Tag Configuration: Select the Cookiebot CMP template you just added.
- Cookiebot ID: Paste your Domain Group ID.
- Where to find it: Log in to your Cookiebot account > Settings > Domains. It is a long alphanumeric code.
- Enable Google Consent Mode: Check this box. This is the most critical step. It activates the V2 signaling to Google.
- Default Consent State:
- For strict compliance (EU/EEA/UK), set the defaults to Denied.
- Set ad_storage to Denied.
- Set analytics_storage to Denied.
- Set ad_user_data to Denied.
- Set ad_personalization to Denied.
- Why? This ensures no tracking happens until the user explicitly clicks “Allow” on your banner.
- Triggering:
- Click the trigger area.
- Do not select “All Pages”.
- Select Consent Initialization – All Pages.
- Why? This special trigger fires before anything else, setting the “rules of engagement” before any analytics tags try to load.
- Click Save.
Phase 3: The Code (HubSpot Listener)
Now we tackle the core challenge: “listening” for the HubSpot form submission.
HubSpot forms emit a specific browser message when a user successfully submits a form. We will create a custom script that waits for this message. When it hears it, it will push a custom event into the Data Layer.
Step 3.1: Create the HubSpot Listener Tag
- In GTM, go to Tags and click New.
- Name: cHTML – HubSpot Form Listener.
- Tag Configuration: Select Custom HTML.
- The Code: Copy and paste the code block below exactly.
					<script>
window.dataLayer = window.dataLayer || [];

//listener for older version (v3) of HS forms
window.addEventListener('message', function(event) {
  if (event.data.type === 'hsFormCallback' && event.data.eventName === 'onFormSubmitted') {
    window.dataLayer.push({
      event: 'hs_form_submission',
      form_id: event.data.id,
      conversion_id: event.data.data.conversionId,
      form_data: event.data.data.submissionValues,
    });
  }
});

//listener for v4 HS forms
window.addEventListener("hs-form-event:on-submission:success", function(event) {
    var hsform = HubspotFormsV4.getFormFromEvent(event);
    if (hsform) {
      hsform.getFormFieldValues().then(function(fieldValues) {
        var transformedData = fieldValues.reduce(function(obj, item) {
          var key = item.name.split('/')[1];
          if (key) {
            obj[key] = item.value;
          }
          return obj;
        }, {});

        window.dataLayer.push({
          event: "hs_form_submission",
          form_id: hsform.getFormId(),
          conversion_id: hsform.getConversionId(),
          form_data: transformedData
        });
      });
    }
  });
</script>
Step 3.2: Trigger the Listener
- Scroll down to Triggering.
- Select All Pages.
- Note: It is safe to run this on all pages. The script is extremely lightweight and simply sits passively waiting for a message. If there is no HubSpot form on the page, the script does nothing.
- Click Save.
Phase 4: GTM Variables & Triggers
Now that the listener code pushes hubspot_form_success to the Data Layer, we need to configure GTM to “read” that event and “extract” the Form ID.
Step 4.1: Create the Data Layer Variable
We want to capture the Form ID so we can see which specific form was filled out in GA4.
- Go to Variables in the left menu.
- Scroll down to User-Defined Variables and click New.
- Name: dlv – hs_form_id.
- Variable Type: Select Data Layer Variable.
- Data Layer Variable Name: hs_form_id.
- Important: This must match the key used in the listener script exactly. Case sensitive.
- Click Save.
Step 4.2: Create the Trigger
This trigger will tell the GA4 tag when to fire.
- Go to Triggers in the left menu.
- Click New.
- Name: Custom Event – HubSpot Form Success.
- Trigger Type: Select Custom Event (under the Other category).
- Event Name: hubspot_form_success.
- Important: This must match the code in the listener script exactly.
- Fires On: Leave as All Custom Events
- Click Save.

Phase 5: The GA4 Event Tag Configuration
Now we create the tag that actually sends the conversion data to Google Analytics 4.
Step 5.1: Create the GA4 Event Tag
- Go to Tags > New.
- Name: GA4 – Event – Generate Lead.
- Tag Configuration: Select Google Analytics: GA4 Event.
- Measurement ID: Enter your G-ID (or use a constant variable).
- Event Name: generate_lead.
- Strategy: We use the standard GA4 event name generate_lead because GA4 understands this event type automatically. This helps with reporting.
- Event Parameters:
- We need to send the extra data we captured (the Form ID).
- Click Add Row.
- Parameter Name: form_id
- Value: {{dlv – hs_form_id}} (Click the brick icon to select the variable).
- Triggering: Select the trigger created in Phase 4: Custom Event – HubSpot Form Success.
- Click Save.
Step 5.2: Register Custom Definitions in GA4 (Critical Step)
This is a step most people forget. If you send a custom parameter like form_id, GA4 receives it but won’t show it in reports unless you define it.
- Open Google Analytics 4.
- Go to Admin (Gear icon bottom left).
- Under Data Display, click Custom definitions.
- Click Create custom dimension.
- Dimension name: Form ID.
- Scope: Event.
- Description: HubSpot Form Identifier.
- Event parameter: form_id (Must match what you typed in the tag).
- Click Save.
Step 5.3: Mark as Key Event (Conversion)
- In GA4 Admin, go to Data Display > Key Events (formerly known as Conversions).
- Look for generate_lead.
- If it exists, toggle the switch to On (blue).
- If it does not exist:
- Click New key event.
- Name it generate_lead.
- Click Save.
Testing & Validation (Deep Dive)
You have built the engine. Now you must test drive it. Never publish a container without validating.
Step 1: Launch GTM Preview Mode
- In GTM, click the blue Preview button in the top right.
- Enter your website URL where the HubSpot form is located.
- Click Connect.
- Your website will open in a new window. Ensure the Tag Assistant tab is also open and connected.
Step 2: Simulate a Form Submission
- Go to your website window.
- Actually fill out the HubSpot form.
- Use a test email (e.g., [email protected]).
- Click Submit.
- Wait for the “Thank You” message or redirect.
Step 3: Check GTM Tag Assistant
- Switch to the Tag Assistant tab.
- Look at the Summary timeline on the left.
- Success Indicator 1: You should see an event named hubspot_form_success appear in the timeline.
- If you see this: The listener script worked!
- If you don’t: The listener failed to detect the message (see Troubleshooting).
- Click on the hubspot_form_success event.
- Success Indicator 2: In the center panel, under Tags Fired, you should see GA4 – Event – Generate Lead.
- Click on that tag to inspect it. Verify that the form_id parameter contains the actual HubSpot form ID (a long string of numbers and letters).
Step 4: Check GA4 DebugView
- Keep your test tab open.
- Go to your GA4 Property.
- Go to Admin > Data Display > DebugView.
- Wait 10-30 seconds.
- Success Indicator 3: You should see a blue icon appear on the timeline (top vertical line).
- It should be named generate_lead.
- Click on it. You should see the parameter form_id.
- If you see this, your data pipeline is 100% operational.
Troubleshooting & Common Mistakes
Even with a perfect guide, things can go wrong. Here are the top 3 complex errors and how to solve them.
Error 1: The “Silent” Listener (No Event in GTM)
Symptoms: You submit the form, but hubspot_form_success never appears in the GTM Preview timeline. Cause:
- You might be using a non-standard HubSpot form (e.g., loaded via a plugin that changes the code).
- The form is inside a “Shadow DOM” or an iframe that blocks message bubbling. Solution:
- Ensure you are using the standard HubSpot Embed Code.
- Check your browser console (F12) > Console tab. Look for errors related to “Cross-Origin” blocking.
Error 2: Blocked by Consent (GDPR)
Symptoms: The event appears in GTM, but the Tag status says “Blocked by Consent Settings.” Cause: You are testing from a region protected by GDPR (or using a VPN), and you did not click “Accept” on the Cookiebot banner. Solution:
- Clear your browser cookies entirely.
- Reload the page.
- When the Cookiebot banner appears, explicitly click Allow All.
- The tag should now fire with the status “Succeeded.”
Error 3: Duplicate Events
Symptoms: You see the generate_lead event firing twice for one submission. Cause:
- You might have the listener script installed twice (once in GTM, once hardcoded).
- You might have another trigger (like a generic “Click” trigger) also firing the tag. Solution: Check the “Firing Triggers” section in Tag Assistant to see exactly what triggered the duplicate tag. Ensure only your Custom Event trigger is active.
Conclusion
Tracking HubSpot form submissions in GA4 is not a simple “plug-and-play” task. It requires stepping outside the basic features of Google Analytics and utilizing the advanced capabilities of Google Tag Manager.
By implementing the Listener Script, you have successfully bridged the gap between your website and the HubSpot form. You have moved from “guessing” to “knowing.”
- You are now compliant with privacy laws via Cookiebot.
- You are capturing real-time behavioral data.
- You are feeding GA4 the critical success signals it needs to attribute value to your marketing efforts.
Your next step? Publish your GTM container. Let the data collect for at least 7 days. Then, open your GA4 User Acquisition report, filter by the generate_lead event, and finally answer the question: “Which marketing channel is actually bringing me leads?”
1. Can I track HubSpot forms without Google Tag Manager?
No, it is extremely difficult. Because HubSpot forms often load via script injection or iframes, standard Google Analytics code pasted on your website headers cannot “see” the submission event efficiently. GTM is the standard, safest, and most reliable platform to deploy the JavaScript listener needed to detect the submission message.
2. Does this listener work for all HubSpot forms?
Yes, for standard embedded forms. This listener works for standard HubSpot forms embedded on external pages (WordPress, Shopify, etc.). It works by listening for the onFormSubmitted message which is a core part of the HubSpot Forms API. It works for both raw HTML embeds and HubSpot WordPress plugin embeds.
3. What if I redirect to a "Thank You" page?
If you redirect users to a specific URL (e.g., /thank-you) after submission, you have an alternative method. You can simply create a Page View Trigger in GTM that fires when Page Path contains /thank-you. However, the listener method in this guide is superior because it works even if the redirect is slow or fails, capturing the data immediately upon button click success.
4. How long does data take to show in GA4?
While GA4 DebugView shows data almost instantly (within seconds) for testing purposes, the actual standard reports (like Traffic Acquisition) typically take 24 to 48 hours to process and update. Do not panic if your total conversion count in the standard reports is zero immediately after testing.
5. Why do I need Consent Mode V2?
If you have any traffic from the European Economic Area (EEA) or the UK, Google requires Consent Mode V2 for all advertising and tracking features. Without it, Google may disable your ability to build remarketing audiences and accurately track conversions. It also helps you recover lost data through AI modeling when users decline cookies.
6. Is the listener code safe for my site?
Yes. The script provided is a “passive listener.” It does not inject content, change your website’s design, or significantly slow down your website. It simply waits in the background for a specific electronic message from HubSpot. It is lightweight and follows standard web development practices.
7. What is a "Key Event" in GA4?
In early 2024, Google renamed “Conversions” in GA4 to “Key Events”. They function exactly the same way—they are the most important actions on your site (like a lead form fill). The term “Conversion” is now reserved specifically for Google Ads. In this guide, when we say “Mark as Key Event,” it is the same as the old “Mark as Conversion.”
8. Can I track which specific form was submitted?
Yes. The listener script captures the event.data.id (HubSpot Form ID). We set up a Data Layer Variable (hs_form_id) to grab this. By registering it as a Custom Dimension in GA4, you can break down your reports by Form ID to see exactly which form (e.g., “Contact Us” vs. “Newsletter”) is performing best.
9. Will this track non-HubSpot forms?
No. This specific listener code looks for type === ‘hsFormCallback’, which is unique to HubSpot. If you use Gravity Forms, Contact Form 7, or Typeform, you need a different listener script designed for those specific platforms. The logic is similar, but the code is different.
10. Do I need to be a developer to do this?
No. You do not need to write code from scratch. We have provided the exact JavaScript code you need. You simply need to be comfortable copying and pasting into Google Tag Manager and navigating the interface. This guide is designed for non-technical marketers to follow step-by-step.
 Need Help Advanced Tracking Setup?


2 Responses
Greate Information! Thank you
Thnak you sir!