Introduction
Imagine you have a thriving online business. You offer a seamless subscription service, sell digital courses, or handle high-ticket consulting fees, and you use Stripe to handle your payments securely. Your website is sleek, your marketing campaigns are running full throttle on Google Ads, and sales are happening.
But when you log into Google Analytics 4 (GA4) or your Google Ads dashboard, something is wrong.
You see traffic landing on your site, but the “Purchase” events are missing. Or worse, your attribution is broken—GA4 claims that stripe.com is sending you all your customers, completely ignoring the Google Ads or SEO efforts that actually brought them there.
This is the “Black Box” of third-party checkouts.
When a customer clicks “Pay,” they often leave your website and enter a hosted Stripe checkout page (checkout.stripe.com). At that moment, they step off your tracking radar. If they purchase there and don’t come back, or if the tracking setup isn’t perfect, that data is lost forever.
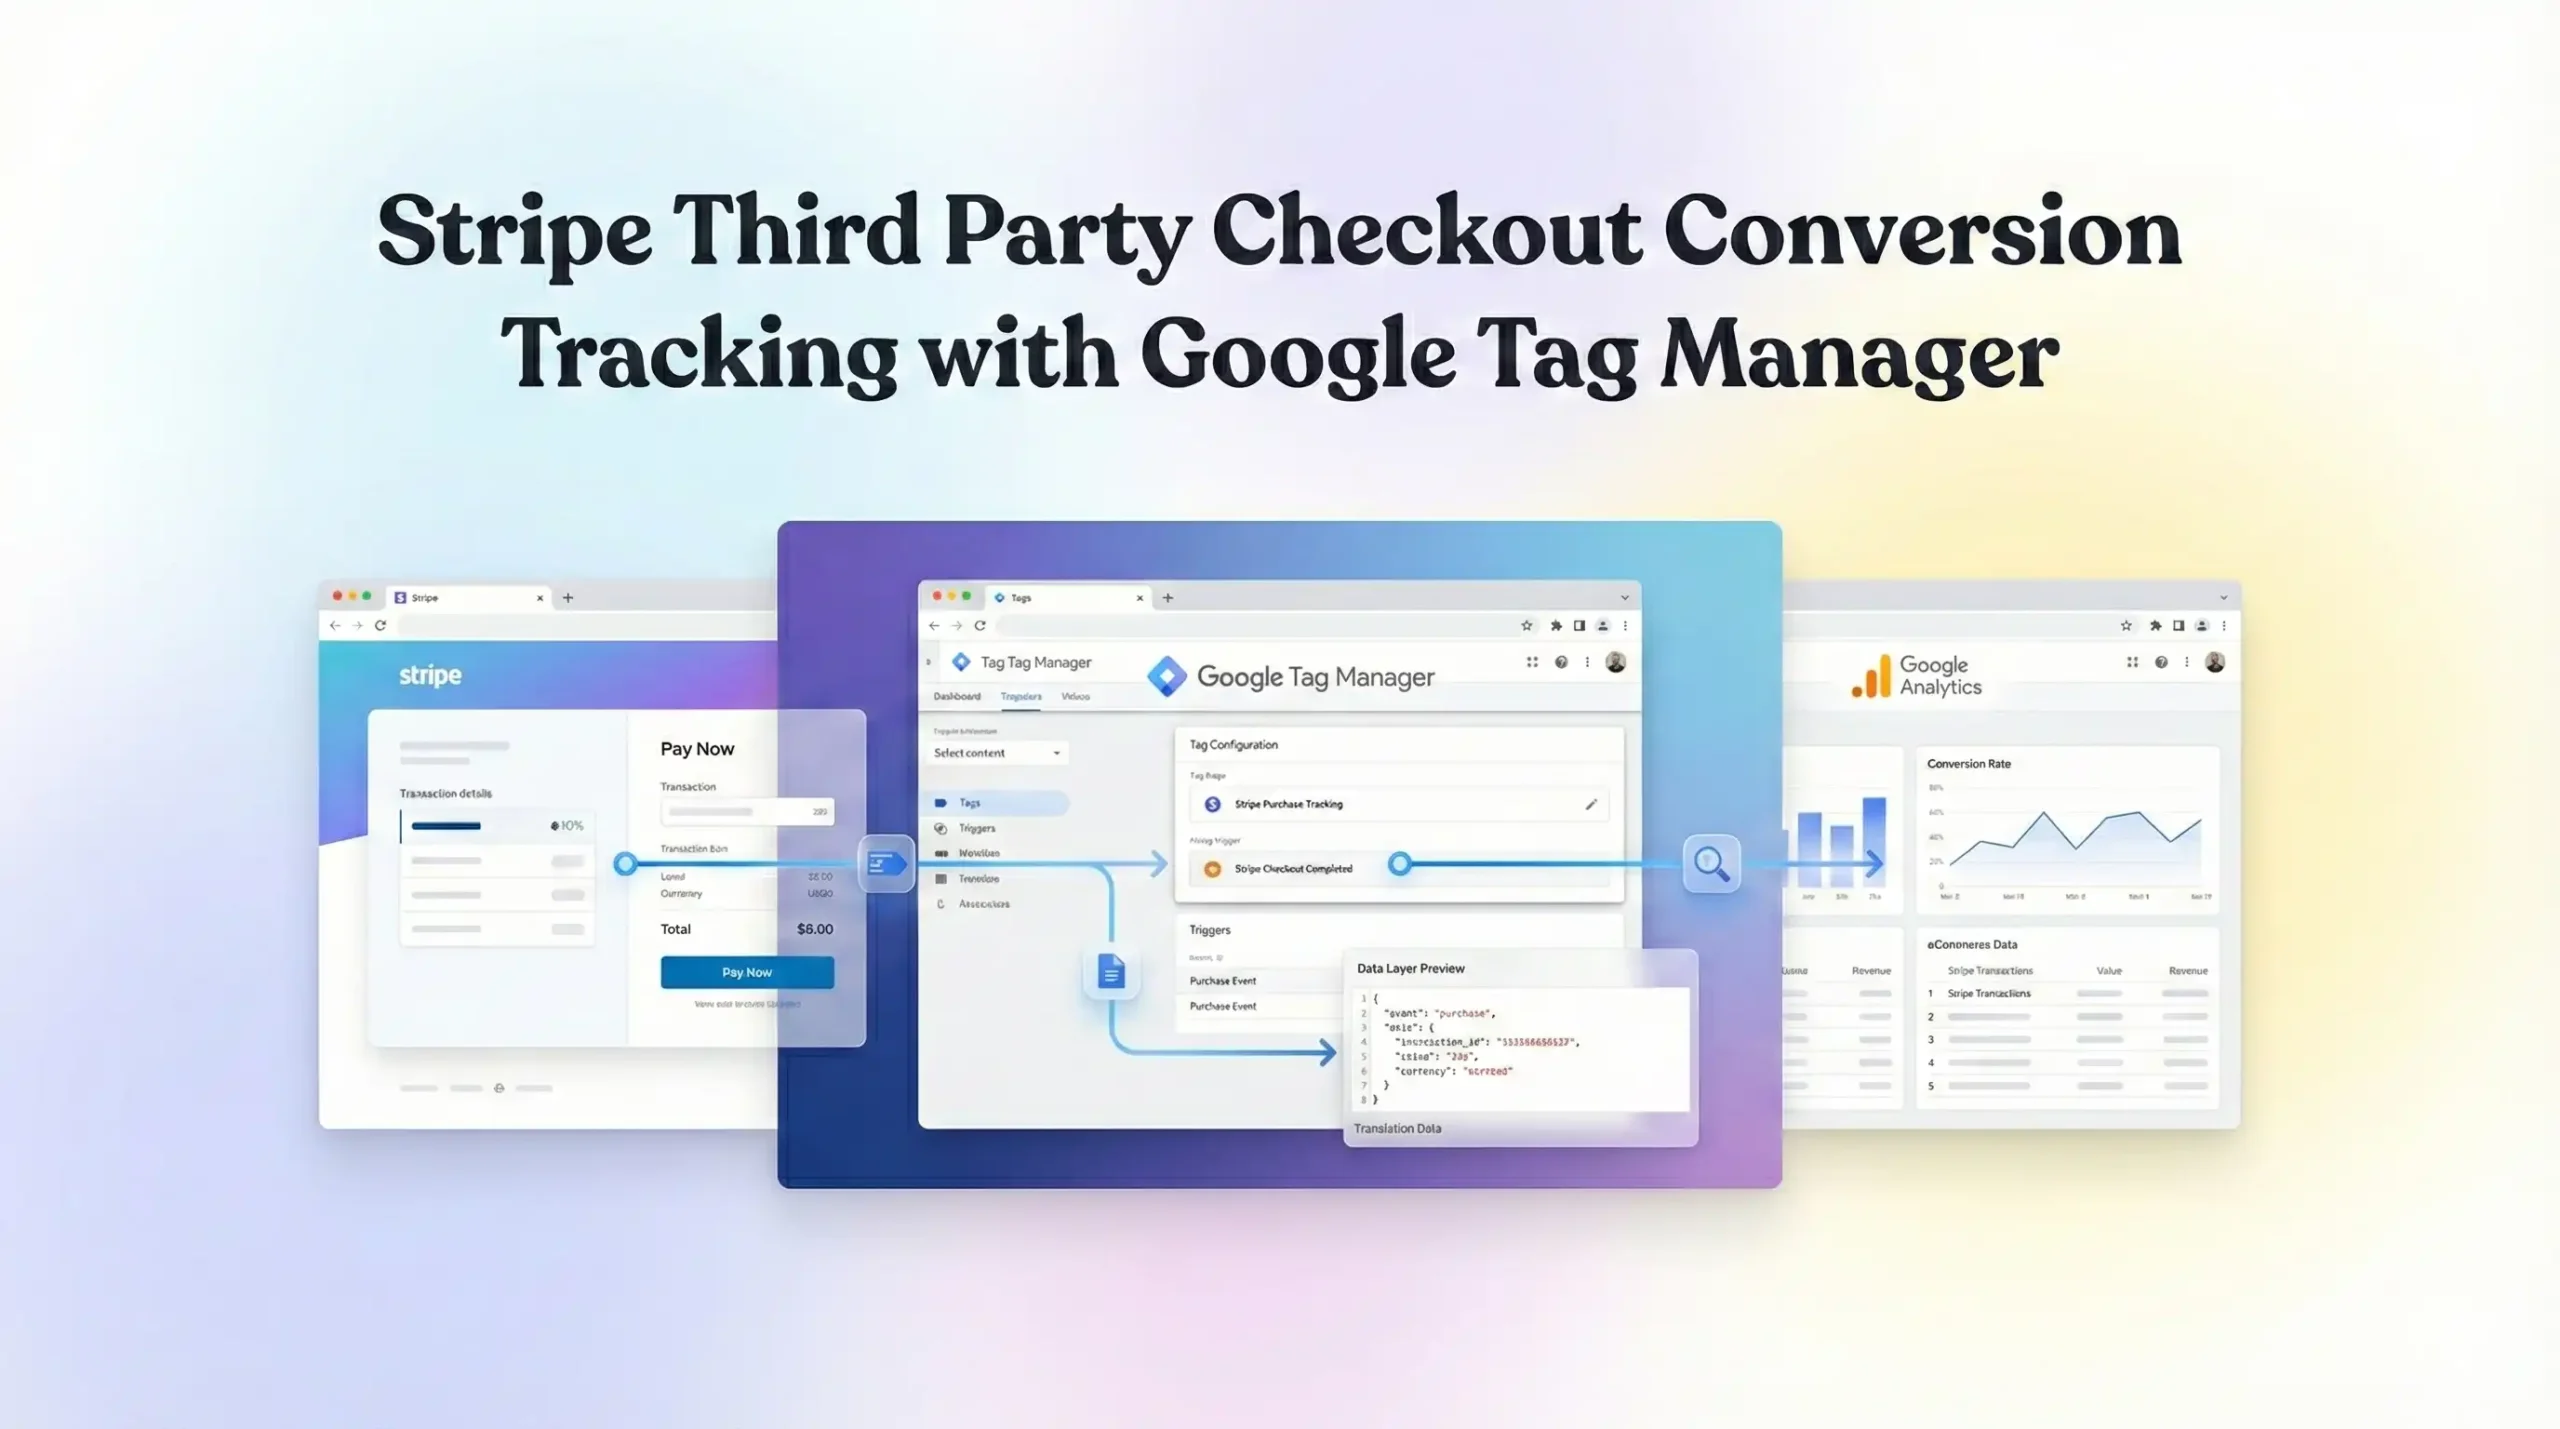
This guide is your solution. We aren’t just going to patch this; we are going to build a professional-grade tracking infrastructure. We will use Google Tag Manager (GTM) to bridge the gap between your site and Stripe. We will implement Google Consent Mode V2 to stay compliant with global privacy laws while recovering lost data. And we will set up sophisticated listener scripts to capture every single transaction.
Why You Must Set This Up
In the world of data-driven marketing, incomplete data is dangerous. It leads to bad decisions. If you are spending money on ads but not tracking the revenue accurately, you are essentially burning cash.
The Problem: The “Stripe Disconnect”
Stripe Hosted Checkout pages live on checkout.stripe.com, not your domain. This creates three critical issues:
- Session Breaking: When a user leaves your site for Stripe, a new session might start. If they return, GA4 sees them as a “Referral” from Stripe, not a user from your “Summer Sale” email campaign.
- Lost Conversions: If a user pays and closes the tab immediately after paying but before redirecting to your “Thank You” page, the conversion tag never fires. You lose the revenue data.
- Algorithm Blindness: Google Ads and GA4 need conversion signals to optimize. Without them, your ad spend becomes less efficient because the AI doesn’t know what “success” looks like.
The Solution: Cross-Domain Tracking & Listeners
We will implement a multi-layered strategy to fix this:
- Cross-Domain Tracking: Configuring GA4 to treat your domain and Stripe’s domain as one continuous journey.
- Referral Exclusion: Telling GA4 to ignore stripe.com as a traffic source so the original source gets credit.
- Redirection Handling: Ensuring users are forced back to your site where the “Purchase” event fires securely.
The 5 Key Benefits for Google Analytics 4 (GA4)
1. Better Algorithm Training (Predictive Metrics)
GA4 isn’t just a scoreboard; it’s a prediction engine. It uses machine learning to identify users likely to churn or purchase. By feeding it accurate Stripe revenue data, you train these models to find high-value customers, not just window shoppers.
2. Higher ROI and ROAS
When you attribute revenue correctly, your Return on Ad Spend (ROAS) becomes accurate. You might discover that a campaign you thought was failing is actually your most profitable one—it just had a high rate of Stripe checkout users.
3. Accurate Reporting (Attribution)
You need to know the truth. Did that $500 sale come from Organic Search or a Paid Social ad? By fixing the “Referral” issue with Stripe, you restore the credit to the marketing channel that actually generated the sale.
4. Audience Building (Retargeting)
You can create powerful audiences in GA4 based on purchase behavior.
- High Spenders: Target users who spent over $100 via Stripe with a loyalty offer.
- Abandoners: Retarget users who initiated checkout but didn’t complete the purchase.
5. Future-Proofing (Privacy & Consent)
By implementing Google Consent Mode V2, you ensure your tracking is robust against privacy laws like GDPR. If a user denies cookies, Consent Mode allows Google to “model” the conversion data, recovering insights that would otherwise be invisible.
Prerequisites & Checklist
This is an advanced setup. Ensure you have the following ready before we begin.
Required Access:
- Google Tag Manager (GTM): Admin or Publish access.
- Google Analytics 4 (GA4): Editor or Admin access.
- Stripe Dashboard: Access to configure “branding” and “redirects” (or access to the developer who manages your Stripe API integration).
- Website Admin: Access to your website’s backend (WordPress, Webflow, custom code) to verify GTM installation and create a “Success” page.
- Cookiebot Account: Access to your Cookiebot dashboard for Consent Mode V2 setup.
Required Tools:
- Google Chrome Browser: For debugging.
- GTM Preview Mode: The built-in debugger.
- GA4 DebugView: To verify real-time data flow.
Google Tag Assistant Extension: Chrome extension for checking tags.
The “How-To- Setup” (Step-by-Step)
We will break this down into logical phases. Follow them in order.
Step 1.1: The Google Tag (Main Configuration)
This tag initializes GA4. If you already have it, you must edit it to include Stripe configuration.
- Open Google Tag Manager.
- Go to Tags.
- Open your existing Google Tag (or create a new one).
- Tag Configuration:
- Tag ID: Your GA4 Measurement ID (G-XXXXXXXXXX).
- Configuration Settings:
- Add a parameter: send_page_view = true.
- Crucial Step: Add a parameter for cookie_flags = samesite=none;secure. This setting helps cookies persist across different domains (your site vs. Stripe) in modern browsers.
- Triggering: All Pages.
- Click Save.
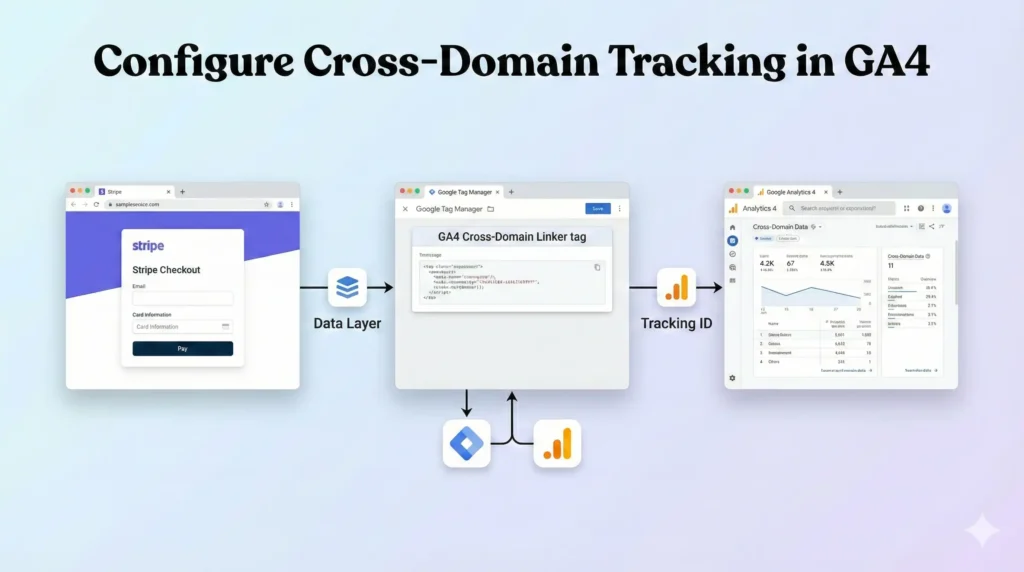
Step 1.2: Configure Cross-Domain Tracking in GA4
This is done inside the GA4 interface, not just GTM. This ensures the _gl parameter (Google Linker) is passed to Stripe.
- Go to Google Analytics 4.
- Navigate to Admin > Data Streams.
- Click on your web data stream.
- Click Configure tag settings.
- Click Configure your domains.
- Add a condition:
- Match type: Contains.
- Domain: stripe.com.
- Add another condition for your own domain (e.g., yourwebsite.com).
- Click Save.
Why? This appends a _gl parameter to the URL when users move between your site and Stripe, carrying the user’s session ID with them so the session doesn’t break.
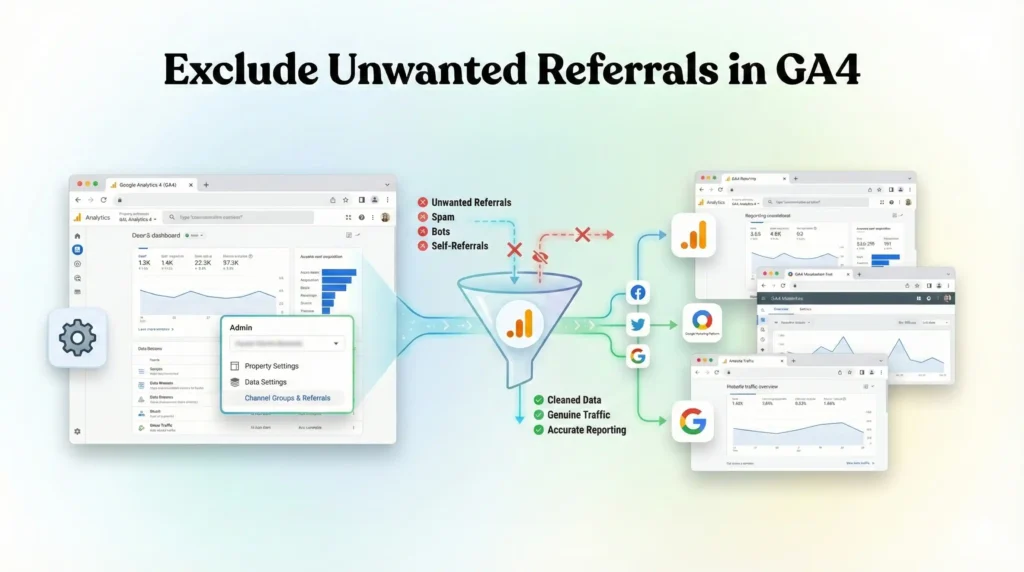
Step 1.3: Exclude Unwanted Referrals in GA4
We need to stop GA4 from starting a new session when the user returns from Stripe.
- In the same Data Streams settings in GA4 (under “Configure tag settings”).
- Click Show more if needed to see all options.
- Click List unwanted referrals.
- Add the following conditions:
- Referral domain contains: stripe.com.
- Referral domain contains: hooks.stripe.com.
- Referral domain contains: checkout.stripe.com.
- Click Save.
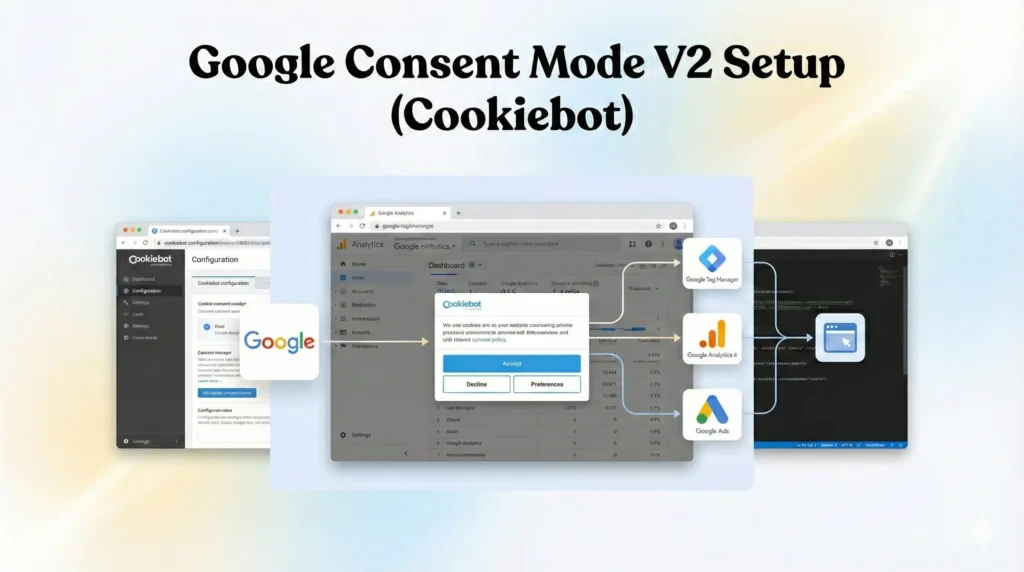
Phase 2: Google Consent Mode V2 Setup (Cookiebot)
We must respect user privacy. We will use Cookiebot as the Consent Management Platform (CMP).
Step 2.1: Add the Cookiebot Template
- In GTM, click Templates on the left.
- In Tag Templates, click Search Gallery.
- Search for Cookiebot CMP.
- Click Add to workspace and confirm.
Step 2.2: Configure the Cookiebot Tag
- Go to Tags > New.
- Name: CMP – Cookiebot Consent Mode V2.
- Tag Configuration: Select the Cookiebot CMP template.
- Cookiebot ID: Paste your Domain Group ID (found in Cookiebot settings).
- Enable Google Consent Mode: Check this box. This is mandatory.
- Default Consent State:
- Set ad_storage to Denied.
- Set analytics_storage to Denied.
- Set ad_user_data to Denied.
- Set ad_personalization to Denied.
- Why? We assume “No” until the user explicitly clicks “Allow” on the banner to be GDPR compliant.
- Triggering:
- Select Consent Initialization – All Pages.
- Note: Do NOT use “All Pages.” This tag must fire first to set the rules before any other tags load.
- Click Save.
Phase 3: The Success Page Listener (The Code)
This is the critical part for Stripe. Since we cannot place GTM code on the hosted Stripe page, we rely on the Redirect Strategy. You must configure Stripe (or your plugin/app) to redirect users to a specific “Thank You” or “Success” page on your website after payment.
Scenario: User pays on Stripe -> Redirects to yourwebsite.com/success?session_id=cs_test_123 -> GTM fires the Purchase tag.
We will use a script to ensure the Purchase event only fires once per transaction, preventing duplicate data if the user reloads the page.
Step 3.1: Create the Transaction Deduplication Script
This script checks if the purchase has already been tracked using localStorage.
- In GTM, go to Tags > New.
- Name: cHTML – Purchase Deduplication.
- Tag Configuration: Select Custom HTML.
- The Code: Copy and paste the code below.
					<script>
  (function() {
    // Get the Transaction ID from the URL (Stripe usually passes session_id)
    var urlParams = new URLSearchParams(window.location.search);
    // Check for common Stripe parameters
    var transactionId = urlParams.get('session_id') || urlParams.get('payment_intent');

    if (transactionId) {
      // Check if this ID has already been tracked in Local Storage
      if (!localStorage.getItem('tracked_tx_' + transactionId)) {

        // If not tracked, push the event to Data Layer
        window.dataLayer.push({
          'event': 'stripe_purchase_success',
          'transaction_id': transactionId,
          // Ideally, value should come from backend, but for URL params:
          'value': urlParams.get('amount') || '0.00',
          'currency': 'USD' // Default currency, change if needed
        });

        // Mark as tracked so it doesn't fire again on reload
        localStorage.setItem('tracked_tx_' + transactionId, 'true');
      }
    }
  })();
</script>
Step 3.2: Trigger the Listener
- Scroll down to Triggering.
- Click the + icon to create a new trigger.
- Name: Page View – Success Page.
- Trigger Type: Page View.
- Trigger Configuration: Some Page Views.
- Condition: Page Path contains /success (or whatever your specific success URL slug is).
- Click Save.
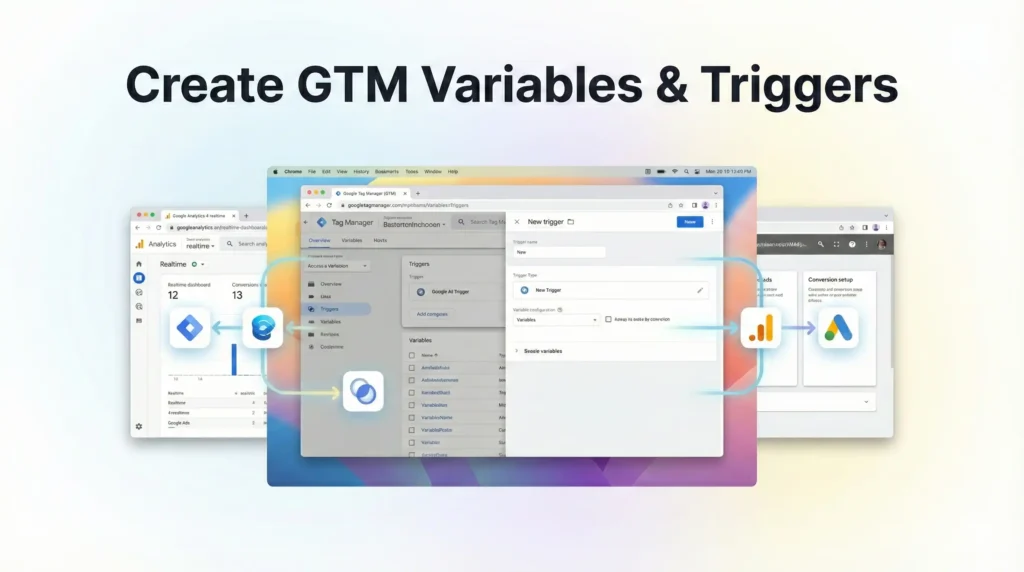
Phase 4: GTM Variables & Triggers
Now we configure GTM to read the data pushed by our listener into the Data Layer.
Step 4.1: Create Data Layer Variables
- Go to Variables.
- Create New under User-Defined Variables.
- Name: dlv – transaction_id.
- Type: Data Layer Variable.
- Data Layer Name: transaction_id (matches the code above).
- Click Save.
- Repeat this process for dlv – value and dlv – currency.
Step 4.2: Create the Custom Event Trigger
- Go to Triggers.
- Click New.
- Name: Custom Event – Stripe Purchase.
- Type: Custom Event.
- Event Name: stripe_purchase_success (Matches the code above exactly).
Click Save.
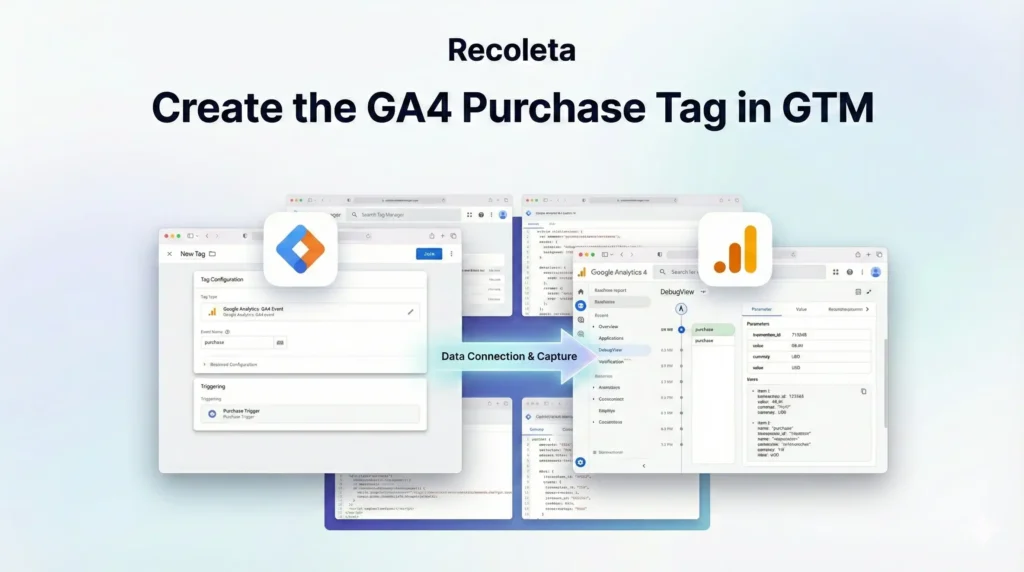
Phase 5: The GA4 Event Tag Configuration
Now we create the tag that sends the purchase data to Google Analytics 4.
Step 5.1: Create the GA4 Purchase Tag
- Go to Tags > New.
- Name: GA4 – Event – Purchase.
- Tag Configuration: Select Google Analytics: GA4 Event.
- Measurement ID: Enter your G-ID (or use a constant variable).
- Event Name: purchase.
- Event Parameters: (Add these rows)
- transaction_id: {{dlv – transaction_id}}
- value: {{dlv – value}}
- currency: {{dlv – currency}}
- Consent Settings:
- Select No additional consent required (Cookiebot handles the logic).
- Triggering: Select Custom Event – Stripe Purchase.
- Click Save.
Testing & Validation (Deep Dive)
You must test this live. A “fake” preview often fails because it doesn’t replicate the cross-domain redirect.
Step 1: Launch GTM Preview Mode
- Click Preview in GTM.
- Enter your website URL.
- Click Connect.
Step 2: Complete a Test Purchase
- Go to your product page on the preview window.
- Click “Buy” to be redirected to Stripe.
- Crucial Check: Look at the URL bar on the Stripe page. Does it have a _gl parameter? (e.g., checkout.stripe.com…?_gl=1*…).
- If Yes: Cross-domain tracking is working.
- If No: Check your Data Stream settings in GA4 (Phase 1.2) or ensure your button link isn’t stripping parameters.
- Complete the payment (use a Stripe test card like 4242 4242… or a 100% off coupon).
- Wait for the redirect back to your /success page.
Step 3: Check Tag Assistant
- Look at the Tag Assistant tab.
- Select the /success page container loaded event.
- Look for the stripe_purchase_success event in the timeline on the left.
- Check Tags Fired. You should see: GA4 – Event – Purchase.
- Click the tag. Verify the transaction_id and value are correct.
Step 4: Verify in GA4 DebugView
- Go to GA4 > Admin > DebugView.
- Wait 10-30 seconds.
- You should see the green purchase icon appear on the timeline.
- Click it. Check the source / medium. It should say google / cpc (if you clicked an ad) or direct / none (if you typed the URL), but it should not say stripe.com / referral.

Troubleshooting & Common Mistakes
1. The “Referral” Issue Persists
- Issue: GA4 still says stripe.com is the source of the purchase.
- Fix: You likely didn’t add stripe.com to the “List unwanted referrals” in GA4 (Phase 1.3), OR your cross-domain tracking (_gl parameter) isn’t carrying over to the Stripe URL. Ensure your website’s link to Stripe includes the GTM linker parameter automatically.
2. Duplicate Purchases
- Issue: If a user refreshes the success page, the revenue counts twice.
- Fix: The code in Phase 3.1 uses localStorage to check the Transaction ID. If this isn’t working, ensure the Transaction ID is actually unique in the URL. GA4 also has internal deduplication if the exact same transaction_id is sent within 48 hours.
3. Missing Value/Currency
- Issue: The purchase event fires, but value is 0.
- Fix: Getting the dynamic value from the URL (?amount=100) is the easiest method. If your URL doesn’t have parameters, you need a developer to push the order data to the dataLayer on the server-side before the page loads.

Conclusion
Tracking Stripe Third-Party Checkouts requires a strategic mix of cross-domain configuration and clever “success page” handling. By forcing a redirect back to your site and using GTM to capture the return signal, you close the attribution loop.
You have now:
- Bridged the Domain Gap: Using GA4 cross-domain settings.
- Secured Data Accuracy: By excluding Stripe referrals.
- Ensured Compliance: Using Consent Mode V2.
- Prevented Duplicates: Using local storage logic.
Publish your GTM container. Let the data flow for 7 days. Then, check your “Monetization” reports in GA4 and finally see the true ROI of your marketing efforts.
1. Can I track Stripe without a "Thank You" page redirect?
It is extremely difficult with client-side GTM. If the user doesn’t return to your site, GTM cannot fire. The only way to track non-redirected sales is Server-Side Tracking (using Stripe Webhooks sent to a Server GTM container), which is much more complex and requires a cloud server setup.
2. Why do I need to exclude "stripe.com" referrals?
If you don’t exclude it, GA4 starts a new session when the user returns from payment. This breaks the link to the original traffic source (e.g., Google Ads). The sale gets credited to “Stripe” instead of “Google Ads,” ruining your attribution reports and blinding your ad algorithms.
3. Will this work for subscriptions?
This setup tracks the initial purchase/signup successfully. However, recurring monthly payments happen silently in the background (on Stripe’s servers) and do not involve the user visiting your website. To track recurring revenue events, you absolutely need Server-Side Tracking or a connector tool.
4. What is the _gl parameter?
It stands for “Google Linker.” It is a URL parameter that encodes the user’s Client ID (cookie ID). When passed from your site to Stripe, it allows GA4 to recognize that the person paying on Stripe is the exact same person who landed on your homepage 5 minutes ago, keeping the session intact.
5. Why is Consent Mode V2 mandatory?
Google requires it for all users in the EEA/UK to continue using audience and measurement features. Without it, your Google Ads remarketing lists will stop populating, and your conversion modeling will be disabled, leading to massive data loss and potential legal risks.
6. Can I use this for Facebook Pixel (Meta) too?
Yes! Once you have the stripe_purchase_success trigger and variables (value, currency) in GTM, you can simply add a Facebook Pixel – Purchase tag and fire it on the exact same trigger. It uses the same data layer logic.
7. Does this work with Stripe Elements?
Stripe Elements (embedded credit card forms on your site) are different. They keep the user on your site, so you don’t need cross-domain tracking. You would just use a standard “Form Submission” or “AJAX Success” listener for Elements. This guide is specifically for Stripe Hosted Checkout.
8. How do I get the Order ID into the URL?
You need to configure this in your website’s backend code where you create the Stripe Checkout Session. When defining the success_url, you should append parameters like ?session_id={CHECKOUT_SESSION_ID}. Stripe will automatically replace that placeholder with the real session ID upon redirect.
9. Why is my Purchase event not showing in GA4 real-time?
GA4 Real-Time view can sometimes be delayed or filter out internal traffic (if you excluded your own IP). Use DebugView (Admin > DebugView) for testing; it is designed specifically for immediate verification of events coming from your device.
10. Will this slow down my site?
No. The scripts used here are lightweight and only run on the “Success” page (for the purchase trigger) or asynchronously (for the Config tag). Using GTM is generally much faster and cleaner than hard-coding multiple tracking pixels directly into your website header.
 Need Help Advanced Tracking Setup?