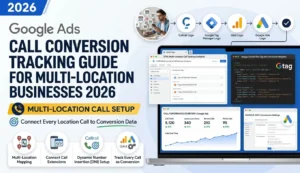
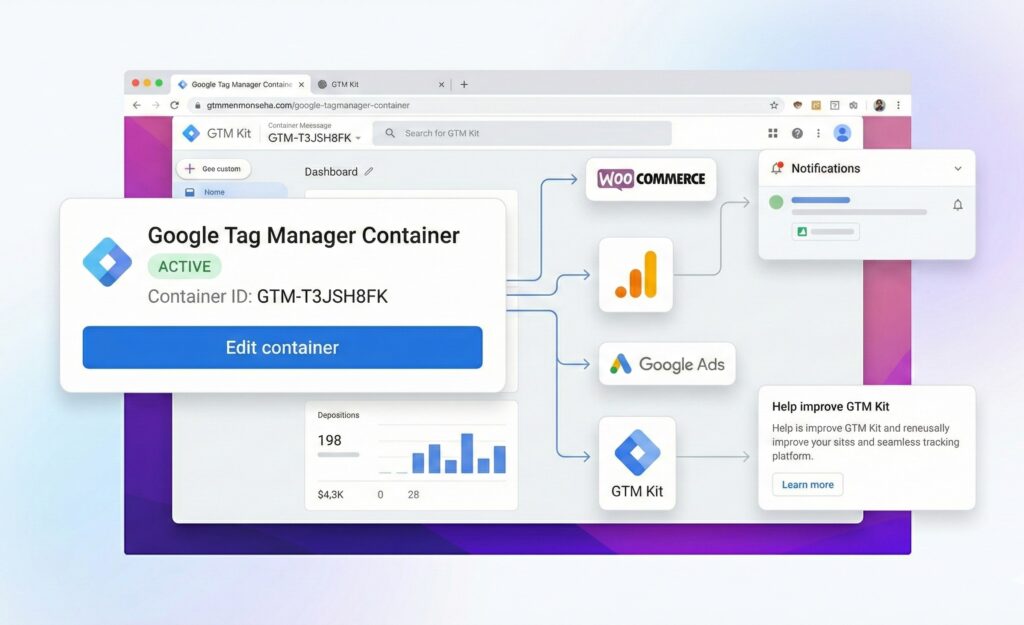
Introduction
As browser restrictions tighten, reliance on client-side pixels is risky. Google Ads Server-Side Tracking with GTM and Stape.io offers a robust alternative. By utilizing a custom domain, you secure data accuracy, bypass blockers, and remain compliant. Learn how to configure Google Ads first-party tracking and GA4 server-side setups with this comprehensive Stape.io guide.
Prerequisites
Requirements To begin, verify you have the following:
- GTM Account (Web & Server containers)
- Active Stape.io account
- DNS provider access (e.g., Cloudflare, GoDaddy)
- Google Ads account (conversions active)
- GA4 Property (Measurement ID on hand)
Need Professional Help?
- Hire Me for Setup: WhatsApp Me
- Book a Consultation: Schedule a Call
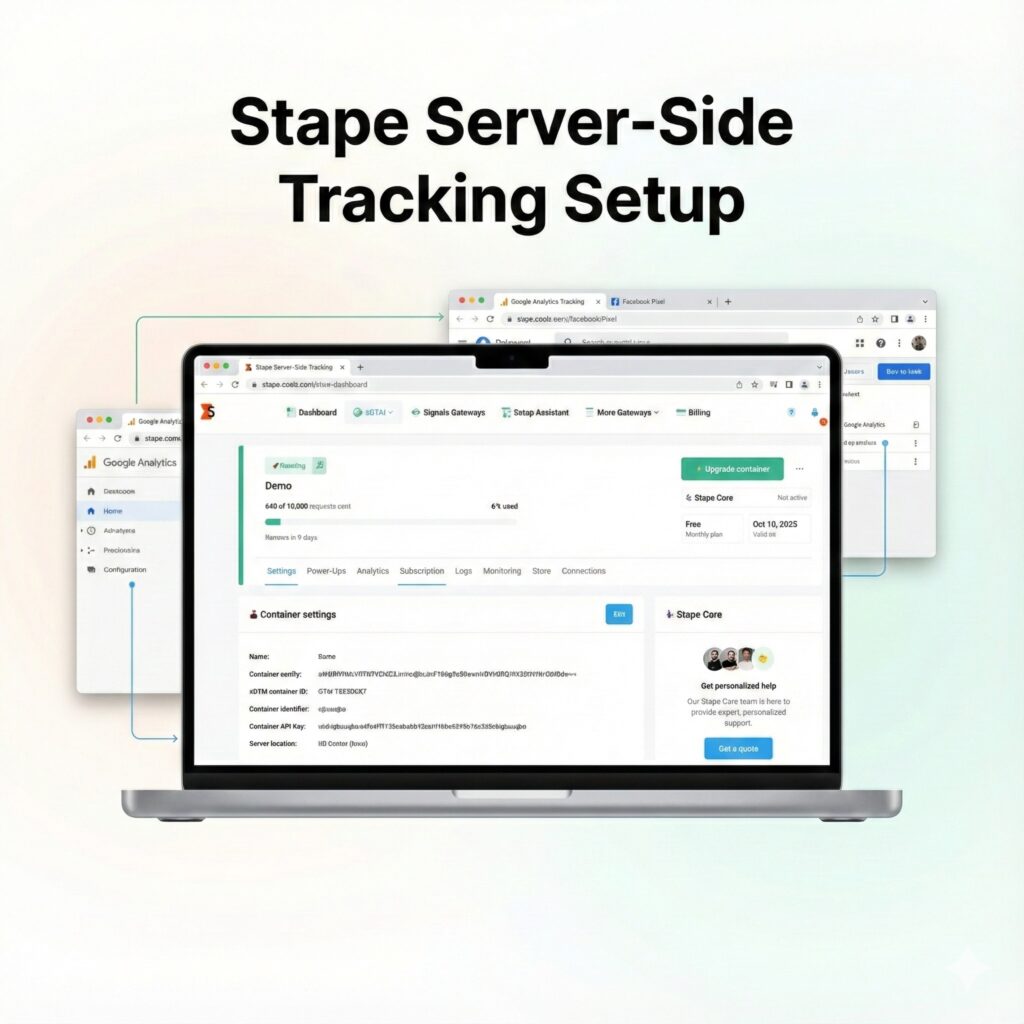
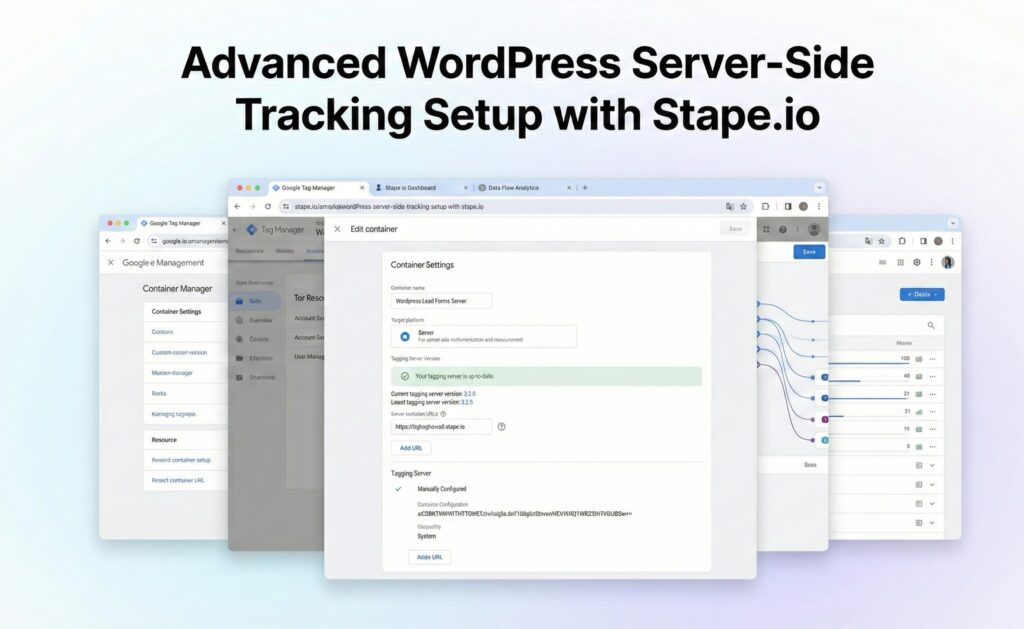
Step 1: Create Stape.io Account & Server Container
A. Prep in GTM
- Create a new Server Container in Google Tag Manager.
- Choose “Manually provision tagging server.”
- Copy the Container Configuration Key.
B. Account Creation on Stape
- Visit Stape.io/sign-up.
- Select your geographical location (either Global or EU).
- Complete the sign-up process using your email address or Google account.
C. Server Container Configuration
- Log in to your account.
- Click on “Create sGTM Container.”
- Paste your GTM Configuration Key into the designated field.
- Specify the desired Server Location.
- Choose the Free plan option.
- Wait for the container status to change to “Running.”
D. Custom Domain Setup
- To set up your custom domain (e.g., tags.yourdomain.com):
- In Stape: Navigate to Domains and select Add custom domain.
- DNS Records: Copy the provided DNS Records from Stape.
- DNS Provider (Cloudflare/GoDaddy): Add these copied DNS Records in your domain’s DNS settings.
- Disable Proxying: Ensure the proxying is disabled for these records (set to DNS only).
- GTM Server Container: Paste the custom domain URL into Settings → Server URL within your GTM Server Container.
Step 2: Create GTM (Web & Server) Properties
A. Account GTM Creation
Navigate to tagmanager.google.com.
Select “Create Account.”
Provide an Account Name.
📸 Screenshot: GTM account or web container creation page
B. Web Container Creation
- Enter a Container Name (e.g., yourdomain-Web).
- Choose “Web” as the Target Platform.
- Copy the two GTM snippets (Web ID: GTM-XXXXXXX).

C. Server Container Creation
To create the server container:
- Go to Admin and select Create Container.
- Name the container (e.g., yourdomain-Server).
- For the Target Platform, choose Server.
- Select the Manually provision tagging server option.
- Copy the resulting Container Configuration Key.
Step 3: Implement Google Tag Manager (GTM) Scripts
To integrate GTM:
- Snippet 1 (Head): Insert this script immediately following the opening <head> tag.
- Snippet 2 (Body): Insert this script immediately following the opening <body> tag.
Step 4: Connecting Stape with SGTM
Stape Setup: Access Stape.io, create your SGTM (Server-side Google Tag Manager) container, and input your GTM Key.
- Stape Setup: Access Stape.io, create your SGTM (Server-side Google Tag Manager) container, and input your GTM Key.
- Custom Domain Configuration: Set up a custom domain within Stape (e.g., tags.yourdomain.com).
- DNS Verification: Add the necessary DNS records with your DNS provider to verify the custom domain.
- GTM Server URL Update: In your GTM Server Container settings, change the Server URL to the custom domain you configured.
Step 5: Add Custom Subdomain & Custom GTM Loader
Server-Side Tagging Configuration Steps
This guide outlines the two main parts for setting up server-side tagging, including an Adblock bypass using the GTM Loader.
Part 1. Subdomain Configuration (Stape & DNS)
- In Stape: Add your desired custom domain (e.g., tags.yourdomain.com).
- In DNS: Create and add the necessary CNAME or A records as directed.
- Verification: Verify the setup, then update the domain settings within your GTM Server Container.
Part 2. GTM Loader Implementation (Adblock Bypass)
- In Stape: Navigate to the “Power-Ups” section and select “Custom Loader.”
- Generate Script: Input your custom domain and your Web GTM ID to generate the custom loader script.
- Deployment: Replace the existing GTM script on your website with the newly generated script.
- Testing: Use GTM Preview Mode to confirm that all scripts are now loading correctly from your custom domain.
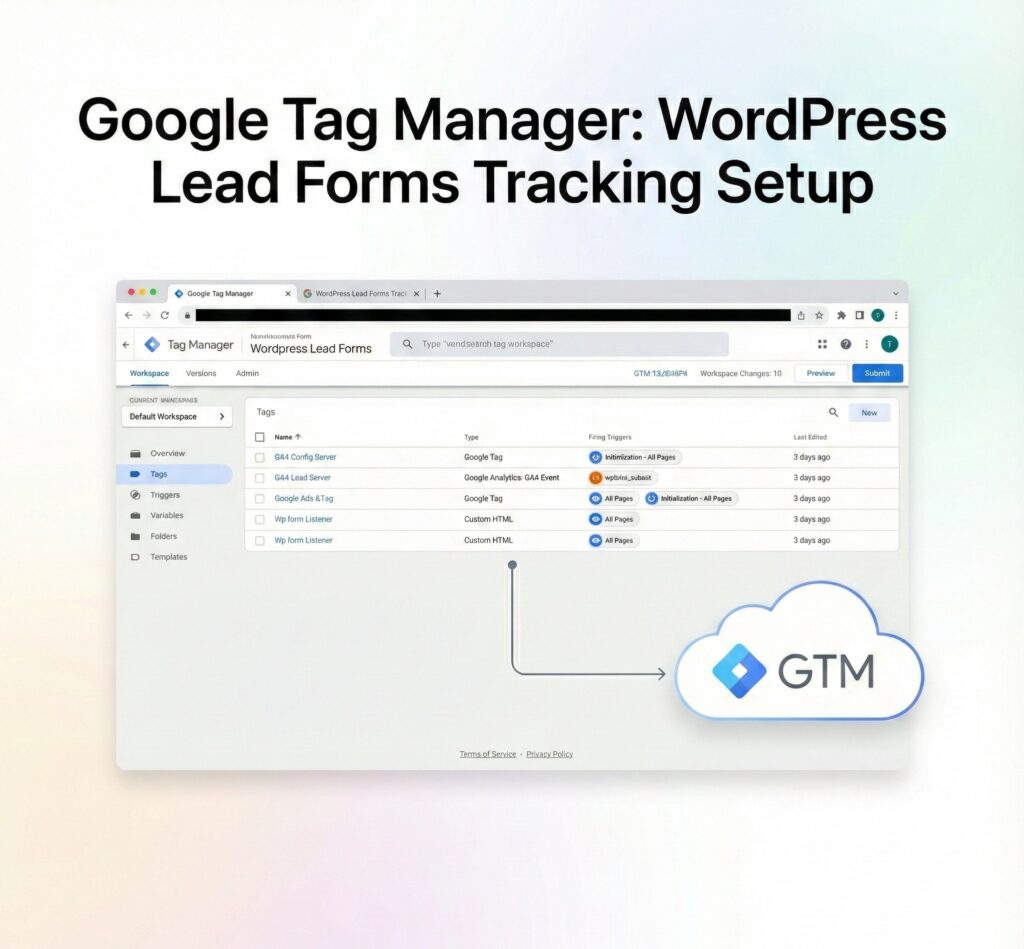
Step 6: Add Form Listener in Web GTM
- Add JavaScript Snippet: Create a Custom HTML Tag containing a JavaScript snippet. This snippet will be responsible for pushing the formSubmission event to the GTM data layer.
- Define Custom Trigger: Set up a new Custom Event Trigger within GTM. The required Event Name for this trigger must be formSubmission.
- Deployment and Verification: Utilize the GTM Preview mode to thoroughly test the setup and confirm that the formSubmission event fires as expected. Once confirmed, publish the container.

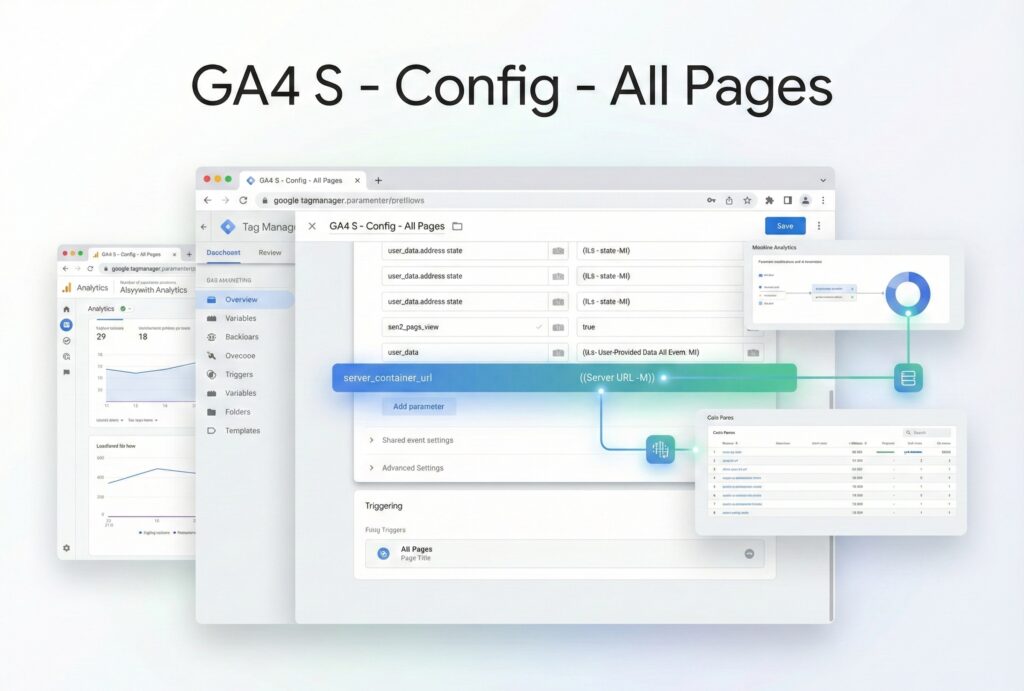
Step 7: Send Data from Web GTM → Server GTM
- Configure GA4: Modify the existing GA4 Configuration Tag to include the server_container_url parameter, setting its value to [https://tags.yourdomain.com](https://tags.yourdomain.com).
- Create GA4 Event Tag: Establish a new GA4 Event Tag with the specific Event Name: form_submit.
- Set Trigger: Assign the formSubmission event as the trigger for the newly created GA4 Event Tag.
- Verification: Utilize the preview mode for both the web and server containers to confirm that both pageview and form_submit requests are being successfully sent and received.
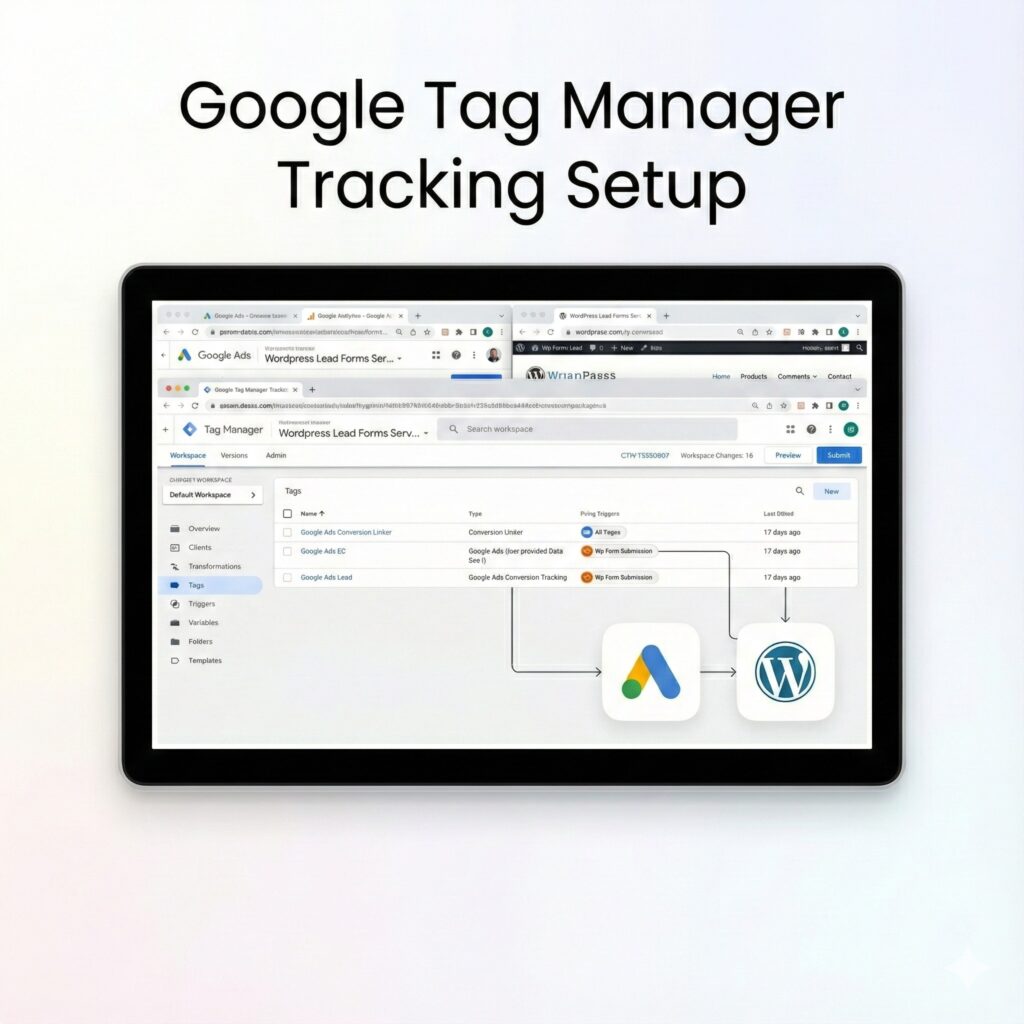
Step 8: Configure SGTM → Send Data to Google Ads
A. Server Variables
The following variables are defined for the server:
- ed_value: Event Data $\rightarrow$ value
- ed_currency: Event Data $\rightarrow$ currency
- cnst_GAds_ID: Constant $\rightarrow$ Your AW-ID
B. Conversion Trigger
- Type: Custom Event
- Condition: event_name = form_submit
C. Server Tags Configuration
The following Server Tags are implemented:
- Google Ads Conversion Linker
- Google Ads Conversion Tracking
Step 9: Test & Debug
Google Tag Manager (GTM) and Google Analytics 4 (GA4) Testing Checklist
- Preparation: Initiate Web (Client-side) and Server GTM Preview/Debug mode.
- Network Check: Verify in the browser’s Network tab that all necessary scripts are loading correctly from the designated custom domain.
- Client-side Conversion Test: Submit a test conversion/event and confirm that the corresponding GA4 Event fires within the Web (Client-side) GTM container.
- Server-side Confirmation: In the Server GTM container, confirm that the GA4 Client successfully receives the incoming request.
- Google Ads Tag Verification: Check that both the Google Ads Conversion Linker tag and the Conversion Tracking tag fire as intended.
- Outgoing Request Validation: Verify the outgoing request from the Server container to Google Ads includes the correct Conversion ID and Conversion Label.
- Final Step: Publish both the Web and Server GTM containers.
Frequently Asked Questions
Q1. What is the benefit of using server-side tracking?
Server-side tracking offers superior accuracy, effectively bypasses common ad blockers, and is a vital method for maintaining compliance with current privacy regulations.
Q2. Is the Conversion Linker still necessary?
Yes, the Conversion Linker remains a mandatory component, especially for accurate Google Click Identifier (GCLID) tracking.
Q3. Can Enhanced Conversions be implemented with Server-Side Google Tag Manager (SGTM)?
Absolutely. SGTM can support Enhanced Conversions by utilizing hashed user data, such as email addresses and phone numbers.
Q4. What is the process for testing the implementation?
To verify functionality, use the GTM Preview mode along with Tag Assistant. Final conversion confirmation will appear in your Google Ads account, though this may take up to 24 hours.
Q5. Is the Stape platform a requirement for SGTM?
While Stape simplifies the deployment and management of SGTM, it is not mandatory. Users have the option to self-host SGTM.
Conclusion
You have successfully implemented Google Ads Server-Side Tracking using GTM and Stape.io.
This method offers significant Benefits, including:
- Accurate data collection
- Reliable Google Ads conversions
- Support for Enhanced Conversions
- Privacy-compliant tracking
With Google Ads first-party tracking in place, you can now optimize your campaigns confidently, knowing that every lead and conversion is tracked correctly.
Q1. What is first‑party tracking?
It sends conversion data through your own domain instead of third‑party endpoints. This improves data accuracy, extends cookie life, reduces ad‑blocker impact, and ensures reliable attribution for Google Ads campaigns.
Q2. Is Stape.io required?
No, but Stape.io simplifies server hosting, scaling, security, and logging. It’s faster and easier than self‑hosting and is widely used for GTM server‑side tracking implementations.
Q3. Is Conversion Linker mandatory?
Yes. Conversion Linker stores GCLID in first‑party cookies, allowing Google Ads to match conversions accurately. Without it, server‑side conversions may fail attribution.
Q4. Does Smart Bidding benefit?
Yes. Server‑side tracking sends higher‑quality conversion signals, helping Smart Bidding optimize bids based on real, reliable data instead of partial browser events.
Q5. Does this bypass ad blockers?
Partially. Server‑side tracking reduces data loss from ad blockers and browser restrictions, though user consent is still respected when Consent Mode v2 is enabled.
Q6. Is this GDPR compliant?
Yes. When combined with Consent Mode v2 and proper consent management, server‑side tracking complies with GDPR and regional privacy laws.
Q7. Does cookie lifetime increase?
Yes. First‑party cookies last longer than third‑party cookies, improving attribution windows and conversion matching.
Q8. Does it replace offline tracking?
No. Server‑side tracking complements offline conversion tracking. Both can be used together for full‑funnel attribution.
Q9. Can ecommerce track purchases?
Yes. Ecommerce events like purchase, add‑to‑cart, and checkout can be sent server‑side for higher accuracy and revenue attribution
Q10. Is setup complex?
It requires technical accuracy but is straightforward when done step by step. Professional setup avoids data loss and mis‑attribution.
 Need Help Advanced Tracking Setup?