1. The Comprehensive Introduction
The “Black Box” That Is Costing You Money
Imagine this scenario: You own a thriving service-based business—perhaps a luxury salon, a high-intensity fitness studio, or a specialized wellness clinic. You have invested thousands of dollars into a sleek, modern website. You are running SEO campaigns to rank for “best massage near me” or “top-rated yoga studio.” You might even be running paid ads on social media.
On the front end, everything looks perfect. You can see traffic hitting your site. You log into your Vagaro dashboard, and you see appointments filling up your calendar. Business is good.
But when you open your Google Analytics 4 (GA4) dashboard to analyze your performance, you see a flat line.
According to GA4, you have thousands of visitors, but zero “Conversions” or “Key Events.” Your analytics tell you that people are visiting your site and then leaving without doing anything. You have absolutely no idea which blog post brought in that $200 hair coloring appointment, or which Instagram ad resulted in a loyal recurring client.
This is the “Black Box” problem. It is the single most frustrating and expensive issue facing service businesses today. You are flying blind, spending marketing budget without any visibility into what is actually working.
The Context: Why This Happens (The Iframe Wall)
The problem is not your marketing. The problem is not GA4. The problem is the technical architecture of how booking widgets like Vagaro work.
Vagaro is typically embedded on your website using an iframe (Inline Frame). To understand this, imagine your website is a house. You invite Google Analytics into your house to watch what people do—which rooms they visit, what pictures they look at.
However, the Vagaro booking calendar isn’t actually in your house. It is a window cut into your wall that looks into Vagaro’s house. When a customer walks up to that window and books an appointment, they are technically interacting with Vagaro’s house, not yours.
Your standard Google Analytics tracking code lives on your walls. It can see the customer standing at the window, but it cannot see what they are typing inside that window. It cannot see them click “Confirm.” It cannot see the dollar value of the booking.
To GA4, that booking never happened.
In this guide, we are going to dismantle that wall. We are going to use Google Tag Manager (GTM) to build a sophisticated communication bridge. We will implement a specialized “Listener Script”—a digital translator that stands by the window, waits for Vagaro to signal a successful booking, and immediately reports that victory back to GA4.
2. The Strategic Importance: Why You Must Set This Up
You might be thinking, “I can just tally up my bookings in Vagaro at the end of the month. Why go through this complex technical setup?”
That approach is obsolete. In the modern era of AIO (AI Optimization) and algorithmic marketing, data is fuel. If you starve the system of data, the system fails you.
The Problem: The High Cost of Missing Data
If you ignore this setup, you are accepting the following failures:
Broken Attribution: You will never know if your SEO efforts or your email newsletter drove the sale. You might cut the budget for a campaign that was actually your biggest revenue driver, simply because GA4 didn’t show the credit.
Weak Audiences: You cannot build retargeting lists of “People who started to book but abandoned.”
Dumb Algorithms: If you run ads, the algorithms need “signals” to optimize. Without conversion data, they assume your ads are failing.
The Solution: A Connected Ecosystem.By implementing the Vagaro Listener via GTM, you create a seamless flow of data. You turn anonymous web hits into attributable revenue.
The 5 Key Benefits for GA4
1. Better Algorithm Training (Predictive Metrics)
GA4 is not just a reporting tool; it is a machine learning engine. It creates “Predictive Audiences,” such as users likely to purchase in the next 7 days. These models rely entirely on historical conversion data. By feeding Vagaro events into GA4, you train the AI to recognize the digital behavior patterns of your high-value clients, allowing GA4 to alert you to future opportunities.
2. Higher ROI and ROAS Clarity
This is the ultimate goal of any business. You need to know your Return on Ad Spend (ROAS). With this tracking in place, you can open the “Traffic Acquisition” report in GA4 and see clearly: “Organic Search brought in 50 bookings worth $5,000,” while “Paid Social brought in 10 bookings worth $500.” This clarity allows you to double down on what makes money and cut what wastes it.
3. Accurate Reporting (Data-Driven Attribution)
The customer journey is rarely linear. A user might find you on Google Maps, then visit your Instagram, then come to your site directly to book. GA4’s Data-Driven Attribution (DDA) model assigns fractional credit to each of these touchpoints. Without the final conversion event from Vagaro, the model breaks, and you lose visibility into the “middle of the funnel” touchpoints that nurtured the lead.
4. Audience Building (Retargeting & Exclusion)
In GA4, you can build powerful segments based on events.
Abandonment: Target users who triggered vagaro_initiate_checkout (if available) but not vagaro_booking_success.
Exclusion: Stop showing “New Customer Offer” ads to people who have already triggered the generate_lead event in the last 30 days. This saves ad budget and improves user experience.
5. Future-Proofing (First-Party Data Strategy)
As we move into an era dominated by privacy regulations and browser restrictions (like Apple’s Intelligent Tracking Prevention), reliance on third-party cookies is dangerous. This GTM-based solution captures first-party data—interactions happening directly on your domain. This makes your tracking infrastructure robust, compliant, and resilient against future browser updates.
3. Prerequisites & Checklist
Required Access:
- Google Tag Manager (GTM): You need Admin or Publish access. You will be creating tags, triggers, and variables and publishing them to the live site.
- Google Analytics 4 (GA4): You need Editor or Admin access. You will need this to mark events as “Key Events” and to register Custom Definitions.
- Website Backend: You need access to your CMS (WordPress, Wix, Squarespace, etc.) to ensure the GTM container snippet is correctly installed on the <head> and <body> of every page.
- Cookiebot Account: You need access to your Cookiebot dashboard to retrieve your Domain Group ID for the Consent Mode setup.
- Vagaro Account: You must confirm you are using the Embedded Widget. If you are just linking to vagaro.com, this guide will not work.
Required Tools:
- Google Chrome Browser: The standard for web development.
- Google Tag Assistant Extension: A free Chrome extension to validate tags.
- GTM Preview Mode: The built-in debugger we will use extensively.
4. Solution (Step-by-Step) Implementation Guide
We will break this down into four distinct phases. Do not skip any steps.
Phase 1: Google Tag Manager Setup
First, we must ensure that Google Tag Manager is properly configured to talk to GA4.
Step 1.1: The Google Tag (Main Configuration)
This tag is the heartbeat of your GA4 setup. It initializes the analytics library on your page.
- Log in to your Google Tag Manager account.
- Navigate to Tags in the left-hand menu.
- Click New.
- Name the Tag: Google Tag – Main Configuration.
- Click Tag Configuration and select Google Tag.
- Note: Google has recently consolidated the “GA4 Configuration” tag into this generic “Google Tag”.
- Tag ID: Enter your GA4 Measurement ID. This usually starts with G-. You can find it in GA4 under Admin > Data Collection > Data Streams.
- Configuration Settings (Optional):
- Parameter Name: send_page_view
- Value: true
- This ensures a page view is sent every time the config loads.
- Click Triggering and select All Pages.
- Click Save.
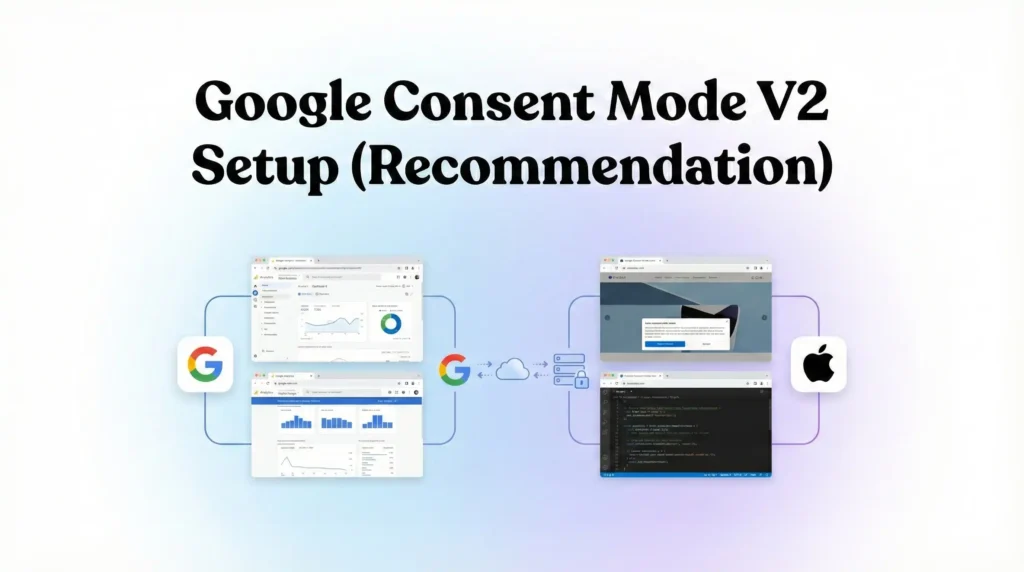
Phase 2: Google Consent Mode V2 Setup (Recommendation)
In the modern landscape of AEO (Answer Engine Optimization) and strict global privacy laws (GDPR, DMA), you must manage user consent. Google Consent Mode V2 allows you to adjust how your tags behave based on the consent status of your users, enabling data modeling even when cookies are denied.
We will use Cookiebot as the Consent Management Platform (CMP).
Step 2.1: Add the Cookiebot Template
- In GTM, click on Templates in the left sidebar.
- In the top section (Tag Templates), click Search Gallery.
- Type Cookiebot in the search bar.
- Select the template named Cookiebot CMP (verified author: Cookiebot).
- Click Add to workspace and confirm.
- Go back to Tags and click New.
- Name: CMP – Cookiebot Consent Mode V2.
- Tag Configuration: Select the Cookiebot CMP template.
- Cookiebot ID: Paste your Domain Group ID here. (Find this in your Cookiebot account under Settings).
- Enable Google Consent Mode: Ensure this checkbox is CHECKED. This is the most critical step for V2 compliance.
- Default Consent State:
- For strict compliance (EU/EEA/UK), set the defaults to Denied.
- ad_storage: Denied
- analytics_storage: Denied
- ad_user_data: Denied
- ad_personalization: Denied
- This ensures that no tracking occurs until the user explicitly interacts with the banner.
- Triggering:
- Click the trigger area.
- DO NOT select “All Pages.”
- Select Consent Initialization – All Pages.
- Why? This specific trigger fires before normal page load triggers, ensuring that the consent status is established before any tracking tags attempt to fire.
- Click Save.
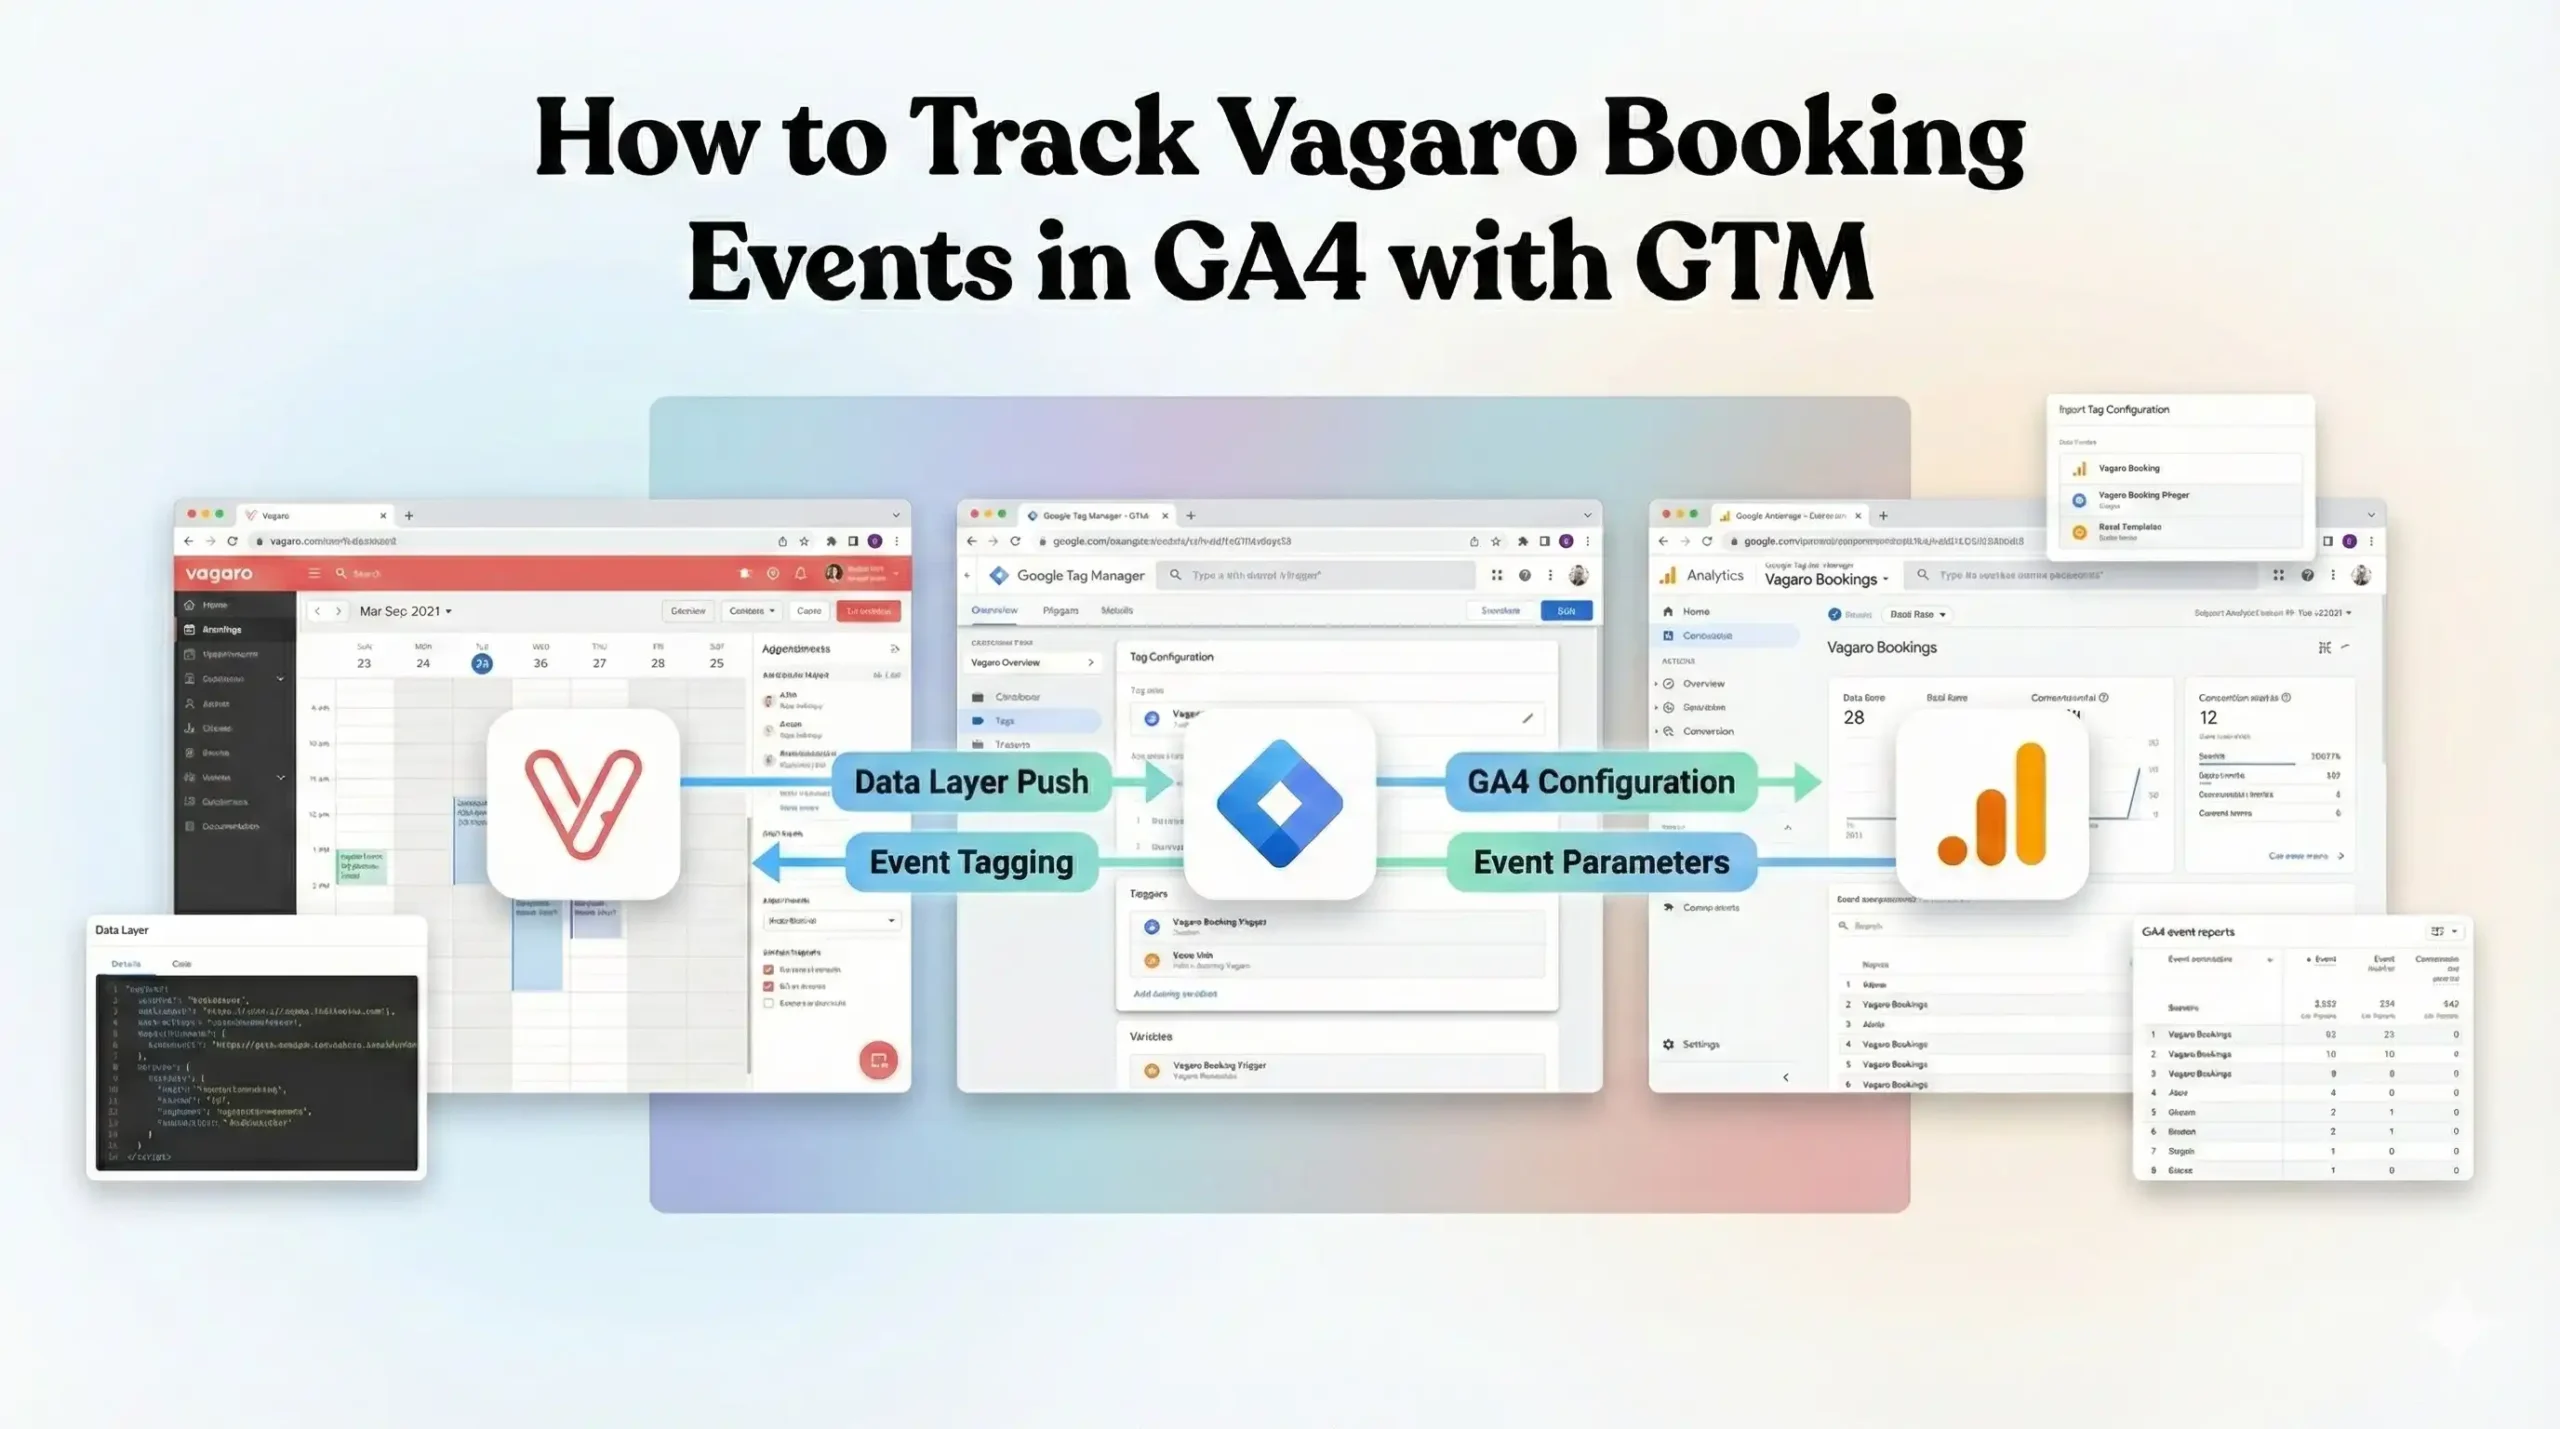
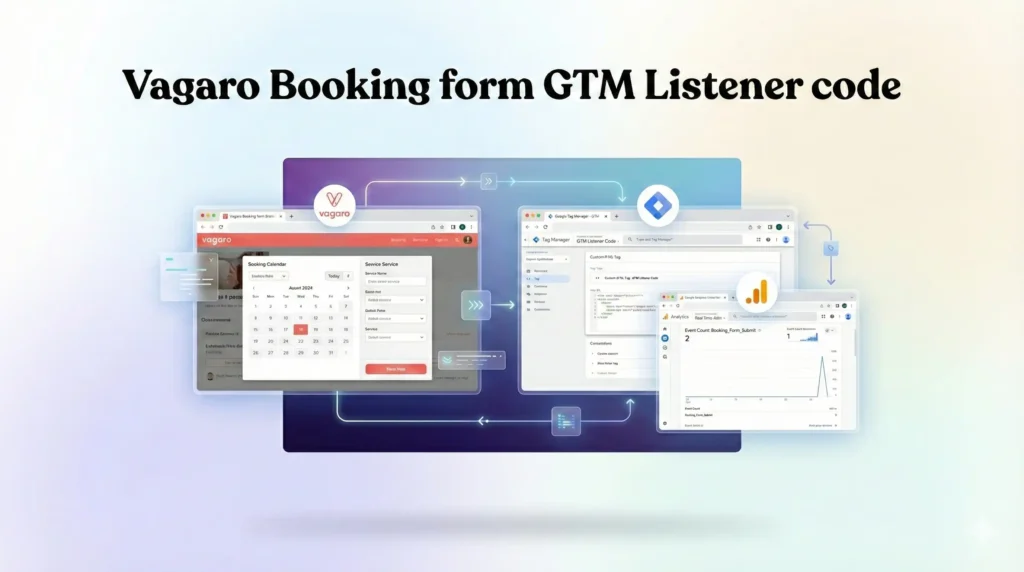
Phase 3: The Code (The Vagaro Listener)
Now we address the iframe issue. We need to deploy a custom JavaScript listener that monitors the browser window for messages coming from the Vagaro widget.
How it works: When a booking is completed, the Vagaro widget sends a “postMessage” (an electronic signal) to the main browser window. Our script will catch this signal, verify it is a booking success, and then push that data into the GTM Data Layer.
Step 3.1: Create the Listener Tag
- In GTM, go to Tags and click New.
- Name: cHTML – Vagaro Booking Listener.
- Tag Configuration: Select Custom HTML.
- The Code: Copy and paste the script below.
If you need Vagaro Booking Form GTM Event Listener Code Please Submit Your Email —>
Step 3.2: Trigger the Listener
- Scroll down to Triggering.
- Select All Pages.
- Why? The script is extremely lightweight. Placing it on all pages ensures that no matter where you embed the widget (Contact page, Home page, Dedicated Booking page), the tracking will work.
- Click Save.
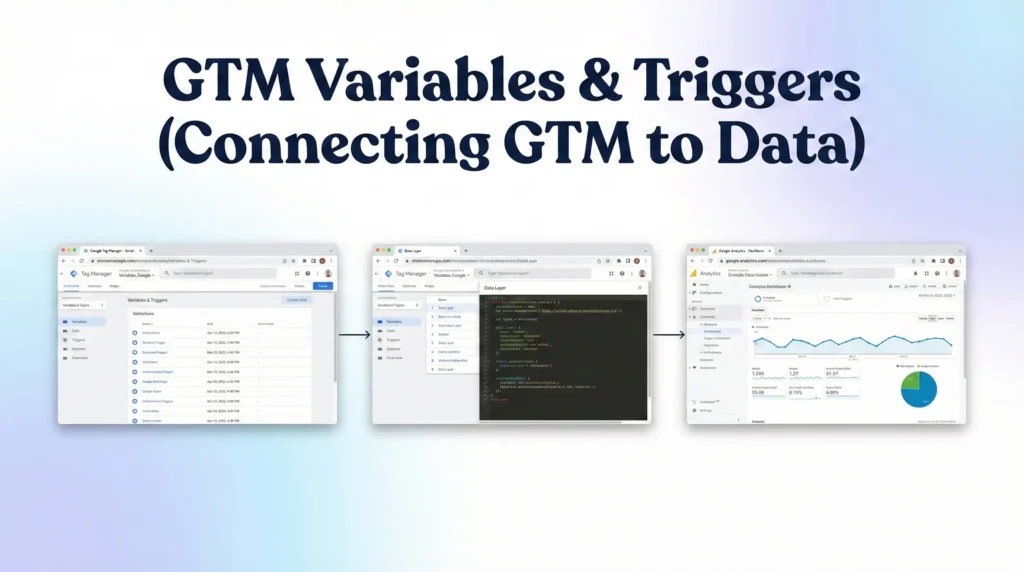
Phase 4: GTM Variables & Triggers (Connecting GTM to Data)
The listener script pushes an event called vagaro_booking_success into the Data Layer. Now we need to configure GTM to “hear” that event and “read” the data inside it.
Step 4.1: Create Data Layer Variables
We want to capture the value and the platform name.
- Go to Variables in the left menu.
- Scroll down to User-Defined Variables and click New.
- Name: dlv – vagaro_value.
- Variable Type: Select Data Layer Variable.
- Data Layer Variable Name: vagaro_value.
- Note: This must match the key used in the listener script exactly.
- Click Save.
- Repeat the process for the platform:
- Name: dlv – vagaro_platform.
- Variable Type: Data Layer Variable.
- Data Layer Variable Name: vagaro_platform.
- Click Save.
Step 4.2: Create the Custom Event Trigger
- Go to Triggers in the left menu.
- Click New.
- Name: Custom Event – Vagaro Booking Success.
- Trigger Type: Select Custom Event (under the “Other” category).
- Event Name: vagaro_booking_success.
- Crucial: Copy and paste this to avoid typos. It is case-sensitive.
- This trigger fires on: All Custom Events.
- Click Save.
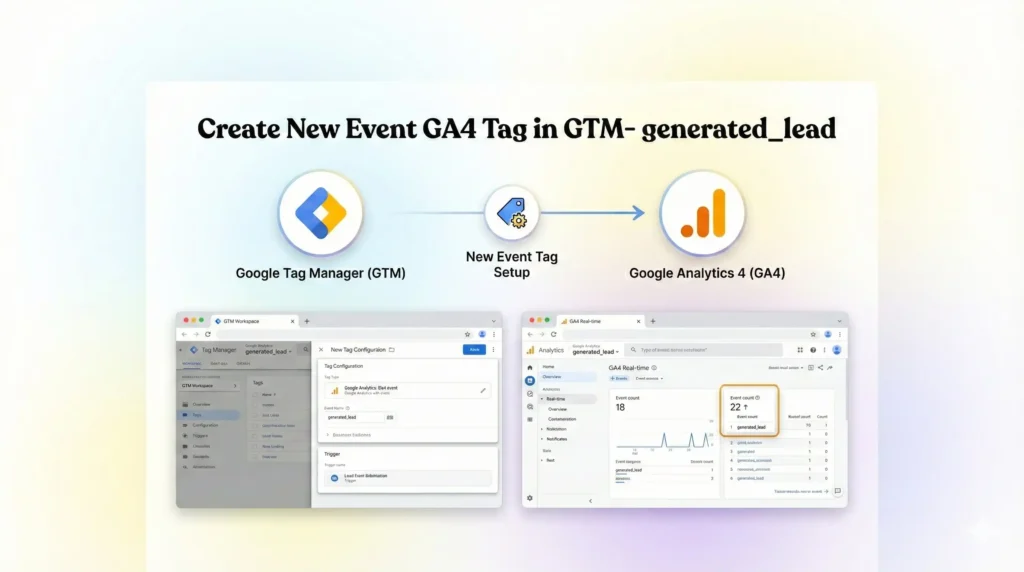
Phase 5: The GA4 Configuration (Sending Data to Analytics)
Now that GTM captures the data, we must send it to GA4 as a proper event.
Step 5.1: Create the GA4 Event Tag
- Go to Tags and click New.
- Name: GA4 – Event – Vagaro Booking.
- Tag Configuration: Select Google Analytics: GA4 Event.
- Measurement ID: Enter your G-XXXXXXXX ID (or use a Constant Variable if you have one set up).
- Event Name: generate_lead.
- Strategy: We use the standard GA4 event name generate_lead because GA4 understands this event type automatically. If you take full payment online, you could use purchase, but for appointments, generate_lead is usually safer.
- Event Parameters:
- We need to send the extra data we captured.
- Click Add Row.
- Parameter Name: value | Value: {{dlv – vagaro_value}}
- Click Add Row.
- Parameter Name: currency | Value: USD (Change to your local currency code).
- Click Add Row.
- Parameter Name: booking_platform | Value: {{dlv – vagaro_platform}}
- Triggering: Select the trigger created in Phase 4: Custom Event – Vagaro Booking Success.
- Click Save.
Step 5.2: Register Custom Definitions in GA4
This is a step most people forget. If you send a custom parameter like booking_platform, GA4 receives it but won’t show it in reports unless you define it.
- Open Google Analytics 4.
- Go to Admin (Gear icon bottom left).
- Under Data Display, click Custom definitions.
- Click Create custom dimension.
- Dimension name: Booking Platform.
- Scope: Event.
- Description: Platform used for booking.
- Event parameter: booking_platform (Must match what you typed in the tag).
- Click Save.
Step 5.3: Mark as Key Event (Conversion)
In GA4 Admin, go to Data Display > Key Events (formerly known as Conversions).
- Look for generate_lead.
- If it exists, toggle the switch to On (blue).
- If it does not exist:
- Click New
- key event.
- Name it generate_lead.
- Click Save.
5. Testing & Validation (Deep Dive)
You have built the engine. Now you must test drive it. Never publish a container without validating.
Step 1: Launch GTM Preview Mode
- In GTM, click the blue Preview button in the top right.
- Enter the URL of your website where the Vagaro widget is located.
- Click Connect.
- Your website will open in a new window. Ensure the Tag Assistant tab is also open and connected.
Step 2: Simulate a Real Booking
- Go to your website window.
- Actually book an appointment.
- Do not just click “Book Now” and stop. You must go through the date selection, service selection, and entering details.
- You can create a “Test Service” in Vagaro that costs $0, or just book and immediately cancel.
- You must reach the “Thank You” or “Confirmation” screen inside the widget.
Step 3: Check GTM Tag Assistant
- Switch to the Tag Assistant tab.
- Look at the Summary timeline on the left.
- Success Indicator 1: You should see an event named vagaro_booking_success appear in the timeline.
- If you see this: The listener script worked!
- If you don’t: The listener failed to detect the message (see Troubleshooting).
- Click on the vagaro_booking_success event.
- Success Indicator 2: In the center panel, under Tags Fired, you should see GA4 – Event – Vagaro Booking.
- Click on that tag to inspect it. Verify that the value parameter contains 1 (or the booking value) and the currency is correct.
Step 4: Check GA4 DebugView
- Keep your test tab open.
- Go to your GA4 Property.
- Go to Admin > Data Display > DebugView.
- Wait 10-30 seconds.
- Success Indicator 3: You should see a blue icon appear on the timeline (top vertical line).
- It should be named generate_lead.
- Click on it. You should see the parameters booking_platform and value.
- If you see this, your data pipeline is 100% operational.
6. Troubleshooting & Common Mistakes
Error 1: The "Silent" Listener (No Event in GTM)
Symptoms: You complete a booking, but vagaro_booking_success never appears in the GTM Preview timeline. Cause: Your specific Vagaro widget configuration might be using a Popup that opens a new window, or an iframe that does not support postMessage. Solution:
- Check Console: Open Chrome Developer Tools (F12) > Console tab. Run the booking again. Look for the log “Vagaro Booking Detected!”.
- The Redirect Strategy: If the listener fails, log into Vagaro > Settings > Booking Widget. Look for a setting called Redirect URL. Create a generic “Thank You” page on your website (e.g., yoursite.com/booking-confirmed). Paste this URL into Vagaro.
- Update GTM: If you use the redirect, you don’t need the listener. Simply create a Trigger in GTM for Page View where Page URL contains /booking-confirmed, and fire your GA4 tag on that.
Error 2: Blocked by Consent (GDPR)
Symptoms: The event appears in GTM, but the Tag status says “Blocked by Consent Settings.” Cause: You are testing from a region protected by GDPR (or using a VPN), and you did not click “Accept” on the Cookiebot banner. Solution:
- Clear your browser cookies entirely.
- Reload the page.
- When the Cookiebot banner appears, explicitly click Allow All.
- The tag should now fire with the status “Succeeded.”
Error 3: Missing Custom Dimensions
Symptoms: You see the event count in GA4, but when you try to breakdown by “Booking Platform,” it says “(not set)” or doesn’t appear. Cause: You forgot Phase 5.2. You sent the data to GA4, but you didn’t tell GA4 to store it as a Dimension. Solution: Go to Admin > Custom definitions and register booking_platform immediately. Note that data collected before you register the dimension will not be backfilled.Tracking
7. Conclusion
Tracking Vagaro booking forms requires stepping outside the “plug-and-play” mindset. Because of the iframe technology, standard analytics simply cannot see your conversions. By following this guide, you have built a professional-grade tracking infrastructure.
You have:
- Bridged the Iframe Gap: Using a custom Listener Script to capture data that was previously invisible.
- Ensured Compliance: Using Consent Mode V2 and Cookiebot to respect user privacy.
- Enriched Your Data: Sending value and platform data to GA4 for deeper analysis.
Your next step is to Publish your GTM container. Let the data collect for 7-14 days. Then, go into your GA4 User Acquisition report, filter by the generate_lead event, and finally answer the question: “Where are my best clients coming from?”
1. Can I track Vagaro without Google Tag Manager?
No, it is extremely difficult and not recommended. Because Vagaro loads inside an iframe, standard Google Analytics code pasted on your website headers cannot detect clicks inside that iframe. You need a custom JavaScript “listener” to detect the booking message. GTM is the safest, most reliable platform to deploy and manage this listener script without editing your website’s hard code.
2. Why does the listener code use "postMessage"?
postMessage is a secure web standard that allows two different windows (your website and the Vagaro iframe) to communicate. Since they are on different domains (yoursite.com vs vagaro.com), browsers block them from reading each other’s data for security. postMessage is the only safe way Vagaro can say “Hey, a booking happened!” to your website.
3. What if Vagaro opens in a new tab?
If your widget is configured to open a new tab that loads vagaro.com directly, tracking will fail. Once the user is on the vagaro.com URL, your GTM container is no longer present. You must use the Embedded Widget (Inline) or configure Vagaro to Redirect the user back to a “Thank You” page on your site after booking to track the conversion.
4. How long does data take to appear in GA4?
GA4 processing takes 24-48 hours. While you can see events instantly in DebugView or the Real-time report, standard reports (like Traffic Acquisition) will not show the conversion data until the next day. Do not panic if your total conversion count in the standard reports is zero immediately after testing.
5. Is this setup compliant with GDPR?
Yes, if you use Consent Mode. By implementing the Cookiebot setup detailed in Phase 2, you ensure that the listener and GA4 tags only fire (or send data) based on the user’s consent choice. If a user declines cookies, Google Consent Mode V2 ensures data is sent anonymously (pings) without storing identifiers, keeping you compliant.
6. Why do I need to register Custom Definitions?
GA4 does not store custom parameters by default. If you send booking_platform: Vagaro in your tag, GA4 receives it but discards it for reporting purposes unless you explicitly create a Custom Dimension for booking_platform in the Admin settings. Always register your parameters immediately after setting up the tag.
7. Can I track the exact dollar value of bookings?
Sometimes. It depends on the Vagaro widget version. Some Vagaro widgets send the booking value in the postMessage data, while others hide it for privacy. The listener script provided in this guide attempts to capture data.value. If Vagaro does not provide it, the script defaults to 1.00 so you still record the conversion count.
8. What is the difference between "Conversion" and "Key Event"?
They are the same thing. In early 2024, Google renamed “Conversions” in GA4 to “Key Events”. This was done to unify terminology across Google products. “Conversions” is now a term reserved specifically for Google Ads. For GA4 reporting, you simply mark an event as a “Key Event” to treat it as a conversion.
9. Does this work for Vagaro Gift Cards?
Yes, usually. The Vagaro widget typically sends a similar success message for gift card purchases (transaction_complete or similar). The listener script provided checks for general success indicators (success, complete). You should test a gift card purchase in GTM Preview Mode to confirm if the vagaro_booking_success event fires.
10. Will this slow down my website?
No. The Vagaro Listener script is extremely lightweight (only a few lines of code). It runs “asynchronously,” meaning it sits in the background waiting for a message and does not block other page elements from loading. Using Google Tag Manager actually improves site speed compared to hard-coding multiple tracking pixels directly into your site.
 Need Help Advanced Tracking Setup?