You are running a sophisticated digital marketing campaign for your B2B company. You have invested thousands of dollars into Google Ads, LinkedIn Ads, and Search Engine Optimization (SEO). You have created an amazing landing page, and you are using a Pipedrive web form to capture leads directly into your sales pipeline.
You look at your Pipedrive CRM, and you see new deals popping up. People are filling out the form! You are excited because the business is growing.
But then, you open your Google Analytics 4 (GA4) dashboard to see exactly which ad campaign, social post, or specific keyword brought in those high-value leads. You navigate to the “Key Events” (conversions) column, and your heart sinks. It says zero.
This is the ultimate frustration for business owners and digital marketers. Your ads are working, your CRM is filling up with potential revenue, but your analytics platform is completely blind to it.
The “Iframe” Black Box
Why does this data disconnect happen? The problem is rooted in the web technology used to embed forms.
When you place a Pipedrive form on your website, it does not actually live on your website’s code. It lives inside an iframe. Think of an iframe as a completely separate window cut into your web page that looks directly into Pipedrive’s private servers.
Your Google Tag Manager (GTM) and GA4 tracking codes live on your website’s main walls. They can see a user scrolling, reading text, and clicking on your main page buttons. However, they absolutely cannot see through the glass of that iframe window.
When a user clicks “Submit” inside the Pipedrive form, that action happens securely on Pipedrive’s server, not yours. Standard tracking tools simply do not know the form was submitted, so they record nothing.
Today, we are going to fix this “Black Box” problem once and for all.
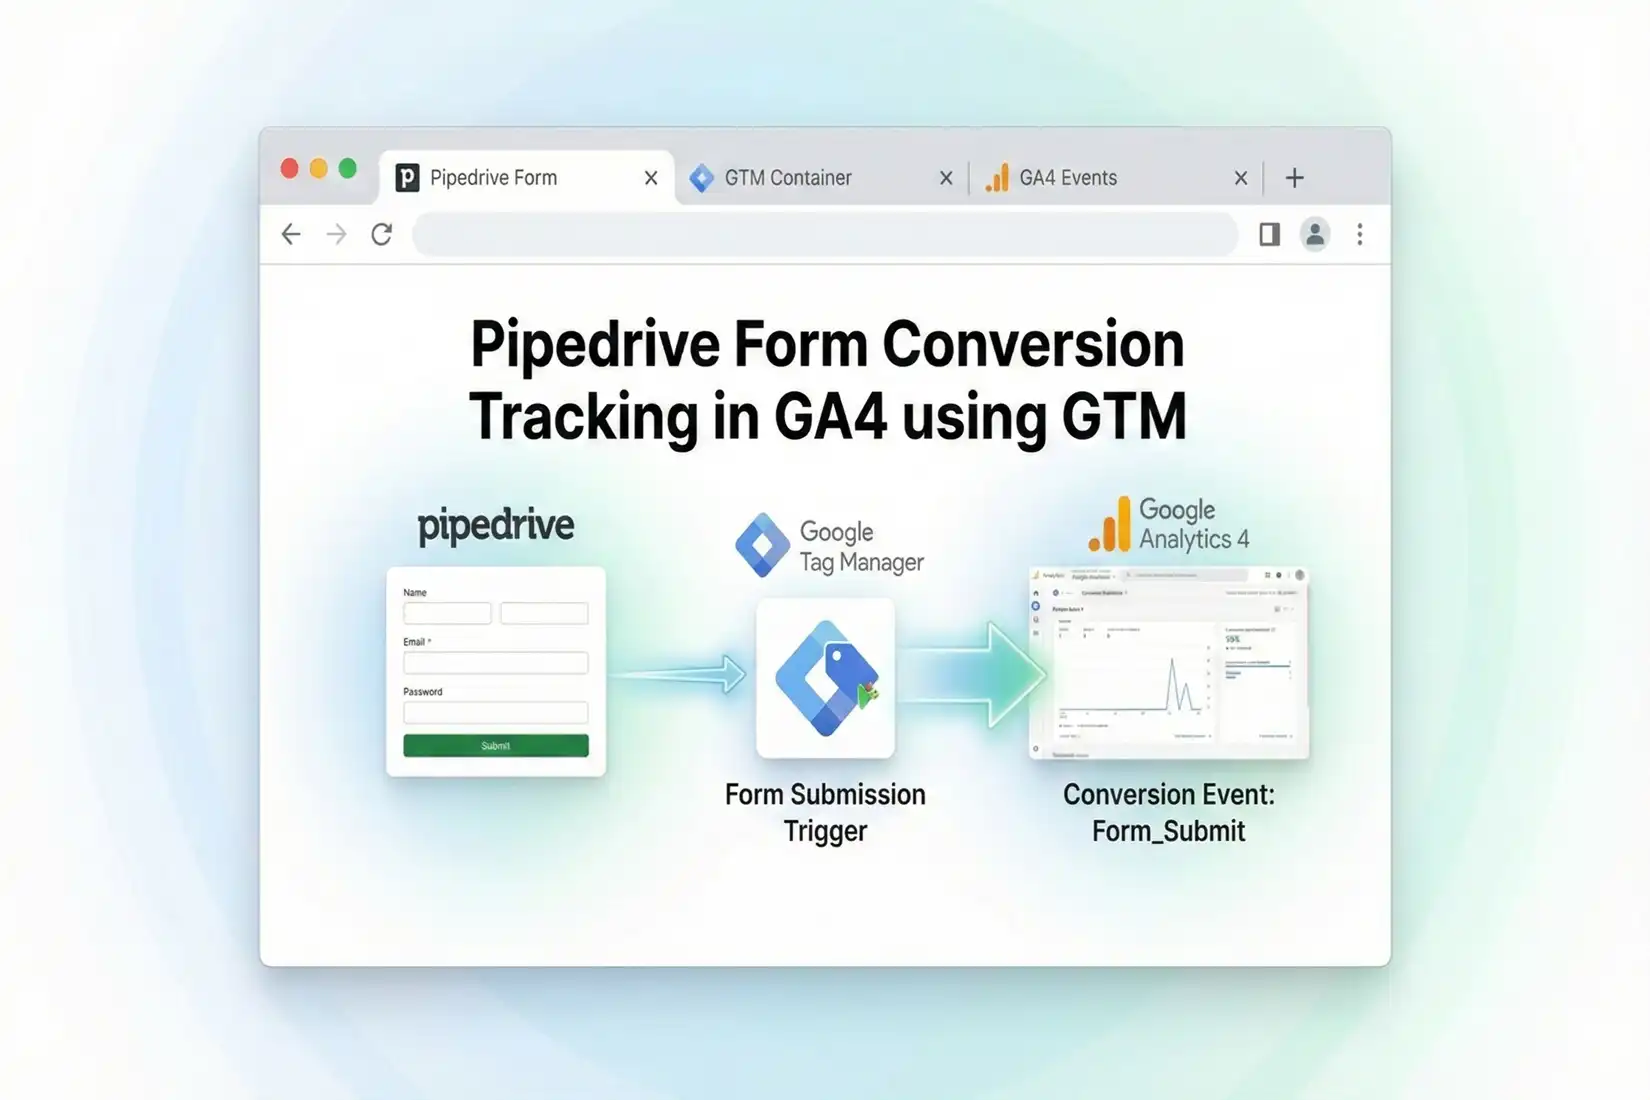
We are going to build a digital bridge between your Pipedrive form, Google Tag Manager, and Google Analytics 4. We will do this by utilizing a custom JavaScript Listener that waits for Pipedrive to shout “Success!” through the iframe, and then securely passes that message to GA4. We will also implement Google Consent Mode V2 using Cookiebot to ensure your tracking is 100% legal and privacy-compliant. Let’s dive in.
Why You Must Set This Up
You might be asking a very reasonable question: “Can’t I just look at Pipedrive to see how many leads I got? Why do I need to go through all this technical trouble?”
Counting leads in your CRM is great for your sales team, but it is a disaster for your marketing team. If you do not feed conversion data back into your analytics and advertising platforms, your marketing engine will eventually stall and become incredibly expensive.
The Cost of Blind Advertising
When GA4 and Google Ads cannot see your Pipedrive form submissions, several terrible things happen to your business:
- Wasted Ad Spend: You cannot see which specific keywords, ads, or campaigns are generating leads. You might continue pouring thousands of dollars into a campaign that gets clicks but zero submissions, while starving a campaign that actually generates pipeline revenue.
- Broken Artificial Intelligence: Modern ad platforms rely heavily on machine learning. If you do not send conversion signals back to the algorithm, the AI assumes your ads are failing. It will stop showing your ads to high-intent users and start showing them to low-quality “clickers” who never buy.
- Incomplete Customer Journeys: You lose the ability to see what pages a user visited, what blog posts they read, and how long they spent on your site before finally deciding to fill out the Pipedrive form.
The Solution: The Listener Script
To solve this, we cannot rely on the default “Form Submission” triggers built into Google Tag Manager. They will fail every single time.
Instead, we will inject a custom piece of code—a Listener Script. This script sits quietly on your website and listens for a specific electronic signal (a postMessage) that the Pipedrive iframe broadcasts to your browser when a user successfully submits a form.
The 5 Key Benefits for Google Analytics 4
1. Better Algorithm Training (Predictive Modeling)
GA4 uses advanced machine learning to predict user behavior. It can identify which users are “likely to convert.” By feeding GA4 highly accurate Pipedrive lead data, you train these predictive models to be incredibly sharp. GA4 learns the exact digital footprint of a qualified B2B lead, making all of your reporting far more valuable.
2. Higher ROI and ROAS
Return on Ad Spend (ROAS) is the ultimate metric for business growth. When you track every single Pipedrive submission in GA4 (and import those into Google Ads), your reported conversions go up. You can immediately identify which channels have the highest ROI, allowing you to cut wasteful spending and double down on what works. Your Cost Per Acquisition (CPA) will drop significantly.
3. Accurate Reporting (Data-Driven Attribution)
Customers rarely buy on their first visit. They might click a Google Ad on Monday, read a blog post from an organic search on Wednesday, and finally fill out your Pipedrive form from a direct visit on Friday. GA4’s Data-Driven Attribution model analyzes this entire path. Without tracking the final form submission, this attribution model breaks entirely. This setup restores the credit to the marketing channels that earned it.
4. Audience Building (Retargeting)
Once you are tracking Pipedrive submissions as Key Events in GA4, you can build highly profitable custom audiences.
- You can create a “Converters” audience and exclude them from seeing your top-of-funnel ads, saving you money on people who are already in your pipeline.
- You can create an “Abandoners” audience of people who visited the form page but did not submit it, and retarget them with a special offer or a softer call-to-action.
5. Future-Proofing (Privacy & Consent Mode)
We are entering a cookieless world heavily regulated by laws like GDPR and the Digital Markets Act (DMA). By implementing Google Consent Mode V2 alongside this tracking, you protect your business from massive legal fines. Furthermore, Consent Mode allows Google to use “conversion modeling” to estimate leads from users who decline cookies, meaning you recover data that your competitors are losing.
Prerequisites & Checklist
This is an advanced technical implementation. To ensure a smooth process without breaking your live website, please gather the following tools and verify your access levels before we begin.
Required Access Levels:
- Google Tag Manager (GTM): You must have “Publish” or “Admin” access to the container installed on your website.
- Google Analytics 4 (GA4): You need “Editor” or “Admin” access to create Custom Definitions and mark events as Key Events.
- Website Backend: You need access to your Content Management System (WordPress, Webflow, Shopify, etc.) to ensure the GTM code is placed correctly in the header and body.
- Pipedrive Account: You need access to your Pipedrive Web Forms to verify how they are embedded on your site.
- Cookiebot Account: You must have access to your Cookiebot dashboard to retrieve your Domain Group ID for the Consent Mode configuration.
Required Tools:
- Google Chrome Browser: The absolute best browser for testing and debugging web tracking.
- GTM Preview Mode: The built-in debugging interface inside Google Tag Manager.
- Google Tag Assistant: A free Chrome extension to verify that your tags are firing correctly on your live website.
- GA4 DebugView: A real-time reporting tool inside the GA4 admin panel that proves your data has arrived.
Video tutorial – Pipedrive Form Conversions Tracking in GA4
Step-by-step video guide to set up Pipedrive Form Conversions Tracking in GA4 via Google Tag Manager for accurate reporting.
Solution (Step-by-Step) Implementation Guide
We are going to build this tracking infrastructure step by step. Do not skip any phases, as they all build upon one another to create a seamless, unbreakable data pipeline.
Phase 1: Google Tag Manager Setup
Before we can track the complex Pipedrive form, we need to ensure that the core foundation of Google Tag Manager is set up correctly to communicate with Google Analytics 4.
Step 1: The Google Tag (GA4 Configuration)
This is the master tag that initializes Google Analytics 4 on your website. Without it, GA4 simply does not exist on your pages.
- Open your Google Tag Manager workspace.
- Navigate to Tags in the left-hand menu.
- Click the blue New button in the top right corner.
- Name your tag clearly, for example: Google Tag – GA4 Main Configuration.
- Click on Tag Configuration and select the Google Tag option.
- In the Tag ID field, paste your GA4 Measurement ID. (You can find this in GA4 by going to Admin > Data Collection and Modification > Data Streams > clicking your stream. It starts with “G-“).
- Click on the Triggering box below.
- Select the All Pages trigger. This ensures GA4 is active everywhere on your site.
- Click the blue Save button.
Phase 3: The Code (The Pipedrive Listener Script)
This is the bridge that connects the isolated Pipedrive iframe to your Google Tag Manager container.
When a user clicks the submit button on a Pipedrive form, the iframe sends a hidden electronic message (a postMessage) to the main browser window to announce that the action was successful. Our Listener Script acts as an antenna, waiting exclusively for that specific message.
Step 1: Create the Listener Tag
- In GTM, navigate to Tags > New.
- Name the tag: cHTML – Pipedrive Form Listener.
- Click Tag Configuration and select Custom HTML.
- Copy the exact code block provided below and paste it into the HTML text area.
					<script>
  /**
   * Pipedrive Form Submission Listener for Google Tag Manager
   * This script listens for the success message sent by the Pipedrive iframe
   * and pushes a custom event to the Data Layer.
   */
  (function() {
    // Check if the listener is already active to prevent duplicate tracking
    if (window.pipedriveListenerActive) return;
    window.pipedriveListenerActive = true;


    // Add an event listener to the main browser window
    window.addEventListener('message', function(event) {
      // Pipedrive sends data to the parent window when a form is submitted.
      // We capture this payload in the eventData variable.
      var eventData = event.data;


      // Safely check if the event data contains Pipedrive submission indicators
      try {
        // Convert the data to a string to easily search for keywords
        var dataString = typeof eventData === 'string' ? eventData : JSON.stringify(eventData);

        // Look for keywords that Pipedrive consistently uses in its postMessage payload
        // We look for both "pipedrive" and "submit" to ensure accuracy and prevent false positives
        if (dataString.toLowerCase().indexOf('pipedrive') !== -1 && dataString.toLowerCase().indexOf('submit') !== -1) {

          // If a match is found, initialize the Data Layer
          window.dataLayer = window.dataLayer || [];

          // Push a custom event to GTM to signal a successful submission
          window.dataLayer.push({
            'event': 'pipedrive_form_submit'
          });

        }
      } catch (e) {
        // Silently ignore errors from unparseable cross-domain messages to keep the console clean
      }
    });
  })();
</script>
Step 2: Trigger the Listener
For this script to hear the message, it must be present on the page where your Pipedrive form is located.
- Scroll down and click the Triggering box.
- Select the All Pages trigger. (The script is extremely lightweight and will not slow down your website. Having it on all pages ensures tracking works seamlessly even if your marketing team moves the form to a new landing page later).
- Click Save.
Phase 2: Google Consent Mode V2 Setup (Cookiebot)
To remain legally compliant and ensure your tracking respects user privacy choices, we must implement a Consent Management Platform (CMP). We will use Cookiebot for this guide, as it is an industry standard and integrates flawlessly with Google Consent Mode V2.
Why Do We Need Google Consent Mode V2?
If a user in a regulated region (like Europe or California) clicks “Decline” on your cookie banner, standard tracking tags are blocked entirely. You lose 100% of that data.
Google Consent Mode V2 changes this dynamic. It tells Google’s tags to run in a restricted “ping” mode without storing any cookies on the user’s browser. This allows Google’s AI to model the missing conversions based on aggregate data, recovering up to 65% of your lost data while remaining strictly compliant with the law.
Step 1: Add the Cookiebot Template to GTM
Instead of writing complex custom code for consent, we will use a pre-built template from the GTM community.
- In GTM, navigate to Templates on the left menu.
- Look at the top section labeled Tag Templates and click the Search Gallery button.
- Click the magnifying glass icon and search for Cookiebot.
- Select the official template named Cookiebot CMP (published by Cookiebot).
- Click the blue Add to workspace button and confirm any permission prompts.
Step 2: Configure the Cookiebot Tag
Now we need to connect this template to your actual Cookiebot account so it knows what rules to enforce.
- Go to Tags > New.
- Name the tag: CMP – Cookiebot Consent Mode V2.
- Click Tag Configuration and select the Cookiebot CMP template you just added.
- You will see a field for Cookiebot ID (sometimes called Domain Group ID). Paste the unique ID from your Cookiebot account here.
- CRITICAL STEP: Ensure the checkbox labeled Enable Google Consent Mode is checked.
- Under the “Default Consent State” section, you must set the baseline rules for before a user interacts with the banner. For strict compliance, set all categories to Denied:
- Set ad_storage to Denied
- Set analytics_storage to Denied
- Set ad_user_data to Denied
- Set ad_personalization to Denied
- Click on the Triggering box.
- DO NOT select “All Pages.” Instead, select the Consent Initialization – All Pages trigger. This specialized trigger ensures that your privacy rules load before any tracking tags are allowed to fire.
- Click Save.
Phase 4: GA4 Event Tag Configuration
Now that our Listener Script is successfully catching the Pipedrive submission and pushing the pipedrive_form_submit event into the Data Layer, we need to instruct GTM to send this verified data to Google Analytics 4.
Step 1: Create the Custom Event Trigger
First, we must create a trigger in GTM that reacts only to the specific name we used in our Listener Script.
- In GTM, navigate to Triggers on the left menu.
- Click New.
- Name the trigger: Custom Event – Pipedrive Form Submit.
- Click Trigger Configuration and select Custom Event (it is located under the “Other” category).
- In the Event name field, type exactly: pipedrive_form_submit. (This must match the code snippet precisely; it is case-sensitive).
- Leave the firing option on “All Custom Events.”
- Click Save.
Step 2: Create the GA4 Event Tag
Now we build the final tag that sends the success signal to your analytics dashboard.
- Go to Tags > New.
- Name the tag: GA4 – Event – Generate Lead.
- Click Tag Configuration and select Google Analytics: GA4 Event.
- In the Measurement ID field, enter your GA4 ID (e.g., G-XXXXXXXXXX) just as you did in Phase 1.
- In the Event Name field, type: generate_lead.
(Why this name? We highly recommend using generate_lead because it is a standard recommended event name recognized natively by Google’s machine learning models. Using standard names unlocks better reports). - Click on the Triggering box.
- Select the custom trigger you just created: Custom Event – Pipedrive Form Submit.
- Click Save.
Testing & Validation (Deep Dive)
You have successfully built the entire architecture. However, a Senior Web Analyst never assumes the setup works perfectly without rigorous testing. We must validate the data flow from your website, through GTM, and into GA4.
Step 1: Launch GTM Preview Mode
- In your Google Tag Manager workspace, click the blue Preview button located in the top right corner.
- A new tab will open asking for your website’s URL. Enter the exact URL of the landing page where your Pipedrive form is embedded.
- Click the Connect button.
- Your website will open in a new window, and the GTM Tag Assistant debugging panel will open at the bottom of the screen (or in an adjacent tab).
Step 2: Verify Initial Tag Firing
Before you touch the form, look at the “Summary” column on the left side of the Tag Assistant debug panel.
- Click on the Consent Initialization event. You should see your CMP – Cookiebot Consent Mode V2 tag fired successfully.
- Click on the Container Loaded event. You should see your Google Tag – GA4 Main Configuration, Google – Conversion Linker, and cHTML – Pipedrive Form Listener tags all fired successfully.
- If you see a cookie banner on your test website, click Accept All to ensure tracking is permitted during your test.
Step 3: Perform a Test Submission
- Go back to the window displaying your website.
- Fill out the Pipedrive form completely. Use test data (e.g., “Test Name” and “[email protected]”).
- Click the Submit button on the form.
- Wait for the form to display its “Thank You” or success message.
Step 4: Analyze the GTM Data Layer
- Immediately switch back to the Tag Assistant debug panel.
- Look at the “Summary” column on the left. As soon as you clicked submit, a new event should have populated at the very top of the list. It should be named exactly: pipedrive_form_submit.
- Click on this pipedrive_form_submit event.
- Look at the “Tags Fired” section in the main window. You should clearly see your GA4 – Event – Generate Lead tag listed under “Tags Fired.”
Step 5: Verify in GA4 DebugView
The final test is ensuring the data actually arrived in Google Analytics.
- Open a new tab and log into your Google Analytics 4 property.
- Navigate to Admin (the gear icon in the bottom left).
- Under the “Data display” section, click on DebugView.
- Look at the vertical timeline. Within 10 to 30 seconds of your test submission, you should see a blue icon appear on the timeline labeled generate_lead.
- Click on the generate_lead icon to expand it and verify that the event fired cleanly without errors.
If all these steps pass, your tracking is perfectly operational. You can return to Google Tag Manager and click the blue Submit and Publish buttons to push these changes live to your real website.
Troubleshooting & Common Mistakes
Even with a flawless guide, external factors can occasionally disrupt tracking. Here are the most common complex errors associated with Pipedrive tracking and how to solve them.
Mistake 1: Nested Iframes (The Double Wall)
- The Problem: You submit the form, but the pipedrive_form_submit event never appears in the GTM Tag Assistant.
- The Cause: Sometimes, website builders (like certain WordPress page builders or Wix plugins) will take the Pipedrive iframe code you pasted and wrap it inside another iframe of their own. The Listener Script we installed can only listen to the immediate iframe. If there is a “double wall,” the message cannot reach the main window.
- The Solution: Right-click on your Pipedrive form on your live website and click “Inspect.” Look at the HTML code. If you see an <iframe> tag nested directly inside another <iframe> tag, you have a nested iframe issue. You must remove the third-party widget or plugin you used to embed the form, and instead paste the raw Pipedrive HTML embed code directly into a basic HTML block on your webpage.
Mistake 2: Consent Mode Blocking the Tag
- The Problem: The pipedrive_form_submit event appears on the left side of the GTM debugger, but your GA4 tag is listed under “Tags Not Fired.” When you click the tag, it says it was blocked by consent settings.
- The Cause: You are testing from a European IP address, and you did not click “Accept” on your Cookiebot banner before filling out the form. Because we set the default consent state to “Denied,” GTM is doing its job and actively blocking the GA4 tag from firing to protect user privacy.
- The Solution: Clear your browser cookies and cache. Reload the page. When the Cookiebot banner appears, explicitly click “Allow All” or “Accept Marketing Cookies.” Then, run the test form submission again. The tag should now fire flawlessly.
Mistake 3: Delayed Key Event Registration in GA4
- The Problem: You see the generate_lead event in GA4 DebugView, but when you look at your main GA4 reports the next day, the “Key Events” count is zero.
- The Cause: In GA4, events are not automatically counted as “Key Events” (conversions). You must manually tell the system that this specific event is highly valuable.
- The Solution: In GA4, go to Admin > Data display > Key Events. Click the blue New key event button. Type in generate_lead exactly as you named it in GTM. Click Save. Note that this is not retroactive; it will only begin counting new submissions as Key Events from this moment forward.
Conclusion
You have successfully executed one of the more challenging technical tracking setups in digital marketing. By bypassing the inherent limitations of Pipedrive iframe forms, you have transformed your analytics infrastructure.
You are no longer guessing where your valuable B2B leads are coming from. You have integrated a custom JavaScript Listener that reliably captures every submission. You have ensured your tracking is ethical and legal by implementing Google Consent Mode V2 via Cookiebot. And most importantly, you are now feeding Google’s machine learning algorithms the exact data they need to optimize your campaigns, lower your acquisition costs, and scale your business growth.
Trust the data pipeline you have built. Monitor your GA4 reports over the next week, and prepare to make highly profitable, data-driven decisions.
Summary
This comprehensive guide tackled the complex issue of tracking Pipedrive form submissions in Google Analytics 4 (GA4) using Google Tag Manager (GTM).
The core problem addressed is that Pipedrive forms load inside an iframe, which blinds standard tracking triggers because the submission happens on a third-party server. Without tracking this, marketing campaigns suffer from massive data loss, broken AI optimization, and an inability to calculate an accurate Return on Ad Spend (ROAS).
To definitively solve this, the guide provided a multi-phase implementation strategy:
- GTM Foundation: Establishing the GA4 Configuration tag and the Conversion Linker tag to ensure proper tag initialization and cross-domain data persistence.
- Privacy Compliance: Implementing Google Consent Mode V2 using the Cookiebot template. This critical step ensures that all tracking defaults to a “Denied” state, protecting user privacy and adhering to GDPR regulations, while simultaneously allowing for Google’s conversion modeling if consent is withheld.
- The Listener Script: The centerpiece of the solution. A custom JavaScript code block was provided to act as a listener on the main website. This script actively listens for a postMessage payload from the Pipedrive iframe containing specific keywords like “pipedrive” and “submit.” Once detected, it safely pushes a custom event (pipedrive_form_submit) into the GTM Data Layer.
- GA4 Integration: Creating a Custom Event Trigger in GTM to catch the listener’s signal, and linking it to a GA4 Event Tag specifically configured to fire the standardized generate_lead event.
- Validation: A thorough breakdown of how to use GTM Preview Mode and GA4 DebugView to simulate a submission, verify correct tag firing sequences, and confirm that the data actually arrives in analytics.
- Troubleshooting: Identifying common pitfalls, such as nested iframes created by page builders, consent mode blocking issues during testing, and the absolute necessity of manually marking the event as a Key Event in the GA4 admin panel for reporting.
By executing this guide, marketers move from blind lead counting in a CRM to highly accurate, privacy-compliant, closed-loop attribution tracking.
1. Can GTM track Pipedrive forms naturally?
No, you absolutely cannot rely on standard built-in triggers. Because Pipedrive forms are almost always embedded within secure iframes on your website, standard Google Tag Manager form submission triggers cannot detect the user’s interactions. To solve this, you must implement a custom JavaScript listener script that actively waits for a specific postMessage signal from the iframe.
2. Why use a custom listener script?
A listener script is completely necessary due to strict web security rules, commonly known as cross-origin resource sharing (CORS) policies. Your main website cannot directly see, access, or track what happens inside the isolated Pipedrive iframe window. Therefore, the listener script acts as an authorized digital receiver waiting for Pipedrive to voluntarily broadcast a success message.
3. Does this solution work on WordPress?
Absolutely, this Google Tag Manager tracking method works flawlessly on WordPress websites. In fact, it applies to any major content management system, including Shopify, Webflow, Squarespace, or Wix. As long as you can properly embed the Google Tag Manager container snippet into your header, the JavaScript listener will function correctly.
4. Why is my GA4 missing conversions?
If your Google Analytics 4 account is consistently missing conversions, it is primarily because standard tracking tags fundamentally fail to recognize third-party iframe interactions. Additionally, strict browser privacy tools or missing cookie consent configurations may be actively blocking your tracking tags from firing upon submission.
5. Do I need Google Ads to use this?
While this specific tutorial focuses heavily on capturing and sending conversion data into Google Analytics 4, you do not strictly need to run Google Ads to benefit from it. Accurate analytics are crucial for evaluating all marketing channels, including SEO. However, if you are running paid search, having this setup is highly recommended.
6. What exactly is a Data Layer?
The Data Layer is essentially an invisible JavaScript array that acts as a secure, temporary data storage container on your website. It reliably holds important structured information—such as user actions, transaction values, or form submission events—so that Google Tag Manager can easily read it and trigger appropriate tags.
7. Is Consent Mode V2 legally required?
Yes, Google Consent Mode V2 is currently required if you receive any web traffic from users located in the European Economic Area (EEA) or the United Kingdom. If you do not implement it using a Consent Management Platform like Cookiebot, Google will systematically suspend your ability to use critical advertising features.
8. Will this listener slow my website?
No, implementing this advanced tracking setup will not negatively impact your website’s loading speed or your Core Web Vitals scores. The custom JavaScript listener code we deploy via Google Tag Manager is incredibly lightweight, loading asynchronously and running entirely in the background without blocking page render.
9. Can I track specific custom fields?
Tracking custom fields from Pipedrive forms is entirely possible, but it requires a slightly more advanced data payload inspection. If Pipedrive includes the specific custom field data within its standard postMessage payload, you can modify the JavaScript listener to carefully extract those specific values and push them into the Data Layer.
10. How long until data appears in GA4?
When you submit a test form on your website, you can verify the event almost instantly by utilizing the real-time DebugView tool located inside the Google Analytics 4 admin panel. However, for standard reporting tabs such as “Traffic Acquisition” or “Key Events,” you must be patient, as GA4 typically requires 24 to 48 hours to process data.
 Need Help Advanced Tracking Setup?