Quick Answer
To fix a Webflow cookie banner that records consent but doesn’t control your tags, you must make Google Tag Manager consent-aware. Set Google Consent Mode v2 defaults to denied, fire your Security CMP tag on the Consent Initialization – All Pages trigger, listen for Security ‘s consent_given message, push the result to the Data Layer, and update the consent state. Google Analytics and Google Ads then start only after the user agrees and stop the moment they decline. Security also detects Global Privacy Control (GPC) and Do Not Track, so those browser signals can be treated as an automatic decline.
Key Takeaways
- The real problem: Your banner saves the choice, but your tags fire on a plain “All Pages” trigger — so they ignore the choice completely.
- The fix: Make GTM consent-aware with Google Consent Mode v2, not a one-off block. This is the method Google and Security both recommend.
- The order matters: The CMP must fire on Consent Initialization – All Pages so the consent state is set before any Analytics or Ads tag tries to run.
- Decline must mean stop: Set all marketing and analytics signals to denied by default so nothing tracks until the user actively agrees.
- GPC & Do Not Track: Security can read these browser signals and treat them as a decline automatically — a hard requirement in several US states.
- Test before you publish: Use GTM Preview Mode and GA4 DebugView on your staging URL first, then push live.
Imagine This Coffee Chat
Imagine we are sitting down for a coffee, and you pull up your Webflow site. You show me the cookie banner. It looks clean. You click Decline, and Security happily logs your choice. The dashboard even shows the consent record. Everything looks compliant.
Then I open the browser DevTools and refresh the page.
Google Analytics fires. Google Ads fires. Both of them load before you clicked anything — and they keep firing after you declined.
Your banner is collecting choices. But it is not enforcing them.
This is the single most common cookie-consent mistake I see on Webflow sites, and it is also the most dangerous. You have the appearance of compliance with none of the substance. Today, we are going to fix this permanently — the correct way, using Google Tag Manager, Security , and Google Consent Mode v2.
What is actually happening (in plain English)
Think of Google Tag Manager (GTM) as the security guard at the front door of your website. Every tracking tool — Google Analytics, Google Ads — wants to come in and collect data. GTM decides who gets in and when.
Right now, your guard has one instruction: “Let everyone in, on every page, immediately.” That is what a standard All Pages trigger does. It does not ask the cookie banner for permission. It just opens the door.
The Security cookie banner is a separate system. It is like a clipboard at the door where visitors sign “yes” or “no.” But nobody told the guard to read the clipboard. So the guard keeps letting everyone in, and the signatures pile up, unused.
Connecting Security to GTM means handing the guard the clipboard and saying: “Only let the Analytics and Ads tags in after someone signs YES. If they sign NO, keep the door shut.”
Why You Must Fix This (Not Just for Looks)
Let’s be direct about why this matters for your business and your legal exposure.
The Problem if you ignore it
A banner that records consent but doesn’t block tags creates three real risks:
- Legal exposure. Under GDPR (EU/UK) and laws like the CCPA/CPRA (California), tracking a user before consent — or after they decline — is a violation. The banner being “present” is not a defense. Enforcement looks at whether tags actually stopped.
- Dirty data. When tracking ignores consent, you mix consented and non-consented traffic. Your reports look full, but the data is not legally usable and not clean.
- Wasted ad spend on bad signals. Google Ads optimizes toward whatever conversions it receives. If those conversions are coming from non-consented sessions, you are training the algorithm on data you should not have — and risking account-level penalties.
The Solution
Connecting Security to GTM with Consent Mode v2 fixes all three at once. Here are the five concrete benefits.
- True compliance, not cosmetic compliance. Tags genuinely respect the user’s choice. “Accept” means accept. “Decline” means stop.
- You keep modeled data even on declines. With Consent Mode v2 Advanced Mode, Google tags can send privacy-safe, cookieless “pings” when consent is denied. Google uses these to model conversions you would otherwise lose entirely. You stay compliant and keep more measurement than a hard block gives you.
- Clean, trustworthy reporting. Your GA4 and Google Ads data now reflects only what you are legally allowed to collect — the “raw truth” your decisions should be built on.
- Healthy Google Ads optimization. With ad_user_data and ad_personalization signals passed correctly, your remarketing and conversion features stay enabled for EEA traffic and feed the algorithm clean signals.
- Future-proofing. Privacy law is getting stricter every year. A proper Consent Mode v2 setup is the foundation you build everything else on — server-side tracking, Enhanced Conversions, and more.
Prerequisites & Checklist
Before we build, make sure you have:
- Admin access to your Security consent account (to find your domain/banner settings).
- Publish/edit access to your Google Tag Manager container.
- Editor access to the Webflow site (Project Settings → Custom Code), in case the GTM container or a default snippet needs to be placed or verified.
- A staging environment — a Webflow staging URL (yoursite.webflow.io) or a separate test domain. Never test consent logic for the first time on the live site.
- GTM Preview Mode and the Google Tag Assistant browser extension.
- GA4 DebugView open in another tab for live verification.
Note on Webflow: Webflow does not give you a native “consent integration” toggle the way Shopify or WordPress plugins do. That is fine. The entire connection lives inside GTM, not inside Webflow. Webflow just needs to host your GTM container snippet (Project Settings → Custom Code → Head/Footer, or via the Webflow GTM field).
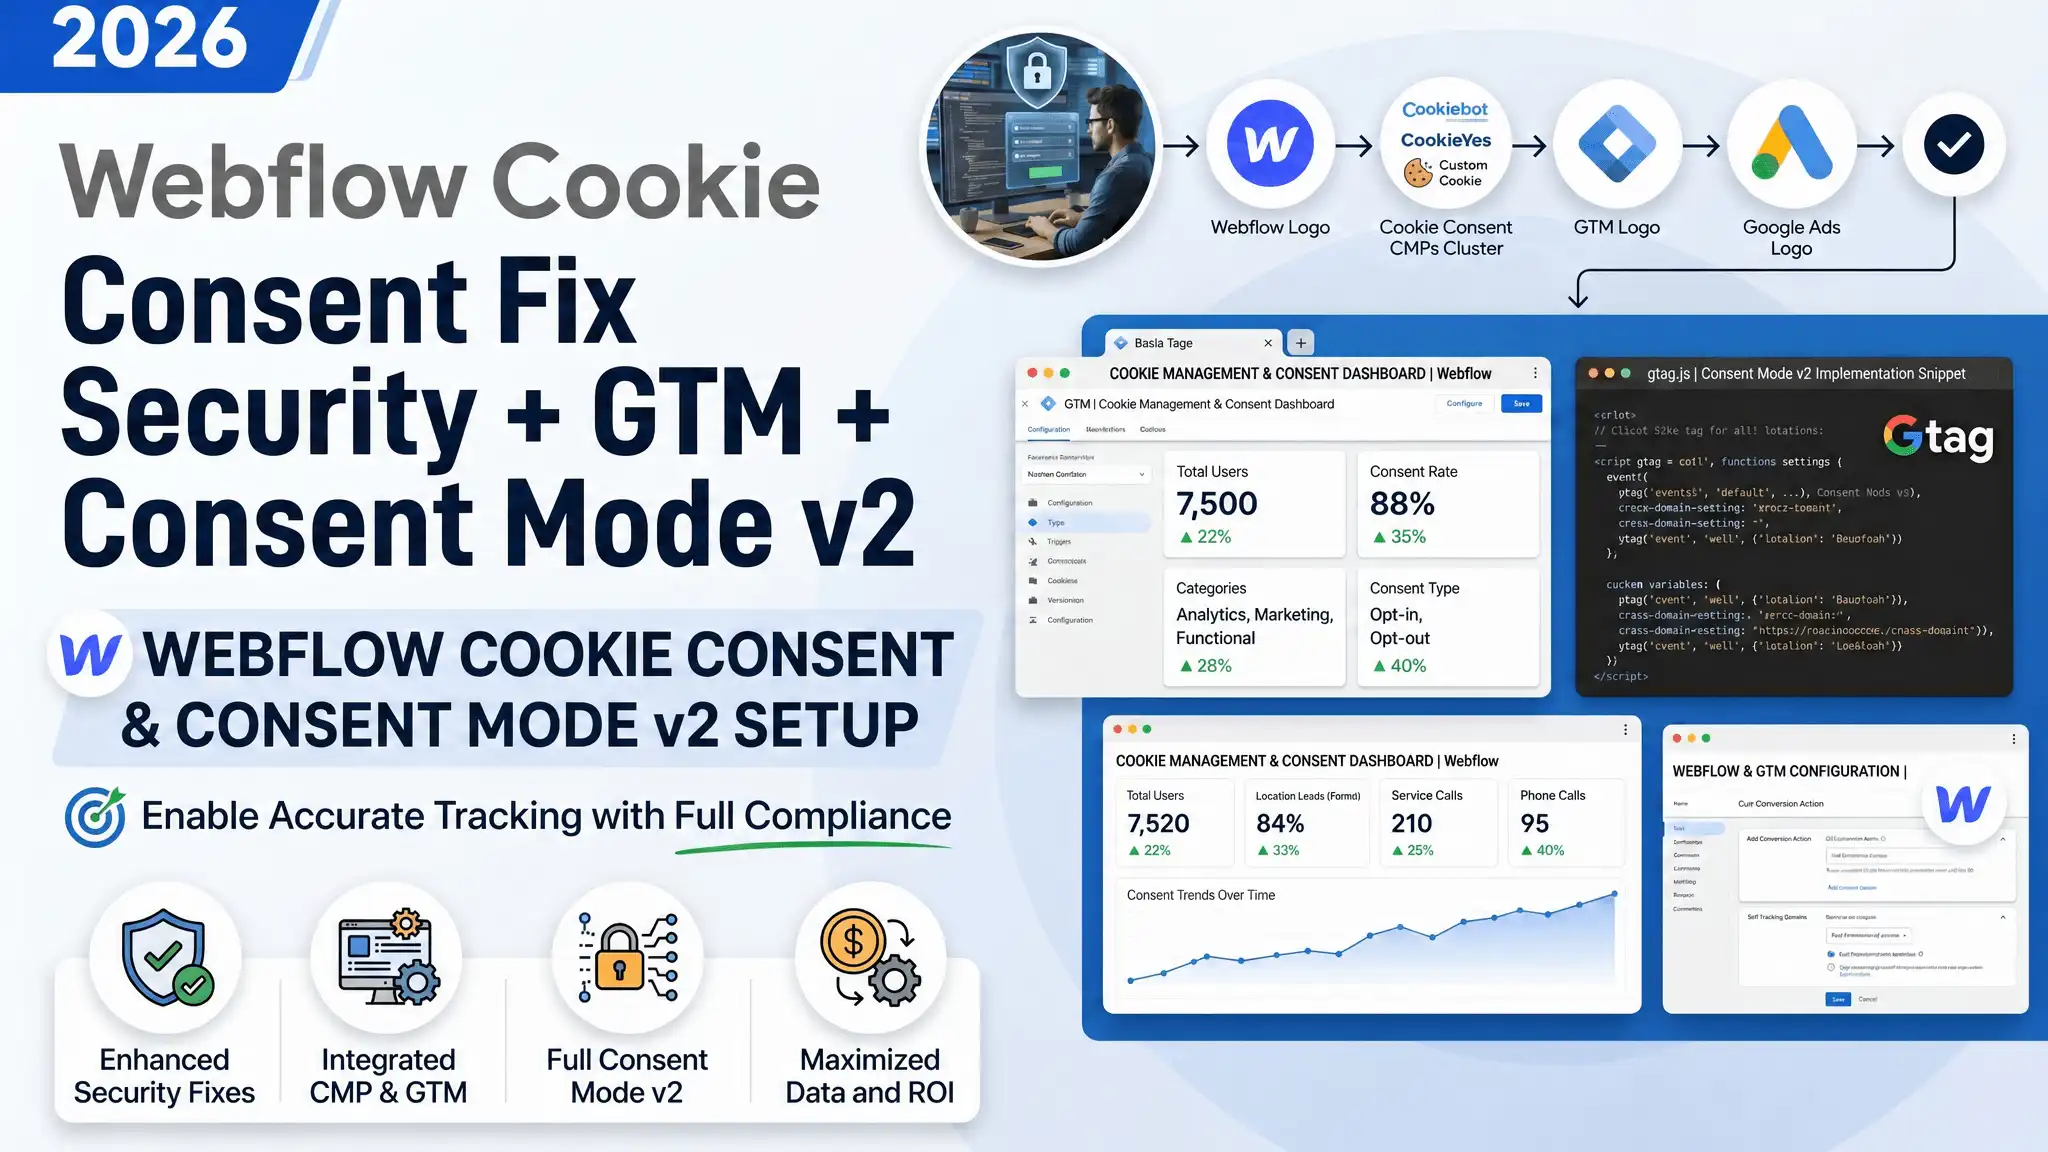
Video tutorial – Webflow Cookie Consent Fix Security + GTM + Consent Mode v2
Step-by-step video guide to Webflow Cookie Consent Fix: Security + GTM + Consent Mode v2 for accurate reporting.
Step-by-Step Implementation
We will build this in four phases.
- Phase 1: Diagnose why the choice isn’t controlling the tags.
- Phase 2: Turn on Consent Mode v2 and set safe defaults.
- Phase 3: Connect Security to GTM (the listener + Data Layer).
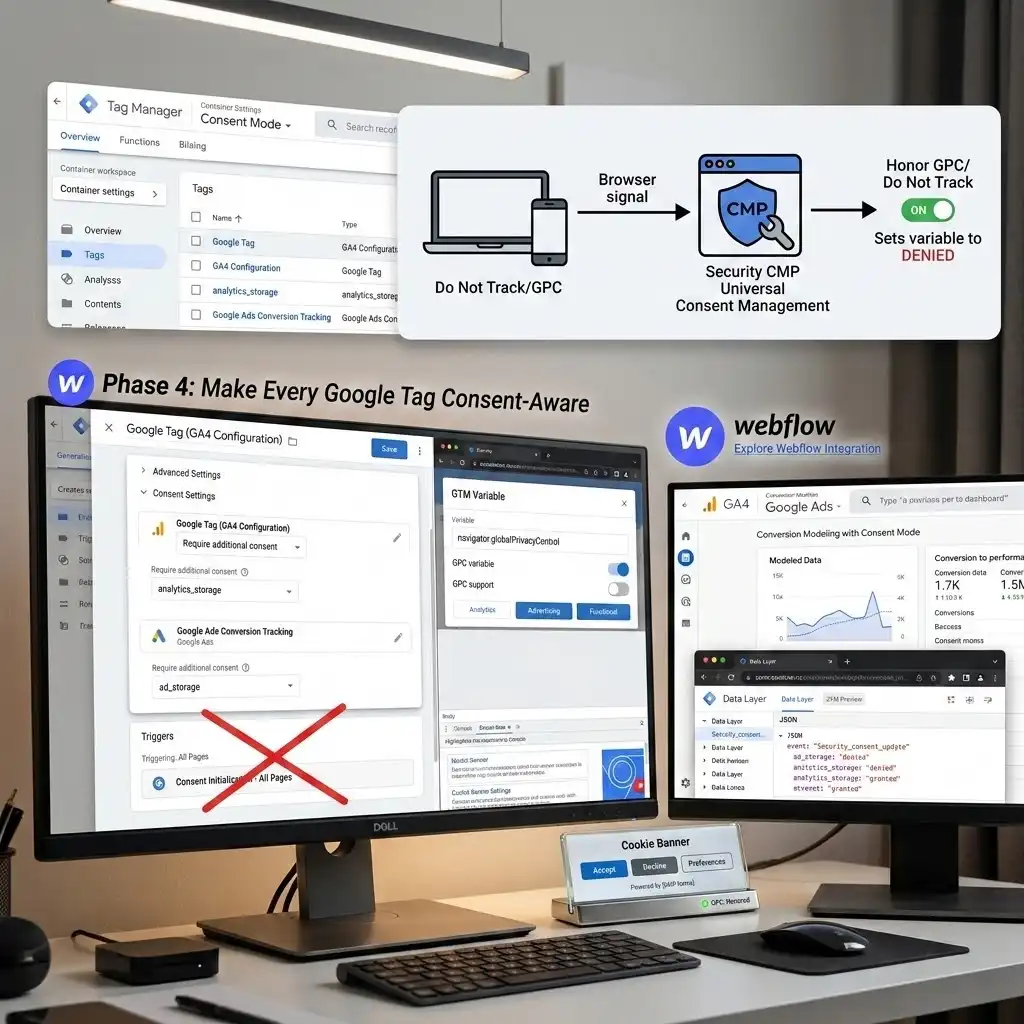
- Phase 4: Make every tag consent-aware, including GPC/Do Not Track.
Phase 1: Diagnose the Real Cause
Before changing anything, confirm the disease. Nine times out of ten, the cause is one of these:
Cause A — Tags fire on a raw “All Pages” trigger. Your GA4 Configuration tag and Google Ads tag are set to fire on Page View / All Pages with no consent condition. They run before the banner is even answered.
Cause B — Consent Mode is not enabled in the container. GTM has a built-in Consent setting. If it was never turned on, GTM has no idea consent exists, so it never blocks anything.
Cause C — The CMP fires too late (or on the wrong trigger). If Security loads on All Pages instead of Consent Initialization, your Google tags can win the race and fire first, before the consent default is even set.
How to confirm it yourself: Open GTM, click Preview, enter your staging URL, and load the page without touching the banner. Watch the left “Tags Fired” panel. If you see GA4 Configuration or Google Ads in the “Tags Fired” column on the very first page load, you have just proven the bug.
CRITICAL STEP: Note exactly which tags fire before consent. That list is your fix list for Phase 4.

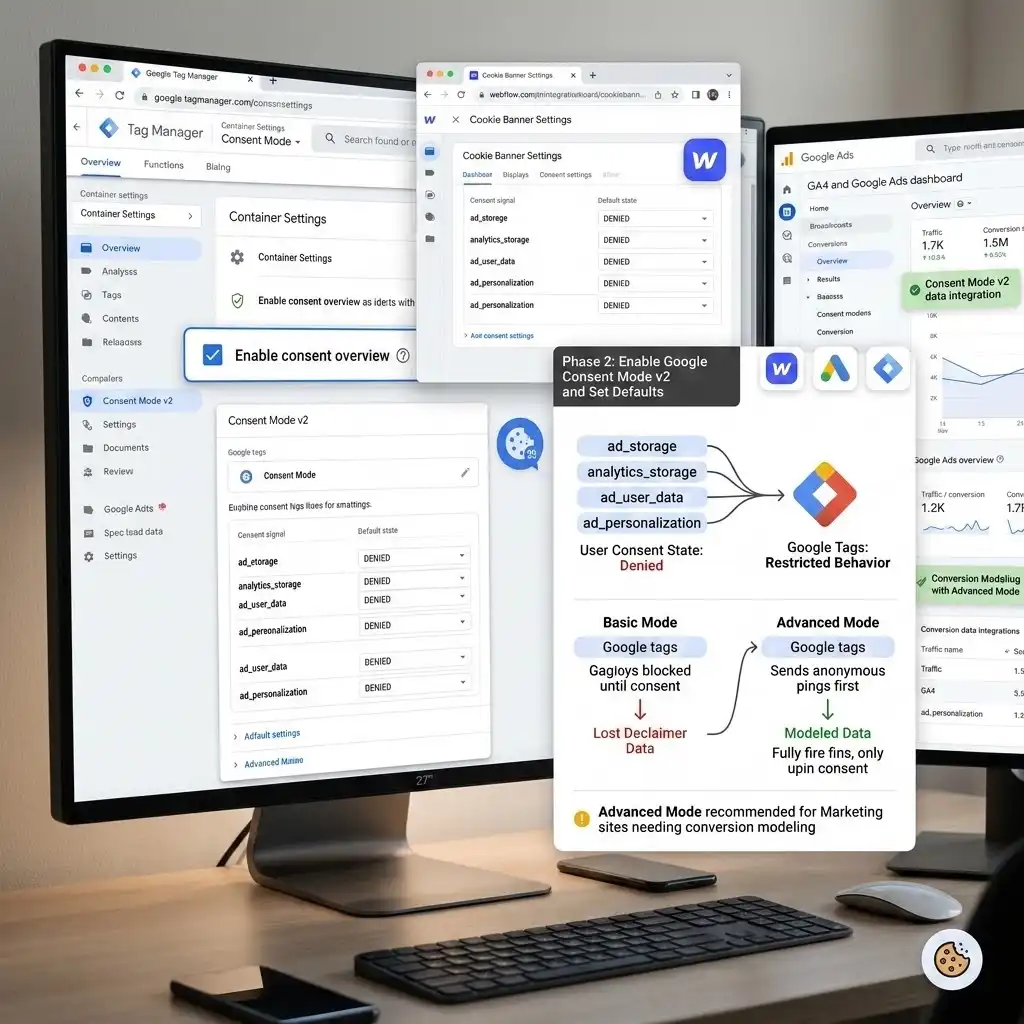
Phase 2: Enable Google Consent Mode v2 and Set Defaults
What is Consent Mode v2? It is a privacy-safe middle ground built by Google. Instead of brutally deleting your tags, it tells every Google tag: “Here is the user’s consent state — behave accordingly.” It uses four key signals:
- ad_storage — can we store advertising cookies?
- analytics_storage — can we store analytics cookies?
- ad_user_data — can we send user data to Google for ads?
- ad_personalization — can we use data for personalized ads/remarketing?
(There are also functionality_storage, security_storage, and personalization_storage for completeness.)
Step 1 — Turn on Consent Overview in GTM. Where to find it: In GTM, click the Admin tab → Container Settings → tick “Enable consent overview” (the small shield icon). This unlocks the per-tag consent settings you’ll need in Phase 4.
Step 2 — Decide your mode. You have two choices:
- Basic Mode: Google tags do not fire at all until consent is granted. Simplest and safest under strict EU ePrivacy reading. You lose all data from decliners.
- Advanced Mode: Google tags fire immediately but send only cookieless, anonymous pings until the user chooses, then fully update on consent. You keep modeled data.
My recommendation: For a marketing site that wants conversion modeling, Advanced Mode is usually best — but for the strictest EEA posture, many teams gate Advanced behind consent or use Basic in the EEA. Choose based on your legal guidance.
Step 3 — Set your default consent state to DENIED. This is the heart of the fix. Before the user chooses anything, everything optional must be denied. This is what makes “no choice yet” behave like “no.”
CRITICAL STEP: If your defaults are set to “granted,” tracking runs before consent and you are right back where you started. Default = denied for all non-essential signals.
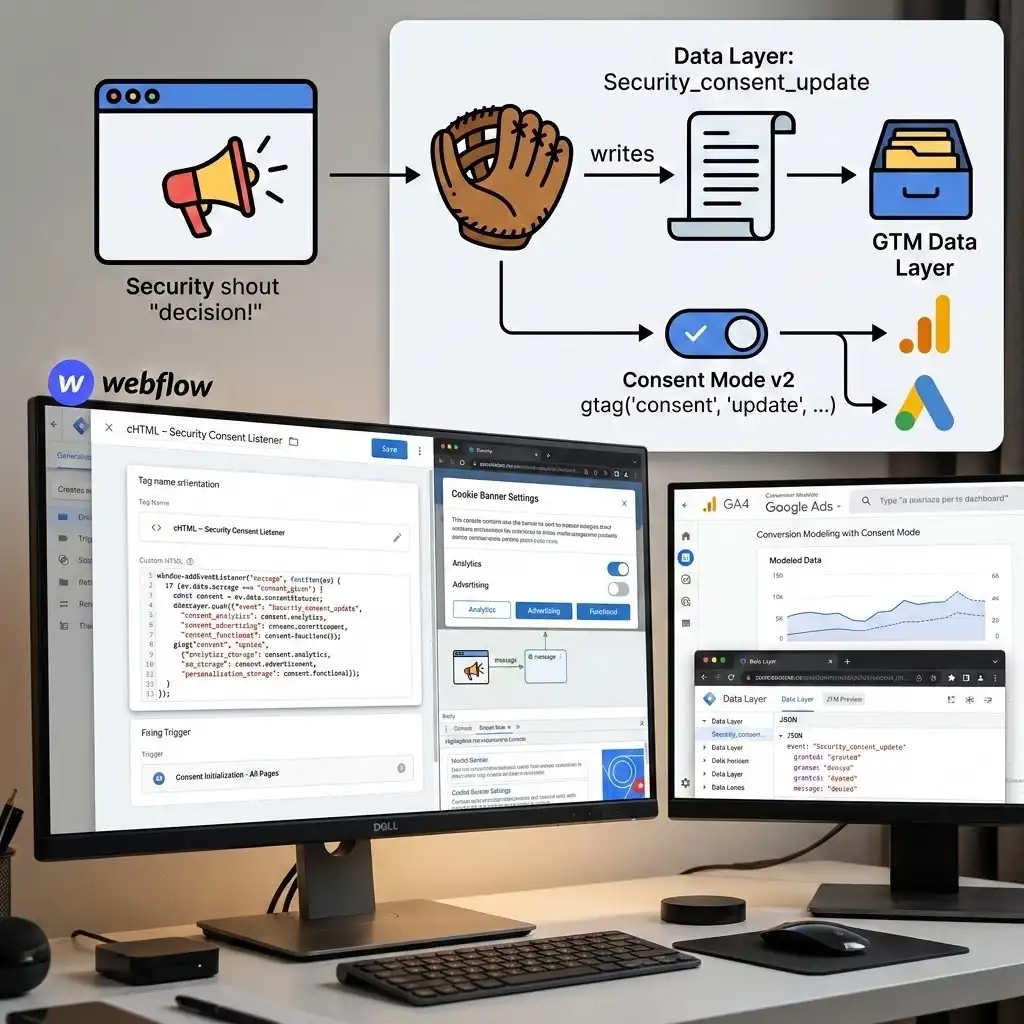
Phase 3: Connect Security to Google Tag Manager (Listener + Data Layer)
Security exposes the user’s choice to your page using a browser message event. Think of it as Security shouting “Here is the decision!” into the room. We need a listener — a smart script that waits and catches that shout, like a catcher’s mitt — and then writes it into the Data Layer, the invisible filing cabinet GTM reads from.
The cleanest, officially supported route on a CMP like Security is the GTM template / Consent Mode integration: you add the Security (CMP) tag in GTM, fire it on Consent Initialization – All Pages, and let it manage the consent signals for you. Use that when it’s available — it’s the least fragile method.
But because you also want full control and a Data Layer event you can build your own triggers on, here is the listener + Data Layer approach.
Step 1 — Create the Listener (Custom HTML tag)
In GTM: Tags → New → Custom HTML. Name it in my convention:
cHTML – Security Consent Listener
Paste this Listener Code:
					script>
  // cHTML - Security  Consent Listener
  // Waits for Security 's "consent_given" message and writes the
  // user's choices into the Data Layer so GTM can react to them.
  window.addEventListener('message', function (ev) {
    // Security  broadcasts a message when the user makes a choice
    if (ev.data && ev.data.message === 'consent_given') {
      var statuses = ev.data.consentStatuses || {};


      // Push one tidy event GTM can trigger on
      window.dataLayer = window.dataLayer || [];
      window.dataLayer.push({
        'event': 'Security _consent_update',
        'consent_analytics': statuses.analytics ? 'granted' : 'denied',
        'consent_advertising': statuses.advertisement ? 'granted' : 'denied',
        'consent_functional': statuses.functional ? 'granted' : 'denied'
      });


      // Tell Google Consent Mode v2 about the choice
      if (typeof gtag === 'function') {
        gtag('consent', 'update', {
          'analytics_storage': statuses.analytics ? 'granted' : 'denied',
          'ad_storage': statuses.advertisement ? 'granted' : 'denied',
          'ad_user_data': statuses.advertisement ? 'granted' : 'denied',
          'ad_personalization': statuses.advertisement ? 'granted' : 'denied'
        });
      }
    }
  });
</script>
What every part does, in plain English:
- window.addEventListener(‘message’, …) — this is the catcher’s mitt. It sits and waits for any message broadcast on the page.
- ev.data.message === ‘consent_given’ — we only react when Security specifically says the consent decision is in. We ignore every other message.
- ev.data.consentStatuses — this object holds the actual yes/no for each cookie category (analytics, advertisement, functional). Category names are case-sensitive — match them exactly to your Security banner configuration.
- dataLayer.push({…}) — we drop a clean event called Security _consent_update into the filing cabinet. Now GTM can fire (or block) any tag based on it.
- gtag(‘consent’, ‘update’, {…}) — this is the line that actually controls Google’s tags. It translates Security ‘s categories into the four Consent Mode v2 signals and updates them live.
Where to fire this tag: Trigger it on Consent Initialization – All Pages (and optionally also on All Pages) so the listener is armed before the user can interact. Why? If the mitt isn’t ready when the ball is thrown, you miss the catch.
Step 2 — The Data Layer event (what it looks like)
When a user clicks Accept, the listener writes this Data Layer event:
					dataLayer.push({
  'event': 'Security _consent_update',
  'consent_analytics': 'granted',
  'consent_advertising': 'granted',
  'consent_functional': 'granted'
});
If they click Decline, the same event fires but with ‘denied’ values. This single event is now your control switch.
To use it in GTM:
- Create a trigger: Triggers → New → Custom Event. Event name: Security _consent_update. Name it Custom Event – Security Consent Update.
- Create a Data Layer Variable: Variables → New → Data Layer Variable. Data Layer Variable Name: consent_advertising. Name it DLV – consent_advertising. Repeat for consent_analytics.
- Now any tag can check, “Did this come back granted?” before it fires.
Phase 4: Make Every Google Tag Consent-Aware
This is where we close the door on the tags you found firing in Phase 1.
Step 1 — Set the default consent (Consent Initialization). Add a Consent Mode default — either through the Security CMP template in GTM (recommended) or a small default gtag(‘consent’, ‘default’, {…}) that sets everything to denied — and fire it on Consent Initialization – All Pages. This must run first.
Step 2 — Add Consent Settings to your Google tags. Open your GA4 Configuration / Google Tag and your Google Ads tag. Go to Advanced Settings → Consent Settings.
- Google’s own tags (GA4, Google Ads) already read the Consent Mode signals automatically once Consent Mode is active — you usually do not need to manually block them. The gtag(‘consent’,’update’) line from the listener controls them.
- For non-Google tags that don’t respect Consent Mode, add a “Require additional consent” check, or attach the Custom Event – Security Consent Update trigger with a condition like DLV – consent_advertising equals granted.
CRITICAL STEP: Remove or replace any raw All Pages trigger on your Analytics/Ads tags that was bypassing consent. That trigger is the original culprit from Phase 1.
Step 3 — Treat Do Not Track / GPC as a decline. This was a specific requirement, and it is important. Global Privacy Control (GPC) is a browser signal (the Sec-GPC: 1 header and navigator.globalPrivacyControl === true) that says “do not sell or share my data.” Several US states legally require you to honor it. Do Not Track is the older browser version of the same idea.
The clean way to handle this is inside Security . Security ‘s Universal Consent Management can detect and honor GPC and Do Not Track signals and treat them as an opt-out automatically. Enable that in your Security dashboard. When Security reads a GPC signal, it sets the user’s state to denied — and your listener pushes that “denied” straight into Consent Mode. No extra clicking required from the user.
Belt-and-suspenders option in GTM: you can also add a Custom JavaScript variable that returns navigator.globalPrivacyControl and use it to force denied defaults, but letting the CMP own this keeps one source of truth.
Testing & Validation (Do This on Staging First)
Never publish consent logic you haven’t watched work. Here is the exact test routine.
Test 1 — GTM Preview Mode
- In GTM, click Preview and enter your staging URL.
- Load the page and do nothing. In the Tag Assistant panel, check the “Tags Not Fired” column. ✅ GA4 and Google Ads should be sitting in Not Fired (Basic Mode) or firing only cookieless pings (Advanced Mode).
- Click Decline on the banner. Confirm GA4/Ads stay blocked and the Security _consent_update event shows denied.
- Reload, click Accept. Now confirm GA4 and Google Ads move to “Tags Fired” and the event shows granted.
Test 2 — GA4 DebugView
Open GA4 → Admin → DebugView in another tab. With consent denied, you should see no user-level events landing (or only modeled/consentless signals). With consent granted, your page_view and key events appear. This proves the real Analytics data is gated correctly.
Test 3 — Check the Consent State
In GTM Preview, click the Consent tab (next to Tags). It shows the on-page consent state for each signal. Confirm that on first load everything reads denied, and after Accept the relevant signals flip to granted. This is the definitive proof the connection works.
Test 4 — GPC / Do Not Track
Use a browser with GPC on (Brave, or Firefox/DuckDuckGo with the setting enabled, or a GPC extension). Load the page. ✅ Security should auto-apply a decline, and your Google tags should stay blocked without you touching the banner.
Only when all four tests pass do you publish to live. In GTM, click Submit → Publish, then re-run Test 1 quickly on the live URL.
Troubleshooting & Common Mistakes
Mistake 1: Tags still fire before consent
- The Problem: After setup, GA4 still loads on first page view.
- The Cause: The tag still has a leftover All Pages trigger, or Consent Mode defaults were never set to denied / fire on Consent Initialization.
- The Solution: Remove the raw All Pages trigger, confirm your CMP/default tag fires on Consent Initialization – All Pages, and set all non-essential defaults to denied.
Mistake 2: The listener never catches anything
- The Problem: Clicking Accept does nothing in the Data Layer.
- The Cause: The category names in the code (analytics, advertisement, functional) don’t match your Security banner’s actual category keys, or the listener fires too late.
- The Solution: Open DevTools Console, accept cookies, and log ev.data.consentStatuses to see the exact key names. Match them precisely (they are case-sensitive). Fire the listener on Consent Initialization so it’s armed early.
Mistake 3: Two consent scripts fighting
- The Problem: Consent signals behave randomly or never update.
- The Cause: Security is installed both directly in the Webflow head and via a GTM template — two copies racing each other.
- The Solution: Pick one install method. If you use the GTM CMP template, remove the duplicate head snippet from Webflow so there’s a single source of truth.
Mistake 4: Decline doesn’t stop Google Ads remarketing
- The Problem: Analytics stops on decline, but Ads keeps tracking.
- The Cause: Only ad_storage was updated, not ad_user_data and ad_personalization.
- The Solution: Make sure your gtag(‘consent’,’update’) updates all four signals together, as shown in the listener code.
Mistake 5: Works in Preview, breaks live
- The Problem: Everything passes in Preview but fails on the published Webflow site.
- The Cause: You forgot to Submit/Publish the GTM container, or the live site loads an old cached GTM version.
- The Solution: Publish the container, hard-refresh the live page (clear cache), and re-test.
Conclusion
You just turned a cosmetic cookie banner into a real consent system.
Your Security banner now talks to Google Tag Manager. Google Analytics and Google Ads start only after a visitor agrees, and they fully stop the moment someone declines. Global Privacy Control and Do Not Track are honored automatically as a decline. And with Consent Mode v2, you stay compliant while still keeping modeled measurement you’d otherwise throw away.
This is the difference between looking compliant and being compliant — and between dirty data and the raw truth your ad spend deserves.
Give it 24–48 hours after publishing, then compare your GA4 and Google Ads numbers. They may dip slightly — that’s expected, because you’re now counting only consented, legitimate sessions. That smaller number is the honest one. Optimize on facts from here.
Summary
Your Security cookie banner on Webflow records consent but doesn’t control Google Analytics or Google Ads, because your tags fire before the choice is read. The fix lives in Google Tag Manager: enable Consent Mode v2, set all non-essential signals to denied by default, fire the CMP on the Consent Initialization trigger, add a listener that catches Security ‘s consent_given message and updates consent, and remove the raw All Pages triggers. Treat GPC and Do Not Track as a decline via Security . Test on staging with Preview Mode and DebugView, then publish. Result: tags start only on Accept, stop on Decline — real compliance and clean data.
1. How do I fix the cookie banner problem?
The fix is not in Security — it’s in Google Tag Manager. Your banner records the choice, but your tags fire on a plain “All Pages” trigger that ignores it. To fix it, enable Google Consent Mode v2 in GTM, set all non-essential consent signals to denied by default, fire your Security /CMP tag on the Consent Initialization – All Pages trigger, and add a listener that updates the consent state when the user chooses. Then remove the raw All Pages triggers that were bypassing consent. After that, Analytics and Ads run only after “Accept” and stop on “Decline.”
2. Is this cookie banner paid or free?
It depends on the tool. Security is a paid, enterprise-grade consent platform — it’s built for compliance at scale, with cookie scanning, audit trails, and GPC handling. There are free options too: a fully custom banner built in GTM costs nothing but your time, and tools like CookieYes, Cookiebot, Silktide, or CookieHub offer free tiers for smaller sites. The banner itself is rarely the expensive part — the correct connection to GTM and Consent Mode v2 is where the real value (and the real risk if done wrong) lives.
3. Is it possible to create a custom banner with GTM?
Yes. You can build a fully custom consent banner using a Custom HTML tag in GTM containing your banner’s HTML, CSS, and JavaScript, plus a listener that pushes the user’s choice to the Data Layer and calls gtag(‘consent’,’update’). This gives you total design and logic control with zero subscription cost. The trade-off: you are responsible for cookie scanning, region detection, audit logs, and keeping up with changing laws — work that a paid CMP like Security handles for you. For a simple marketing site, custom is fine. For regulated industries or heavy traffic, a managed CMP is safer.
4. Why does my banner record consent but not block tags?
Because recording and enforcing are two separate jobs. The banner’s job is to ask and store the answer. Blocking tags is GTM’s job. If GTM was never told to read the consent state — because Consent Mode isn’t enabled or tags fire on raw triggers — it keeps firing everything regardless of what the banner stored. Connecting the two is exactly what this guide solves.
5. Do I need Consent Mode v2 or just block the tags?
You can do either, but Consent Mode v2 is the better method. A hard block (Basic Mode) means you lose all data from anyone who declines. Consent Mode v2 Advanced Mode lets Google send cookieless, anonymous pings so you keep modeled conversions while staying compliant. Since March 2024, Google also requires Consent Mode v2 for using Ads remarketing and audience features on EEA/UK traffic.
6. How does Webflow change this setup?
Very little. Webflow has no built-in consent plugin, so the entire connection lives in GTM — which is exactly where it should be. You only need Webflow to host your GTM container snippet (Project Settings → Custom Code, or Webflow’s GTM field). Everything else — the listener, the Data Layer, Consent Mode — is configured inside GTM and works the same as on any other site.
7. How do I treat GPC or Do Not Track as a decline?
The cleanest way is to enable GPC and Do Not Track detection inside Security . Security reads the browser’s Sec-GPC signal and treats it as an automatic opt-out, setting consent to denied. Your listener then passes that “denied” into Consent Mode, so Google tags stay blocked — no banner click needed. Several US states legally require honoring GPC, so this isn’t optional for many businesses.
8. Should I test on staging or live?
Always staging first. Consent logic is easy to get subtly wrong, and a mistake on the live site means either tracking people illegally or accidentally blocking all your data. Use a Webflow staging URL or test domain, run GTM Preview Mode and GA4 DebugView until every test passes, then publish to live and re-test once.
9. Will fixing this drop my Analytics numbers?
Possibly, and that’s a good sign. If your tags were firing for everyone — including decliners and non-consented sessions — your old numbers were inflated with data you weren’t allowed to use. After the fix, you count only consented sessions (plus modeled data in Advanced Mode). The smaller number is the accurate, legally usable one. Make decisions on that.
10. What if I use a different CMP later (Cookiebot, CookieYes)?
The exact same logic applies. Every certified CMP — Cookiebot, CookieYes, Security , CookieHub — exposes the user’s choice and maps to the four Consent Mode v2 signals. Only the listener event name and category keys change. The architecture (default denied → fire CMP on Consent Initialization → update on choice → gate tags) stays identical. Build it once and you understand them all.
 Need Help Advanced Tracking Setup?