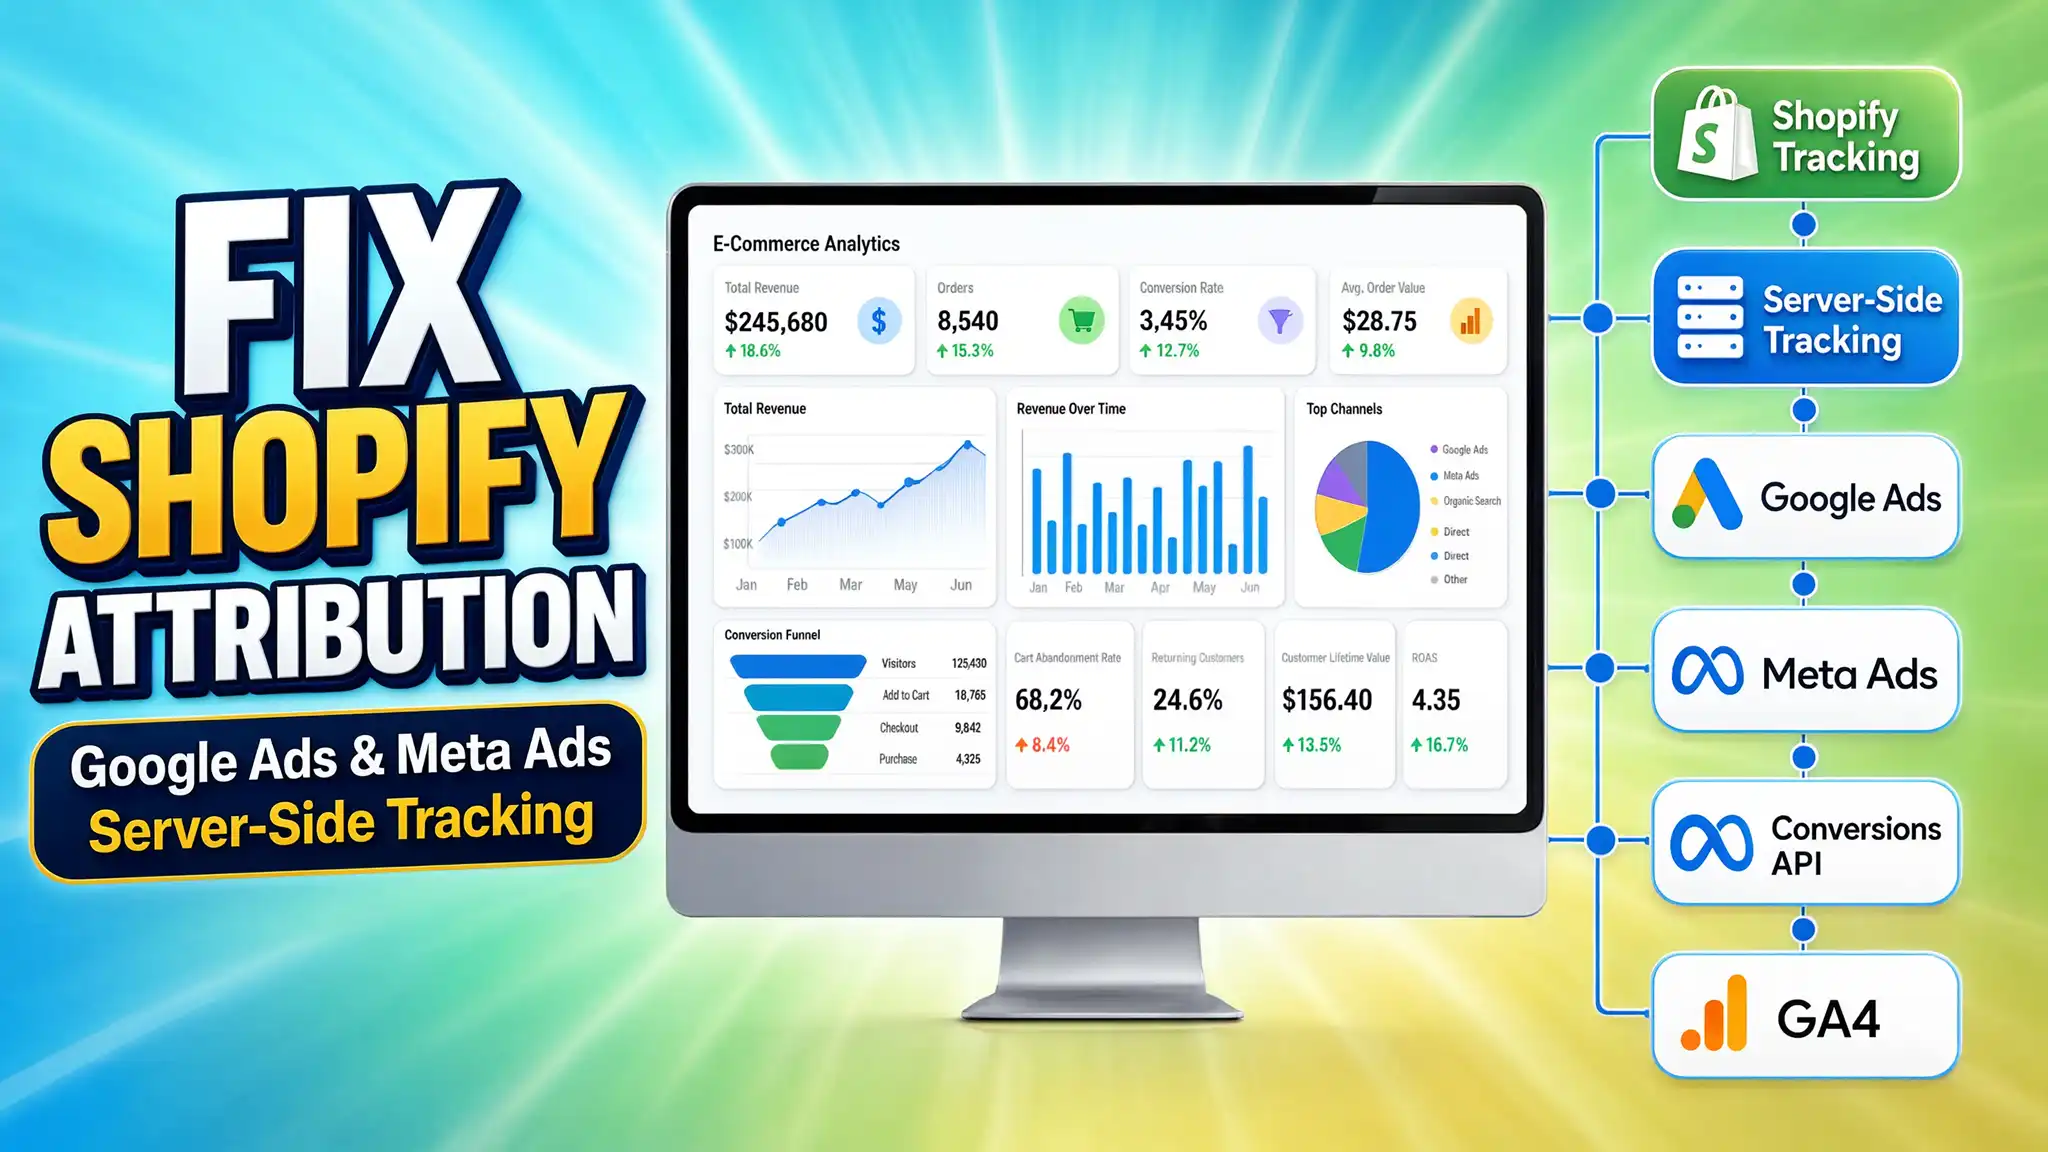

Quick Answer
If your Shopify sales are not showing up in Google Ads or Meta Ads, it is because Apple’s iOS updates, Intelligent Tracking Prevention (ITP), and ad blockers are blocking your standard tracking pixels. You can fix this attribution gap by implementing Server-Side Tracking via Google Tag Manager. This allows you to capture customer data in a first-party data layer and send it directly from your server to Meta (via CAPI) and Google Ads (via Enhanced Conversions), ensuring 99% accuracy.
Key Takeaways
- The iOS14+ Black Hole: Client-side pixels (the standard way of tracking) lose 30-40% of conversion data because browsers actively block them.
- Server-Side is the Solution: Moving your tracking to a custom server subdomain bypasses these browser blocks, reclaiming your lost Shopify data.
- Data Layer Dependency: You must build an accurate, dynamic Data Layer in Shopify to capture critical variables like transaction ID, order value, and hashed customer emails.
- Meta CAPI & Enhanced Conversions: Feeding accurate server data back into these platforms trains their AI, drastically improving your Return on Ad Spend (ROAS).
- Compliance is Mandatory: Integrating Google Consent Mode v2 via Cookiebot ensures your robust data pipeline remains 100% legal under GDPR and CCPA.
Introduction: The $10,000 Attribution Nightmare
Last Tuesday, a Shopify brand owner sent me a frantic WhatsApp message. She had just scaled her daily ad spend to $1,500 across Meta and Google, but her ad managers were completely frozen. Shopify showed 45 sales for the day, but Meta claimed 12, and Google Ads claimed 8.
Because her ad platforms couldn’t see the actual buyers, her campaigns were blindly optimizing for the wrong people. Her Customer Acquisition Cost (CAC) skyrocketed, and her ROAS tanked. She thought her ads were failing, but the ads were fine—her tracking was broken.
When you rely solely on standard browser pixels, you are asking a web browser (like Safari or Chrome) for permission to track the user. Apple and ad blockers now default to saying “no.” This means your ad networks never receive the signal that a sale occurred.
The fix is engineering a secure, backend data pipeline. By utilizing Shopify Server-Side Tracking Services, you take the data directly from your store’s backend and hand it to Google and Meta privately. Let’s fix your broken attribution and get your ad performance back on track.
Why Server-Side Tracking Matters for Shopify
Think of your current setup like a standard mail delivery system where anyone (like an ad blocker) can intercept the package before it reaches Meta or Google. Server-side tracking is like building a private, secure underground tunnel directly from your Shopify store to the ad networks.
5 Key Benefits for E-commerce Scaling
- Bypassing ITP & Ad Blockers: Browsers block third-party tracking scripts. By hosting a server container on your own domain (e.g., tracking.yourstore.com), browsers view your data collection as first-party, allowing it to pass through freely.
- Accurate Meta ROAS: The Meta Conversions API (CAPI) allows you to bypass the iOS14+ restrictions. When the standard pixel fails, the server sends the backup event, ensuring Meta knows exactly which ad drove the sale.
- Feeding Google’s AI: Google Ads Enhanced Conversions securely hashes user data (email/phone) and matches it to Google accounts, recovering lost cross-device sales and training the algorithm to find high-value buyers.
- Faster Shopify Load Times: Moving bulky tracking tags from your website’s front end to your cloud server speeds up your website, which directly improves your conversion rate and SEO.
- Complete Data Ownership: You control exactly what data is collected and where it goes, completely stripping out sensitive information before sending it to third parties.
Prerequisites & Checklist
Before we begin building this architecture, ensure you have administrative access to the following tools:
Platform | Access Required | Purpose |
Shopify Admin | Store Owner / Full Admin | To edit theme.liquid and the Order Status Page scripts. |
Google Tag Manager | Publish Access | You will need two containers: a Web Container and a Server Container. |
Stape.io | Account Owner | To host your cloud server and create your custom subdomain. |
Cookiebot | Account Admin | To manage user consent and deploy Consent Mode v2. |
Ad Platforms | Admin / Edit | Meta Events Manager and Google Ads Conversion settings. |
Video Tutorial: Fixing Shopify Attribution
I have outlined this entire process visually on my YouTube channel. Watch the tutorial below before diving into the code to understand the data flow.
Prerequisites & Checklist
To build this masterclass setup, you need administrative access to the following:
- Google Tag Manager: Both a Web Container and a Server Container.
- Cloud Hosting: A Stape.io account to host your sGTM container.
- CRM Platform: HubSpot, Salesforce, Pipedrive, or GoHighLevel.
- Consent Management: Cookiebot account configured for your domain.
- Ad Platforms: Google Ads and Meta Ads managers.
Step-by-Step Implementation Guide
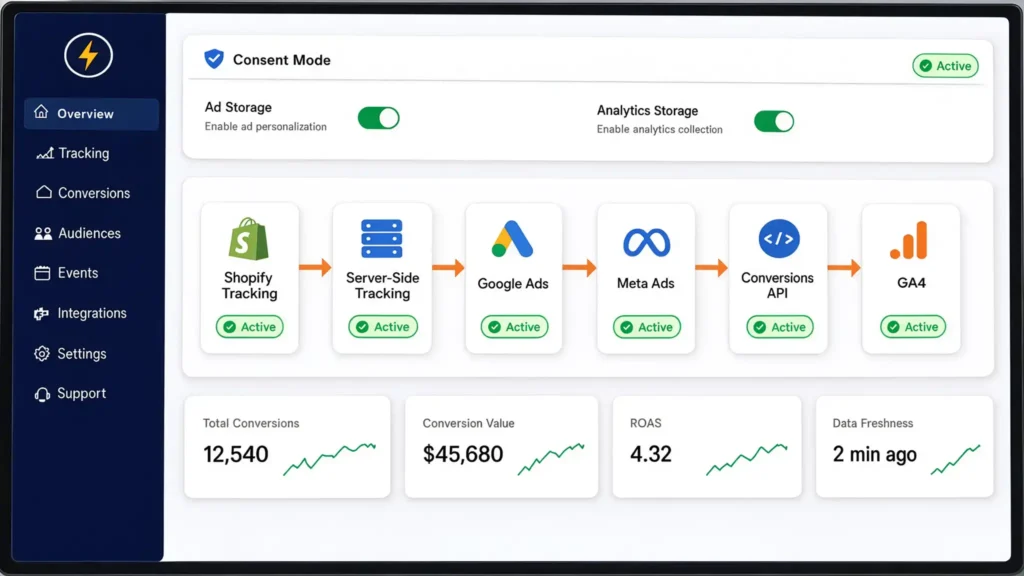
Phase 1: Google Consent Mode v2 via Cookiebot
You cannot legally track users without their consent. We must configure Google Consent Mode v2 so that if a user denies cookies, we still send anonymous, cookie-less pings to the server to maintain conversion modeling.
- Install the Cookiebot app in your Shopify store.
- In your Web Google Tag Manager container, import the official Cookiebot CMP template.
- Configure the default consent state to fire before any other tags.
- Set the default parameters:
- ad_storage: ‘denied’
- analytics_storage: ‘denied’
- ad_user_data: ‘denied’
- ad_personalization: ‘denied’
- When the user accepts the banner, Cookiebot automatically updates these states to ‘granted’. Your server container will read these parameters and respect the user’s choice.
Phase 2: Deploying the Shopify Data Layer
The Data Layer is like an invisible filing cabinet on your website. It neatly organizes the chaotic data of a Shopify transaction (order ID, price, customer email) so Google Tag Manager can easily pull it out.
Since we are focusing on fixing purchase attribution, you need to add this Liquid code to your Shopify Settings > Checkout > Order status page > Additional scripts.
					<!-- Shopify Purchase Data Layer by MD Niamul -->
<script>
  window.dataLayer = window.dataLayer || [];

  // Hash the email and phone for privacy and match quality
  var userEmail = "{{ customer.email | default: checkout.email }}";
  var userPhone = "{{ customer.phone | default: checkout.billing_address.phone }}";

  window.dataLayer.push({
    'event': 'purchase',
    'ecommerce': {
      'transaction_id': '{{ order.order_number | default: checkout.order_number }}',
      'value': {{ checkout.total_price | times: 0.01 }},
      'currency': '{{ shop.currency }}',
      'tax': {{ checkout.tax_price | times: 0.01 }},
      'shipping': {{ checkout.shipping_price | times: 0.01 }},
      'items': [
        {% for line_item in checkout.line_items %}
        {
          'item_id': '{{ line_item.sku | default: line_item.product_id }}',
          'item_name': '{{ line_item.product.title | escape }}',
          'price': {{ line_item.final_price | times: 0.01 }},
          'quantity': {{ line_item.quantity }}
        }{% unless forloop.last %},{% endunless %}
        {% endfor %}
      ]
    },
    'user_data': {
      'email': userEmail,
      'phone': userPhone,
      'first_name': '{{ checkout.billing_address.first_name }}',
      'last_name': '{{ checkout.billing_address.last_name }}',
      'city': '{{ checkout.billing_address.city }}',
      'country': '{{ checkout.billing_address.country_code }}'
    }
  });
</script>
- Why we do this: If you skip this, GTM has no idea what product was bought or who bought it.
- What it does: It pushes the exact dollar amount, order number, and customer details into the filing cabinet the moment the payment clears.
Phase 3: The Web GTM Transport Setup
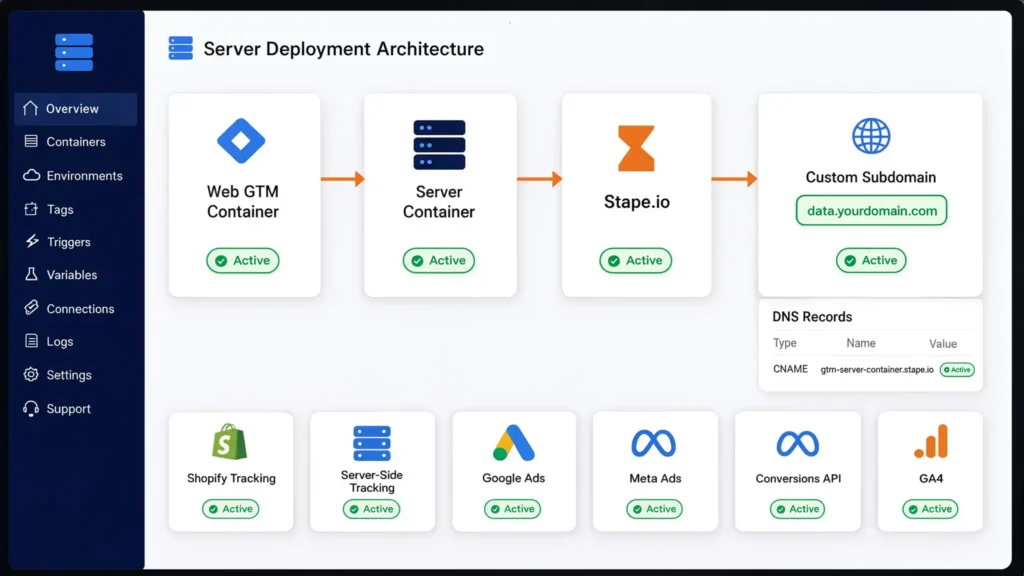
Your Web GTM acts as the middleman. It reads the Data Layer and forwards it to your server.
- Variables: Create Data Layer Variables in GTM for ecommerce.transaction_id, ecommerce.value, and user_data.email.
- Trigger: Create a Custom Event trigger named purchase.
- The Transport Tag: We do not send data directly to Facebook or Google Ads from the web. Instead, we use the Google Analytics 4 (GA4) Event Tag as a transport vehicle.
- Configure the GA4 tag to trigger on purchase. Crucially, under the GA4 Configuration Tag settings, tick the box for “Send to server container” and paste your custom Server URL (which we will create in Phase 4).
Phase 4: Server GTM Deployment (Stape)
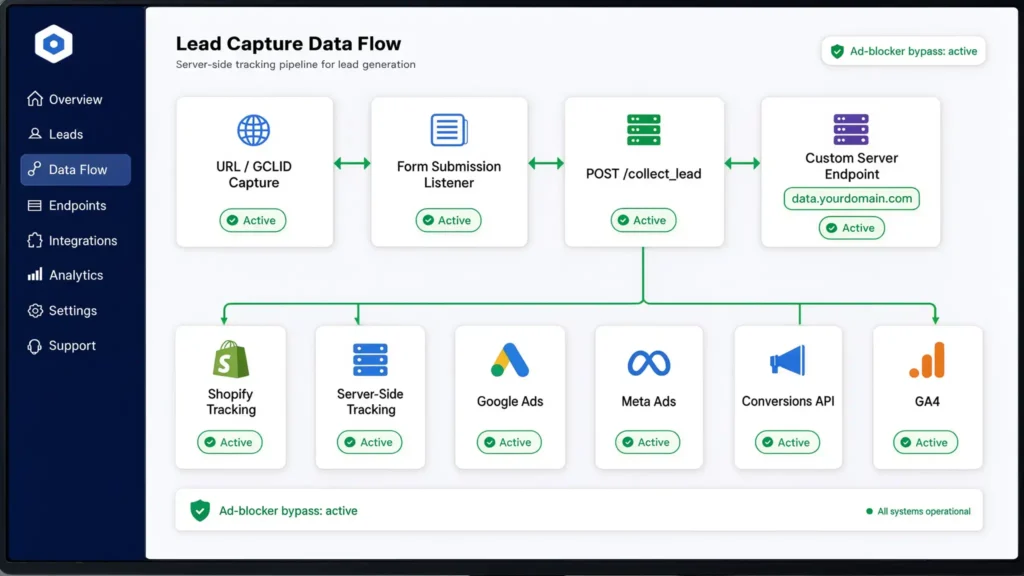
To achieve first-party data status, your server must share a root domain with your Shopify store.
- Create a Server Container in Google Tag Manager.
- Sign up for Stape.io and create a new server container using your GTM Server config string.
- The First-Party Secret: Create a custom subdomain. If your store is superkicks.com, make your tracking domain data.superkicks.com.
- Go to your domain registrar (like Cloudflare or GoDaddy) and point an A-Record to Stape’s IP address. This bypasses ITP because Safari sees data.superkicks.com as part of your own website, not a third-party tracker.
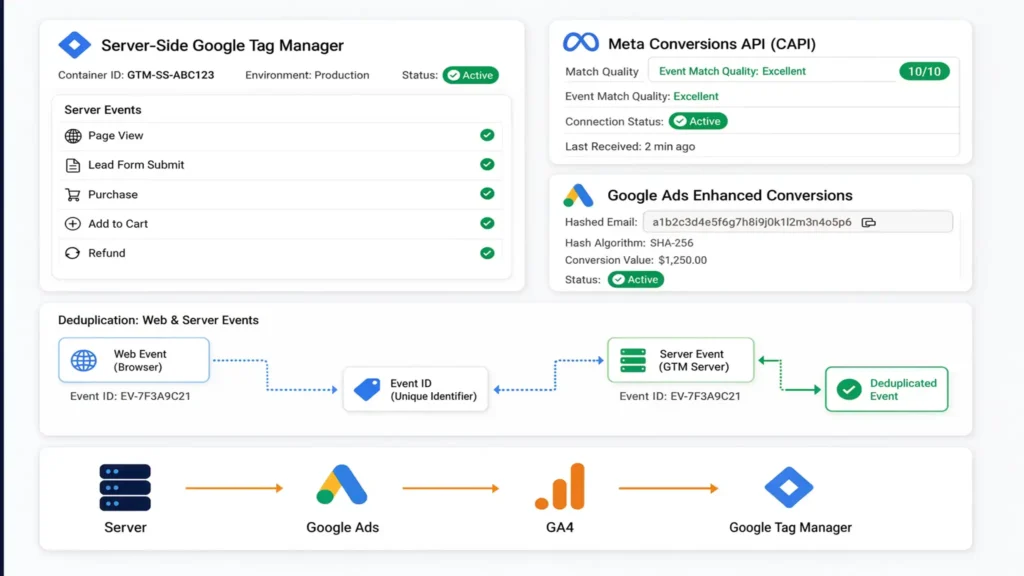
Phase 5: Meta CAPI & Google Ads Enhanced Conversions
Now, your server is receiving the purchase data from the GA4 transport tag. It’s time to distribute it.
For Meta Conversions API:
- In Server GTM, add the Conversions API Tag (by Stape) from the template gallery.
- Map your Facebook Pixel ID and your standard API Access Token.
- Ensure you pass the user_data variables. Meta requires this data to be hashed, but the Stape Server tag automatically hashes the email and phone variables before sending them, guaranteeing privacy and boosting your Event Match Quality to a 9/10 or 10/10.
- Important: You must generate a unique Event ID in Web GTM and pass it to Server GTM. Meta uses this to deduplicate the browser pixel and the server event so you don’t count the same sale twice.
For Google Ads Enhanced Conversions:
- In Server GTM, select the Google Ads Conversion Tracking Tag.
- Input your Conversion ID and Conversion Label.
- Tick the box for “Include user-provided data from your website” and attach your user data variable.
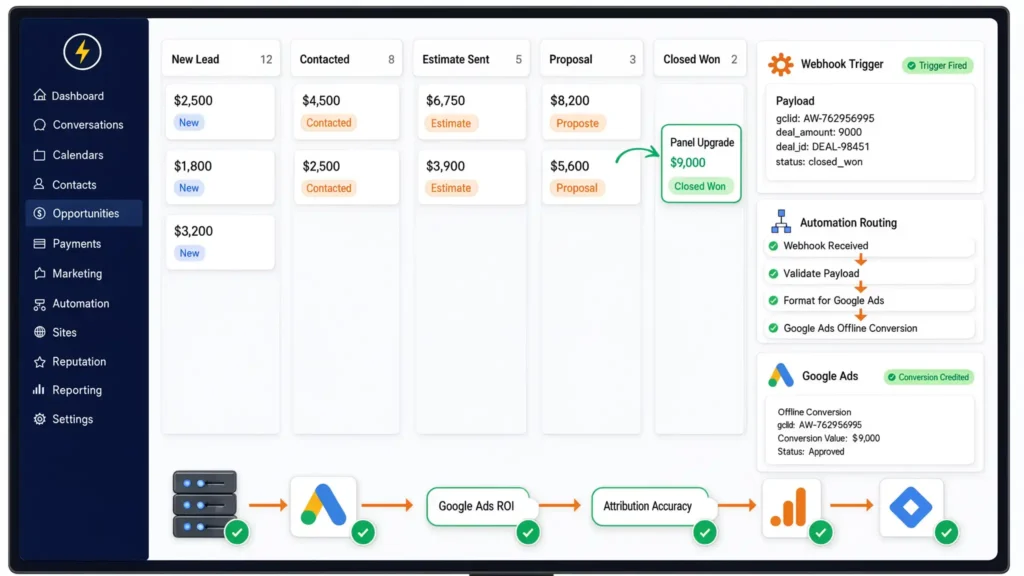
- Google will now receive the offline conversion securely, matching the Shopify buyer to the exact ad they clicked 14 days ago.
Need this implemented flawlessly for your agency or store? Review my Server-Side Tracking Service.
Testing & Validation Framework
Never assume your tracking works. Validate every step of the pipeline.
Tool | What to Check | Success Metric |
GTM Web Preview | Complete a test purchase in Shopify. | The purchase event fires in the left sidebar, and the Data Layer tab shows the correct total value and email. |
GTM Server Preview | Look at the incoming HTTP requests. | The server should receive a “Pageview” and a “Purchase”. Outgoing tags for Meta CAPI and Google Ads should show as “Succeeded” with a 200 HTTP status. |
Meta Events Manager | Check the “Deduplication” tab under the Purchase event. | Browser and Server events should both show as “Processed” with identical Event IDs. |
Google Ads Diagnostics | Go to Conversions > Diagnostics. | Status should display “Recording Enhanced Conversions” with no mapping errors. |
Troubleshooting Common Errors
Problem 1: Meta CAPI is showing duplicated events.
- Cause: The Event ID generated on the web is not being passed correctly to the server, or you are generating two different IDs.
- Solution: Use a single GTM variable to generate a random unique ID. Attach this same variable to both the Facebook Browser tag and the GA4 Transport tag simultaneously.
Problem 2: Google Ads says “Enhanced Conversions not configured.”
- Cause: The user data (email/phone) is firing after the purchase tag triggers, meaning the tag sends an empty payload.
- Solution: Check your data layer sequence in Shopify. Ensure the user_data object pushes into the Data Layer in the exact same block as the ecommerce purchase event, not after it.
Problem 3: Stape server requests are blocked by the browser.
- Cause: Your custom subdomain SSL certificate hasn’t fully propagated, or your DNS A-records are incorrect.
- Solution: Log back into Stape and click “Verify DNS.” Wait until the SSL certificate shows as “Active.” If using Cloudflare, make sure the proxy status (the orange cloud) is turned OFF (DNS only) for the tracking subdomain.
Conclusion
Losing 40% of your sales data to iOS updates is not a marketing problem; it is an engineering problem. By shifting your Shopify tracking from the fragile client-side browser to a robust Server-Side Google Tag Manager setup, you reclaim your data sovereignty.
With a dynamic Data Layer, first-party custom subdomains via Stape, and direct API connections to Meta and Google Ads, you stop wasting ad spend on blind algorithms. You feed them the truth, and they reward you with drastically better attribution and a higher ROAS.
Summary by MD Niamul
Broken attribution on Shopify leads to wasted ad spend and poor scaling. By migrating to a Server-Side Tracking architecture utilizing Google Tag Manager, a custom Data Layer, and Stape cloud hosting, e-commerce brands can bypass iOS14+ restrictions. Implementing Meta CAPI and Google Ads Enhanced Conversions restores 99% data accuracy, training ad algorithms to target high-intent buyers and maximizing ROAS.
Frequently Asked Questions (FAQ)
1. What exactly is Shopify server-side tracking?
Server-side tracking moves your tracking pixels from the user’s browser (client-side) to a cloud server you control. Instead of Meta or Google collecting data directly from the shopper’s device, your Shopify store sends the data to your server, which securely forwards it to the ad platforms.
2. Why are my Shopify sales missing in Google Ads?
Since iOS14 and the rise of Intelligent Tracking Prevention (ITP), browsers like Safari block third-party tracking cookies. If a user clicks your Google Ad and buys on an iPhone, the browser blocks the Google pixel from reporting the sale back to your ad account.
3. How does Server-Side Tracking bypass ad blockers?
Ad blockers target known third-party tracking scripts (like google-analytics.com or connect.facebook.net). By using a custom subdomain (e.g., data.yourstore.com), the ad blocker sees the data request as a native, first-party function of your own website, allowing it to pass unhindered.
4. What is the Meta Conversions API (CAPI)?
The Meta Conversions API is a tool that lets you share key web and offline events directly from your server to Meta’s servers. It acts as a fail-safe backup; if a browser blocks the standard Meta Pixel, the CAPI ensures the purchase data still reaches your ad manager.
5. What are Google Ads Enhanced Conversions?
Enhanced Conversions is a feature that captures first-party customer data on your checkout page (like email, name, and phone), securely hashes it, and sends it to Google. Google matches this data to signed-in users, recovering conversions that otherwise would have been lost.
6. Do I need Shopify Plus to set up server-side tracking?
No, you do not need Shopify Plus. While Shopify Plus offers Web Pixels (Customer Events) for advanced tracking, standard Shopify plans can utilize the Order Status Page additional scripts and theme.liquid to build an effective server-side data pipeline.
7. Does server-side tracking violate GDPR or CCPA?
No, it actually improves privacy compliance. Because the data goes to your server first, you have total control over it. You can strip out Personally Identifiable Information (PII) or strictly enforce Consent Mode v2 (via Cookiebot) before any data is sent to Meta or Google.
8. Why do I need Stape for server-side tracking?
Stape is a cloud hosting provider specifically optimized for Google Tag Manager Server containers. It makes it incredibly easy and affordable to deploy your server environment, manage custom subdomains, and handle the heavy data traffic of a Shopify store.
9. What is event deduplication in Meta Ads?
Because server-side tracking uses both the browser pixel and the server API, Meta receives two signals for one sale. Deduplication uses a unique “Event ID” attached to both signals. When Meta receives matching IDs, it discards one, ensuring your sales aren’t double-counted.
10. Can this setup track third-party checkout apps?
Yes. Standard client-side tracking often breaks when users leave Shopify for third-party checkouts (like Recharge or Carthook) because the cookie drops. Server-side tracking preserves the session data. You can read more about this on my Third-Party Checkout Conversion Tracking Services page.
 Need Help Advanced GHL Automation & Tracking Setup?